
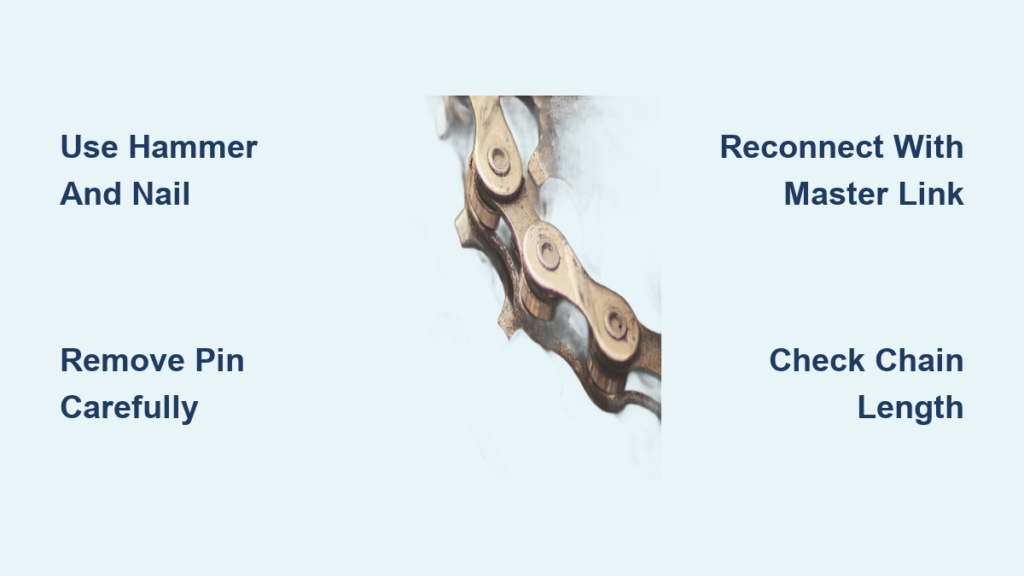
You’re 20 miles from home when your bike chain snaps with a metallic ping. No chain tool in your saddlebag, no bike shop within 10 miles. Panic sets in—but what if you could fix this with just a hammer and a nail? Learning how to cut a chain without a chain cutter transforms stranded riders into self-reliant cyclists. This isn’t theoretical: mechanics have used these field-expedient methods for decades when specialized tools vanish. You’ll discover how to shorten or repair your chain using only garage essentials, avoid dangerous mistakes, and get back on the trail in under 15 minutes.
Why Your Chain Snaps Mid-Ride
Chain failures rarely happen randomly. Most snap due to fatigue at weak points—like stiff links or corroded pins—exposed by sudden load shifts. When pedaling hard uphill, a single compromised link bears 200+ pounds of force. Without a chain cutter, your goal isn’t perfection but creating a rideable connection that survives until proper repair. Ignoring this skill risks chain whip injuries or costly drivetrain damage when broken links jam between gears.
Emergency Tools Already in Your Garage
What You Must Have (No Substitutes)
- Claw hammer (16-oz minimum): Delivers controlled force without shattering pins
- 3-4mm metal punch (or hardened nail): Diameter must match chain pins—thinner bends, thicker mushrooms pins
- Solid backing block: Drill a 10mm hole in scrap wood or use a metal nut flipped upside down
- Safety glasses: Flying pin fragments can permanently damage eyes—non-negotiable
Skip these “hacks”: Screwdrivers (slip and gouge plates), pliers (crush hollow pins), or rocks (shatter pins unpredictably).
Pro Upgrades for Reliable Reconnection
- Master link (SRAM/SunRace): Installs in 30 seconds; critical for multi-speed chains
- Needle-nose pliers: Grip stubborn pins without slipping
- Degreaser rag: Clean grit from pin channels—dirt causes misalignment during reinsertion
Measure Chain Length in 60 Seconds Flat
Bypass the Derailleur Trick
Route the chain over your largest front chainring and biggest rear cog—ignore the derailleur entirely. Pull both ends until they meet with zero tension. Mark this spot with chalk. For multi-speed bikes, add exactly two links (1 inch) to accommodate derailleur movement. Single-speed riders need only 1/2 inch vertical play at the chain’s midpoint when pressed.
Why Riders Get This Wrong
- Mistake: Measuring while chain runs through derailleur → chain too short
- Red Flag: Derailleur cage pulls tight when shifting to smallest gears
- Fix: Re-measure with derailleur bypassed; if already connected, remove one link
Pin Removal: Hammer Technique That Won’t Destroy Your Chain
Setup for Zero Damage
- Shift to smallest chainring/cog to slacken chain
- Clean pin area thoroughly with rag—grit jams removal
- Position marked link over your backing block’s hole with inner plate facing up
- Place punch tip dead-center on pin head—any angle >5° bends pins
The 3-Stage Hammer Sequence
- Tap phase: 3-5 light taps to seat punch (like starting a nail)
- Drive phase: Firm, consistent strikes until pin protrudes 2-3mm (thickness of two credit cards)
- Separation: Slide chain sideways—never yank. If stuck, tap opposite end gently
Critical Warning: Hollow pins on Shimano Ultegra/Dura-Ace chains require half the force of standard chains. Mushroomed pins mean starting over—file flush with outer plate before removal.
Reconnect Chains Two Ways (No Tool Required)
Method 1: Original Pin Reinsertion (For Solid Pins Only)
Align chain ends so outer plates cover inner plates perfectly. Push the protruding pin through both sides until it sticks 1mm out. Flip chain so pin head rests on your backing block. Gentle taps only—hammering while pin floats cracks plates. Stop when pin sits flush. Test by bending link side-to-side; binding means pin is bent—replace immediately.
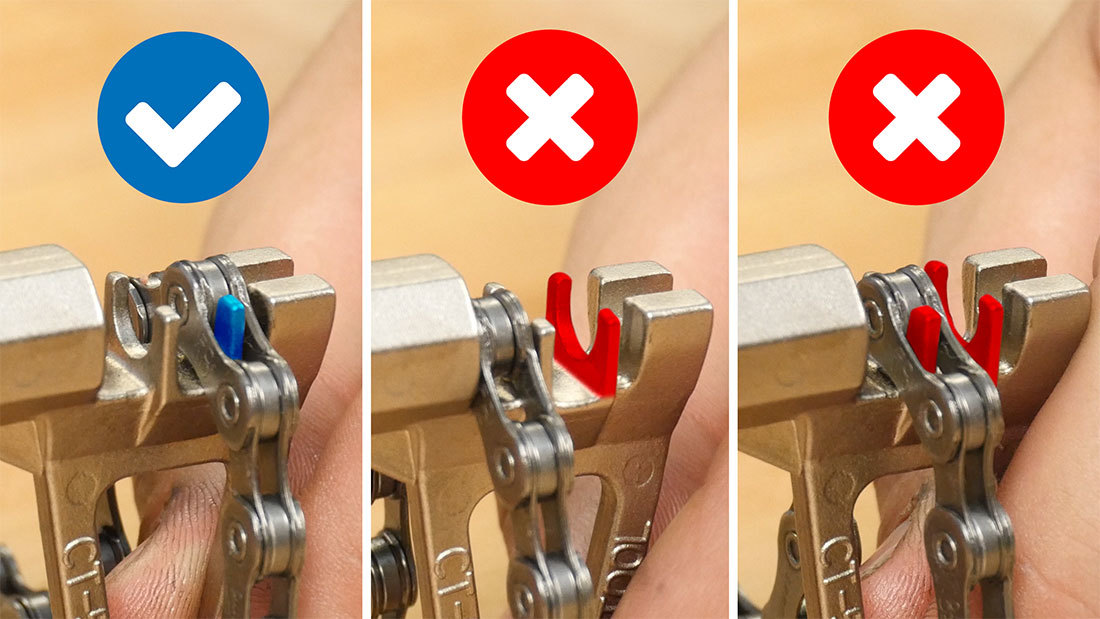
Method 2: Master Link Installation (Faster & Safer)
- Split master link into two halves
- Insert one half into each chain end (curved side toward direction of travel)
- Squeeze ends together until pins click into master link slots
- Verify security: Pull chain hard—no separation should occur
Pro Tip: Master links work on 8-12 speed chains but require exact model matching (e.g., Shimano CN-IG51 won’t fit SRAM). Always carry spares in your repair kit.
Avoid These 3 Chain-Killing Mistakes

Mistake #1: Rushing Pin Extraction
Hammering too hard mushrooms pin ends, preventing reinsertion. Fix: Count taps—max 10 light strikes per stage. If pin resists, apply penetrating oil and wait 15 minutes.
Mistake #2: Incorrect Chain Length
Too long = chain drops between gears; too short = derailleur tears off under load. Fix: Post-repair, shift to smallest chainring/smallest cog. Derailleur cage should have 1 inch of slack. If cage pulls tight, remove one link.
Mistake #3: Skipping Safety Checks
Riding with a stiff link shreds cogs. Fix: Before riding, manually flex every repaired link 20 times. Lubricate with wet lube if raining.
When to Abandon Field Repair
Stop immediately if:
– Hollow pins deform during removal (common on high-end chains)
– Outer plates crack around pin holes
– Master link won’t click fully (indicates worn chain)
In these cases, walk the bike. Forcing a bad connection risks chain snap at speed—potentially yanking the derailleur into spokes.
Post-Repair Riding Protocol

First 5 Miles: Survival Mode
- Ride in middle gears only (reduces chain angle stress)
- Avoid standing climbs (doubles chain load)
- Check connection points every mile for pin protrusion
After Reaching Safety
- Replace extracted pins with new ones (cost: $2)
- Install master link for future emergencies
- Clean/lube chain within 24 hours—road grit accelerates wear at repair points
Why This Beats Paying for a Chain Tool (Sometimes)
A $15 chain tool is ideal for home maintenance—but when stranded, your garage is the bike shop. Mechanics confirm hammer-and-punch repairs survive 50+ miles if done correctly. Critical advantage: Unlike chain tools that require precise alignment, this method leverages brute force physics any rider can control. Still, practice on an old chain first; your first attempt should not be 20 miles from pavement.
Master this once, and you’ll never cancel a ride over a broken chain. The key isn’t fancy gear—it’s knowing exactly where to tap, how hard to push, and when to walk away. Your chain failed you; don’t let panic fail you too. Next time you hear that dreaded ping, smile—you’ve got a nail and a hammer in your pocket.


