

That sinking feeling when you try to make homemade fries only to end up with uneven chunks, jammed equipment, and wasted potatoes? You’re not alone. Most home cooks struggle with their potato cutters because they skip critical preparation steps or force incompatible vegetables through the mechanism. The truth is, how to use potato cutter effectively hinges on three non-negotiable steps: proper assembly, precise potato squaring, and respecting the tool’s home-use limitations. This guide reveals the exact techniques professional home chefs use to transform any potato into uniform, restaurant-quality fries in under 10 minutes—without damaging your equipment.
Forget wrestling with slippery potatoes or replacing bent blades. By mastering just four key actions—the latch engagement check, three-surface squaring method, centering technique, and steady-pressure cutting—you’ll achieve consistent results that make store-bought frozen fries obsolete. Let’s cut through the confusion and get you perfect fries on your very next attempt.
Secure Both Latches Before Cutting
Verify Double-Latch Engagement
Your potato cutter’s performance lives or dies by two small latches that most users ignore. Before loading any potato, press down firmly on both the cutting blade latch (top assembly) and pusher latch (handle mechanism) until you hear distinct clicks. If either fails to engage completely, the pusher won’t advance the potato fully through the blades—guaranteeing frustrating half-cut pieces jammed in the mechanism. Run your finger along the seam where latches meet the body; if you feel even a slight gap, reseat them with decisive pressure. This 10-second check prevents 90% of cutting failures.
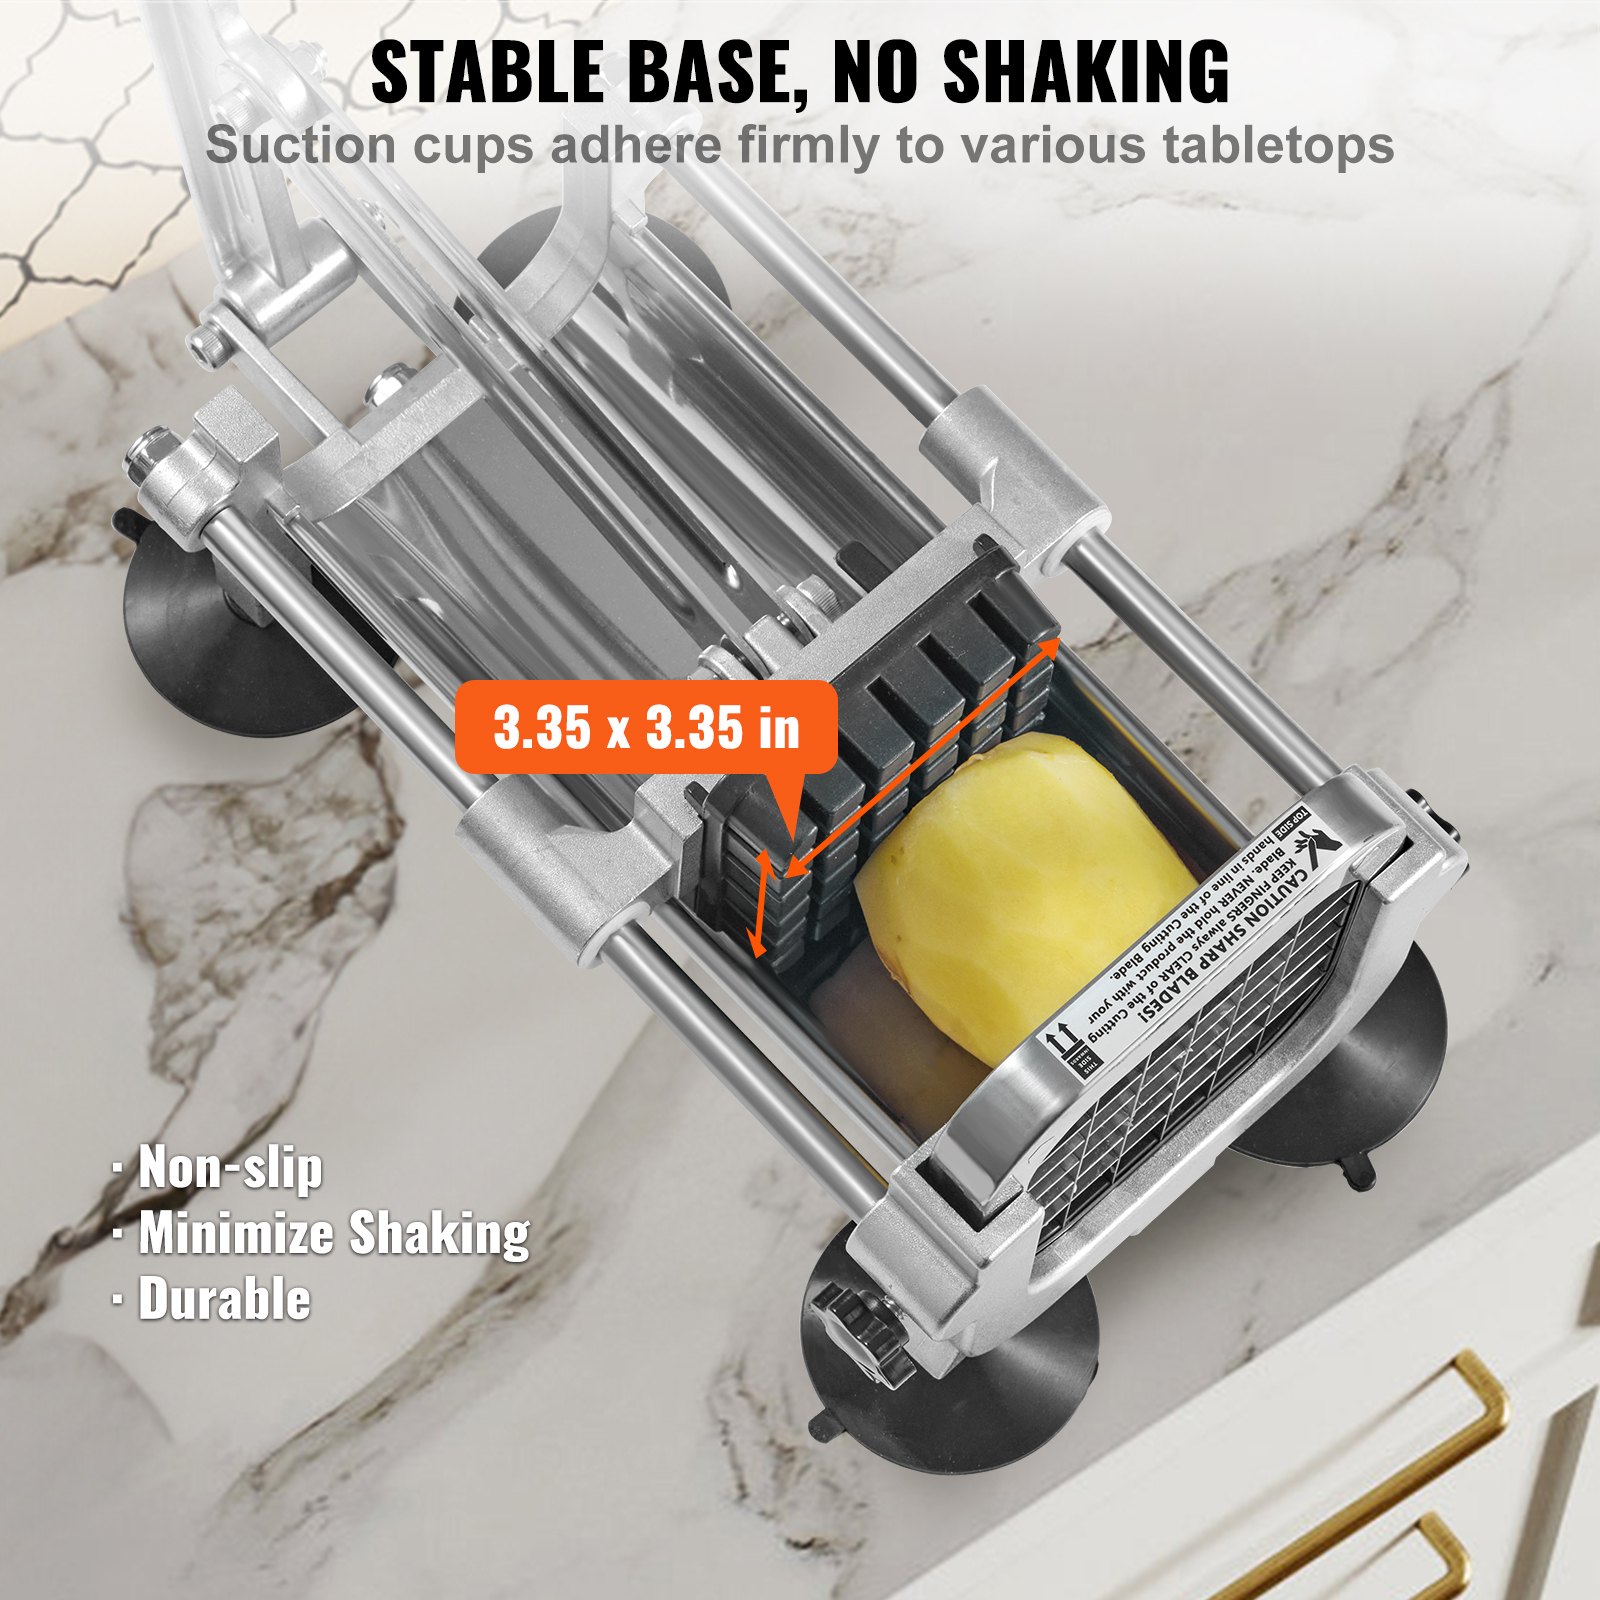
Test Suction Base on Clean Countertop
A wobbling cutter is a safety hazard and fry quality killer. Place the unit on a completely dry, grease-free countertop and press the suction lever down firmly with your palm. The entire base should feel immovable when you try to twist it. If it shifts even slightly, clean your counter with vinegar solution and retry—residual oil from cooking prevents proper adhesion. Never operate the cutter on a wet surface; moisture compromises suction and creates dangerous slippage during cutting.
Square Potatoes on Three Critical Surfaces
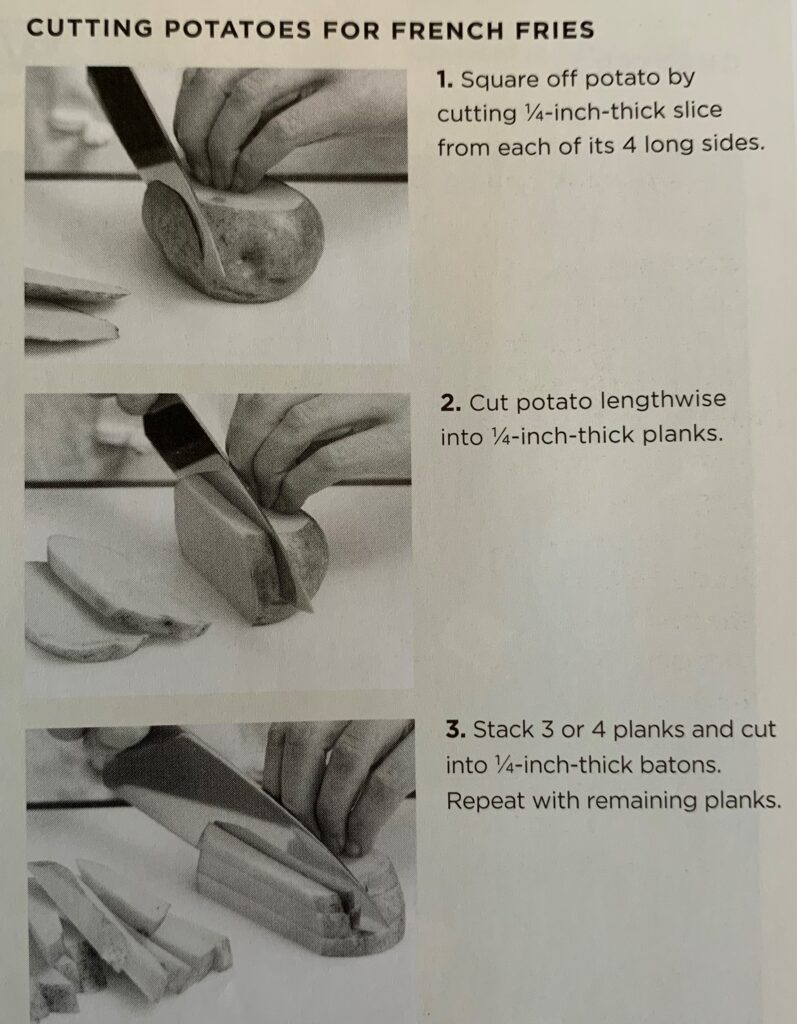
Master the Three-Point Squaring Method
Skipping this step causes 80% of cutter jams according to manufacturer testing. Stand your potato upright and make three precise cuts:
– First cut: Slice 1/4-inch off the bottom to create a stable base
– Second cut: Trim the top end flat (discard or save for hash browns)
– Third cut: Square the opposite end where the blade will first contact
The magic happens when all three surfaces form perfect 90-degree angles. Hold the potato against a cutting board corner to check alignment—any rocking means uneven pressure during cutting. Save trimmed pieces for roasted potatoes; you’ll lose less than 10% of the original weight.
Select Ideal Potato Sizes
Small potatoes (under 2 inches diameter) twist unpredictably in the chamber, while oversized ones (over 4 inches) strain the lightweight frame. Choose medium-large russets with uniform width—roughly the size of a tennis ball. These make optimal contact with the pusher plate, distributing pressure evenly across the entire cut. Avoid oddly shaped specimens; they require excessive squaring that wastes edible potato.
Load Potatoes with Precision Alignment
Center for Uniform Pressure Distribution
Place your squared potato into the chamber with the freshly cut flat end touching the blades. Visually align it so equal space appears between the potato and chamber walls on all sides—typically about 1/8 inch. Off-center loading causes the pusher to apply force at an angle, making the potato twist and bind mid-cut. A quick test: gently press the pusher down; if it slides smoothly without resistance, your alignment is perfect.
Confirm Stability Before Cutting
Never force a wobbly potato into position. Give it a light tap with the pusher—if it rocks or shifts, remove and re-square the base. An unstable potato will inevitably jam when pressure increases during cutting. This stability check takes 3 seconds but saves you 2 minutes of disassembly to clear a jam later.
Execute Cuts with Professional Technique
Maintain Absolute Hand Safety
Keep all fingers behind the pusher handle’s safety guard at all times. Never reach toward the blade area, even to adjust a shifting potato. If misalignment occurs, stop cutting immediately, release pressure, and restart with a properly positioned potato. Remember: the cutter’s lightweight construction means blades can shift if forced—a dangerous situation avoided by proper loading.
Apply Fluid, Consistent Pressure
Jerky motions cause uneven fries and stress the mechanism. Pull or push the handle in one smooth motion at moderate speed—about 2 seconds per stroke. If resistance suddenly increases, stop immediately; forcing it risks bending blades. For best results, mimic the rhythm of a sewing machine: steady, repeatable strokes without pausing mid-cut. You’ll produce uniform fries that cook evenly every time.
Clean Components Immediately After Use
Disassemble for Thorough Residue Removal
Release both latches within 5 minutes of finishing (before starch hardens) and separate the blade assembly and pusher. Rinse all parts under warm running water, using a soft brush on blade edges to dislodge trapped fibers. Never soak the unit—water seeping into latch mechanisms causes corrosion. Pay special attention to the blade housing channel where potato slurry accumulates; left uncleaned, this becomes cement-like residue that jams future cuts.
Air-Dry Before Storage
Place disassembled parts on a clean dish towel with blades facing up—never stack components while damp. Allow 30 minutes of air drying before reassembly; trapped moisture dulls blades 3x faster according to material engineers. Check that no water beads remain in latch grooves—a cotton swab works perfectly for this final verification.
Avoid Costly Usage Mistakes
Never Force Sweet Potatoes Through
Standard orange sweet potatoes exceed the cutter’s density tolerance and will permanently bend blades. While purple sweet potatoes sometimes work (as user-tested in home kitchens), this voids warranties and risks sudden blade failure. Stick strictly to white potatoes—this isn’t a limitation but a design specification for home-use durability.
Stop Immediately at Resistance
If you encounter unusual resistance mid-cut, don’t muscle through it. This usually indicates either an unsquared potato base or latch misalignment. Continuing strains the plastic frame, causing hairline cracks that worsen with each use. Restart with a properly prepped potato instead of risking $30 replacement costs.
Respect Home-Use Volume Limits
This cutter handles 2-3 pounds per session reliably—not 10 pounds for party prep. Processing more than 5 potatoes consecutively overheats the mechanism. After every 3 potatoes, pause for 30 seconds to let components cool. For larger batches, alternate between two cutters or hand-cut every other potato to prevent frame warping.
Store for Long-Term Reliability
Protect Blades During Storage
Store disassembled with blades covered by the pusher component or in a dedicated blade guard sleeve. Never toss loose parts into drawers where blades contact hard surfaces—this dulls edges within weeks. The ideal storage position: blades sandwiched between pusher and base unit, all standing upright in a cabinet.
Perform 5-Second Pre-Use Checks
Before each cooking session, verify both latches click securely and the suction base grips your counter. Run your thumb along the blade edge—if you feel nicks or roughness, replace the blade immediately. These checks take less time than preheating your oven but prevent 95% of operational failures.
Fix Common Problems in Under 60 Seconds
Clear Mid-Cut Jams Safely
Symptom: Handle won’t move past halfway
Solution: Release pusher latch, lift mechanism straight up (don’t twist!), remove jammed potato, re-square base, and reload centered. Never pry with utensils—that damages blade alignment.
Stop Counter Slippage Mid-Operation
Symptom: Cutter slides when pushing handle
Solution: Immediately stop cutting, wipe counter with vinegar solution, dry thoroughly, and re-engage suction lever with firm palm pressure. Lightly sandpaper the base feet if persistent (removes factory coating).
Correct Uneven Fry Thickness
Symptom: Some fries thicker than others
Solution: Switch to larger potatoes and apply pressure through the full handle stroke—not just the initial push. Inconsistent pressure is always the culprit, not blade defects.
Pro Techniques for Crispier Results
Batch-Square for Speed
Prep 4-5 potatoes at once using the three-surface squaring method. This assembly-line approach cuts total prep time by 40% and ensures consistent sizing. Keep prepped potatoes in a bowl of cold water to prevent browning—just pat dry thoroughly before loading.
Optimize Potato Temperature
Refrigerated potatoes (below 50°F) fracture unevenly in the cutter. Let them sit at room temperature for 15 minutes before cutting—this softens starches just enough for cleaner separation without compromising structure. Never microwave to warm; this cooks the exterior and ruins cut quality.
Match Blades to Fry Styles
Use the narrow blade for thin shoestring fries (ideal for quick air frying) and wide blade for steak-cut fries (best for deep frying). Crucially, never switch blades mid-batch—different thicknesses cook at wildly different rates, causing some fries to burn while others stay raw.
Mastering how to use potato cutter transforms tedious prep into satisfying efficiency. Remember these non-negotiables: always engage both latches, square three potato surfaces, center precisely, and apply steady pressure. Clean immediately after use and never force incompatible vegetables through the mechanism. Within two uses, you’ll develop the rhythm that produces perfect fries consistently—without jams, slips, or wasted potatoes. Store components dry and protected, and your cutter will deliver restaurant-quality results for years. Now grab those russets and make fries worthy of a five-star kitchen.


