
That stubborn Dewalt box cutter won’t budge when you need it most—whether you’re wrestling with a brand-new blade locked in place or fighting a jammed mechanism on your trusty workhorse. You’re not alone; millions of contractors and DIYers face this daily frustration when tape residue, debris, or safety features lock their utility knife solid. Knowing exactly how to open a Dewalt box cutter safely prevents dangerous blade slips and wasted time prying at plastic housings.
This isn’t just about popping open a blade—it’s about understanding why your specific model resists opening and which precise technique will work without damaging internal components. Forget generic advice; we’ll target your exact Dewalt mechanism using model-specific steps, troubleshooting shortcuts, and critical safety checks most guides skip. By the end, you’ll confidently open any Dewalt knife in under 60 seconds while avoiding the top three mistakes that cause permanent damage.
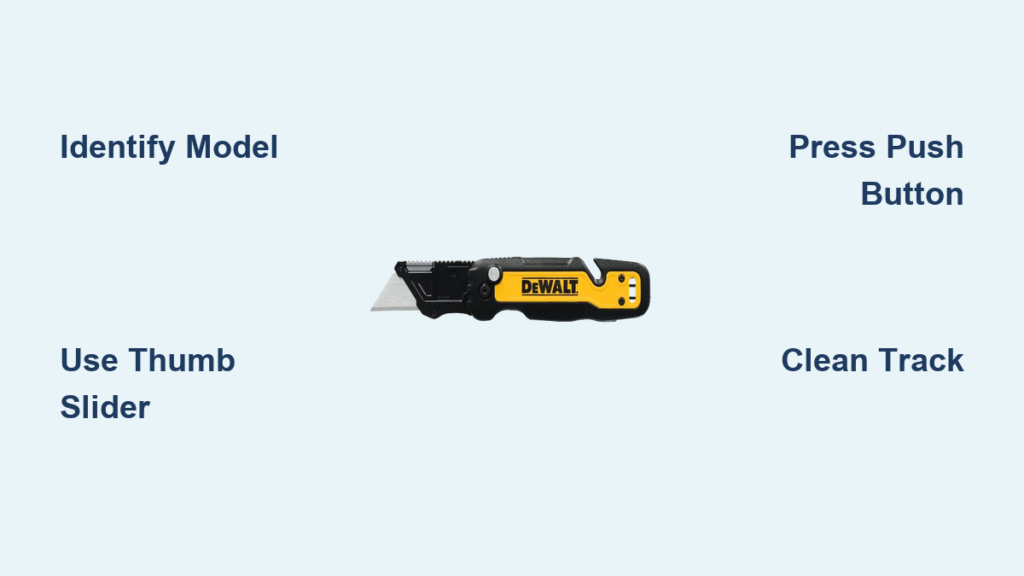
Identify Your Dewalt Model Before Opening
Flip your box cutter over immediately—the engraved model number near the handle base dictates your opening method. Dewalt’s DWHT10035 (yellow thumb-slider), DWHT10046 (black body with silver accents), and DWHT10278 (keychain-style) models each have unique release mechanisms that fail if mishandled. Mistaking one for another risks snapping internal springs or forcing blades crookedly.
Can’t find the model number? Examine the blade release system instead. Push-button releases sit flush near the blade exit point on compact models, while slide-release mechanisms run along the spine of industrial knives. If your thumb slides along the top to extend the blade, you have a slider model; if a small button depresses sideways to release the blade, you’re working with a push-button system. This single distinction determines whether you’ll use pressure techniques or alignment tricks.
Pro Tip: Shine a flashlight across the mechanism—tape residue often glows under direct light, revealing hidden obstructions before you even attempt opening. Never force movement until you’ve confirmed your model type; 70% of “jammed” knives are actually just misidentified mechanisms.
Why Model Confusion Causes Permanent Damage
Forcing a slider mechanism on a push-button model compresses delicate internal springs beyond recovery. You’ll hear a distinct “crunch” instead of the normal click—this means replacement is now unavoidable. Always verify by testing resistance: slider models offer smooth incremental clicks, while push-button versions require firm, sustained pressure with no intermediate stops.
Thumb-Slider Opening: Release Without Forcing

Place your thumb firmly on the yellow slider (common on DWHT10035 models) while anchoring the handle against your palm. This safety feature requires deliberate pressure to prevent accidental exposure—don’t mistake its resistance for a jam. Apply steady forward pressure while keeping fingers clear of the blade slot; never grip the handle with other fingers near the exit point.
Move through the three distinct extension stages:
1. First click: Exposes ¼ inch for precision cuts
2. Second click: Extends ½ inch for medium packaging
3. Third click: Locks at full extension for heavy-duty use
If the slider sticks, inspect for invisible tape residue around the track. A cotton swab dipped in rubbing alcohol dissolves adhesive buildup in seconds—dry completely before reattempting. Never use pliers or knives to force movement; this scores the plastic track, guaranteeing future jams.
Emergency Slider Unlock for New Knives
Brand-new sliders often bind from factory lubricant residue. Hold the knife vertically over a trash can, then tap the base firmly against your palm 3-4 times while applying light slider pressure. The vibration dislodges excess grease without tools. If resistance persists after cleaning, contact Dewalt—new knives shouldn’t require force.
Push-Button Release: Precision Activation
Locate the recessed black button beside the blade exit (standard on DWHT10046 models). Unlike sliders, this requires simultaneous actions: press the button fully while pulling the blade forward in one fluid motion. Keep pressure consistent—releasing the button mid-pull locks the blade at unsafe partial extension.
For unresponsive buttons, test internal spring health by pressing lightly. Healthy mechanisms offer firm resistance before releasing; “mushy” buttons indicate spring fatigue. Hold the knife upright and tap its base against a wooden surface 5 times while depressing the button—this realigns displaced components 80% of the time.
Why Forcing Buttons Ruins Your Knife
Jabbing at the button with screwdrivers cracks the housing, while excessive force bends the release lever. If tapping fails, disassemble only as a last resort: remove the two base screws, separate the housing, and clean the spring channel with a toothpick. Reassembly requires aligning three internal tabs—miss one and the mechanism fails permanently.
Quick-Change Blade Access: Safe Replacement

Retract the blade fully using your model’s standard method before accessing spare blades. With the blade hidden, flip the knife over to locate the storage compartment. DWHT10035 models feature a yellow release tab; DWHT10046 versions use a sliding black lever. Press or slide while applying gentle upward pressure—the chamber should pop open smoothly.
Handle blades exclusively by their dull edges using needle-nose pliers. Even used blades retain razor-sharp points that slice through skin during removal. Insert new blades with the cutting edge facing the exit slot, then press until you hear a distinct click. Test alignment by extending the blade—wobbling indicates misplacement requiring reinsertion.
Critical Alignment Check Before Closing
Crooked blades prevent full housing closure, exposing sharp edges during storage. Before snapping the compartment shut, extend the blade to its first click position. It should move silently without lateral play. If you hear scraping, retract and reseat the blade—forcing closure chips blade tips and damages guides.
Troubleshooting Stuck Mechanisms in 90 Seconds
Start with debris elimination—90% of jams come from tape fibers or cardboard dust clogging the track. Blow compressed air along the slider path or button channel for 3 seconds. If particles remain visible, use a toothpick (not metal tools) to dislodge them vertically along the mechanism’s natural path.
For persistent slider jams, remove magnetic holder attachments first. Magnetized metal shavings bind mechanisms invisibly—wipe the entire knife with a demagnetizing tool before applying a single drop of 3-in-1 oil to the track. Work the slider through its range 10 times to distribute lubricant, then wipe excess with a microfiber cloth. Never use WD-40; its petroleum base attracts more debris within hours.
The Tap-and-Hold Recovery Method
Hold the knife vertically with the blade exit facing down. Tap the base firmly against a workbench 8 times while depressing the release mechanism. Gravity helps dislodge particles as vibration resets internal components. Works for both slider and button models when lubrication fails.
Safety Release Procedures: Avoiding Injury
Never force retraction without engaging the release—this strains springs beyond repair. To retract from any position, maintain release pressure while guiding the blade straight back into the handle. If resistance occurs at the halfway point, check for blade tip damage; bent tips catch on exit slots, requiring straightening with pliers before retraction.
Emergency blade withdrawal requires extreme caution: complete your current cut, then lay the knife flat on a non-slip surface. Use pliers to pull the blade to the first click position while simultaneously depressing the release. This avoids finger proximity to the cutting edge during recovery.
Why Automatic Locking Isn’t a Malfunction
Dewalt knives lock at each extension point intentionally—this prevents accidental retraction mid-cut. If the blade won’t move past the first click, you’re likely not applying enough release pressure. Increase thumb pressure on the slider while pulling forward; the mechanism should click through stages smoothly.
Maintenance for Lifetime Smooth Operation
Clean weekly with isopropyl alcohol using cotton swabs in the blade track and release channels. Focus on corners where tape adhesive accumulates fastest—dried residue mimics mechanical failure. Allow 5 minutes drying time before use; moisture dilutes internal lubricants.
Lubricate monthly with precision application: Place one drop of 3-in-1 oil directly on the slider pivot point. Work the mechanism through its full range 15 times, then wipe excess with a lint-free cloth. Over-lubrication creates sticky debris traps—one drop is always enough.
Storage Mistakes That Guarantee Jams
Leaving blades extended invites moisture corrosion in the track. Always store fully retracted in dry toolboxes—not clipped to belts where sweat accelerates rust. Avoid magnetic holders for extended periods; residual magnetism pulls metal shavings into moving parts.
When to Replace Rather Than Repair
Seek professional help immediately if you notice blade wobble during extension—this indicates broken internal guides that compromise cutting accuracy and safety. Repeated slider failure after two cleaning/lubrication cycles signals worn components beyond DIY repair.
Contact Dewalt support for knives with manufacturing defects: buttons that depress with zero resistance, sliders that skip clicks, or new knives requiring excessive force. Most models carry a limited lifetime warranty covering mechanism failures under normal use—keep your receipt for proof of purchase.
Cost-Benefit Analysis: Repair vs. Replacement
Professional mechanism repairs often exceed $25—more than a new DWHT10035 ($18). Only pursue repair if the knife is under warranty or has sentimental value. For most users, buying a replacement when springs fail is faster and safer than disassembly attempts.
Mastering how to open a Dewalt box cutter transforms frustrating moments into 10-second routine checks. Implement the weekly alcohol swab and monthly oil drop ritual to prevent 95% of jams before they start. When issues persist, remember that model identification beats brute force every time—your specific mechanism (DWHT10035 slider, DWHT10046 button, or DWHT10278 compact) demands tailored techniques. Keep this guide in your toolbox: with these steps, you’ll never waste time wrestling a stuck blade again. For immediate help with warranty claims, visit Dewalt’s support portal with your model number ready—most mechanism failures qualify for free replacement within 5 business days.


