You’re applying steady pressure, rotating the pipe cutter around the copper tubing, but instead of a clean separation, you’re left with a jagged edge or no cut at all. That familiar frustration when your pipe cutter not working properly can derail an otherwise simple plumbing project. When your cutting tool fails to deliver those crisp, square cuts you need for proper fittings, it’s more than just annoying—it compromises the entire installation.
Most pipe cutter issues stem from preventable problems that require minimal expertise to fix. Whether you’re a professional plumber facing deadline pressure or a DIYer tackling a weekend project, understanding why your pipe cutter fails and how to address it immediately saves wasted materials and endless frustration. This guide delivers practical solutions for restoring your cutter’s performance, helping you diagnose the exact problem and implement the right fix—without needing to replace your entire tool.
Identify Immediate Mechanical Issues

Before assuming your pipe cutter needs replacement, perform these quick checks that solve most common cutting failures.
Examine Cutting Wheel Sharpness and Integrity
Hold your pipe cutter under bright light and inspect the cutting wheel’s edge. A functional wheel should have a distinct beveled edge that catches light sharply. Look for telltale signs of damage: chips along the rim, a completely rounded profile, or visible flat spots where the wheel contacts the pipe. If you can run your finger along the edge without feeling resistance, the wheel has lost its cutting ability. Most standard wheels maintain effectiveness for 100-200 cuts on copper pipes, but this lifespan plummets when cutting stainless steel or hardened materials. When you see metal shavings instead of clean copper curls during cutting, that’s your clearest indicator it’s time for replacement.
Verify Frame Alignment with Precision
Place the cutter on a flat surface and sight down the tool from multiple angles. The cutting wheel must sit perfectly centered between the two guide rollers—any visible offset means misalignment. Even a slight 2-3mm deviation causes the cutter to apply uneven pressure, resulting in angled cuts that won’t accept standard fittings properly. Check for subtle bends near the adjustment mechanism, especially if the tool has been dropped. Gently rotate the cutter frame while watching the wheel’s position relative to the rollers; wobbling indicates internal damage that requires component replacement.
Test Roller Mobility and Grip
Spin each guide roller individually with your fingertip—they should rotate smoothly with minimal resistance. Sticky rollers create inconsistent pipe rotation, causing the cutter to bind at certain points during the cutting process. Run your finger along the roller surfaces; deep grooves or corrosion spots mean the rollers can’t maintain proper pipe contact. Clean rollers immediately using a stiff wire brush to remove embedded metal particles, then test their grip on a scrap pipe piece. If rollers spin freely but lack traction, they’ve worn too smooth and need replacement.
Address Specific Cutting Failures Immediately
Different malfunction symptoms require targeted solutions—knowing which problem you’re facing saves critical time.
Stop Pipe Slippage During Operation
When the pipe rotates instead of the cutter, your rollers have lost their grip. First, clean the roller surfaces thoroughly with a degreaser and wire brush to remove oil buildup. If cleaning doesn’t restore traction, check for excessive roller wear—smooth, groove-free surfaces won’t hold the pipe securely. For temporary field fixes, wrap electrical tape around problem rollers to increase grip until proper replacements arrive. Ensure pipe surface is clean and dry before cutting, as even small amounts of moisture or oil cause slippage with worn rollers.
Correct Angled or Beveled Cuts
An angled cut indicates uneven pressure distribution across the pipe circumference. Position yourself so you’re looking directly at the cutting point throughout the rotation—any tilting of the cutter body creates beveled edges. Make sure all three contact points (cutting wheel plus two rollers) maintain equal pressure against the pipe. For larger diameter pipes, support the pipe ends to prevent flexing during cutting. If you consistently get angled cuts even with perfect technique, your cutter frame has likely bent and requires professional realignment or replacement.
Resolve Mid-Cut Jamming Situations
When your cutter suddenly stops advancing despite continued rotation, immediately back off the adjustment knob before attempting to restart. Forcing the tool risks damaging both the cutter and pipe. Inspect the cutting area for metal shavings packed between the wheel and frame—use compressed air or a small brush to clear debris. Check if the cutting wheel has developed a flat spot from previous over-tightening. If the jam persists after cleaning, back the adjustment completely out, rotate the cutter 180 degrees, and restart the cut from the opposite direction to bypass the problem area.
Implement Essential Maintenance Protocols

Regular maintenance prevents 80% of pipe cutter failures before they disrupt your workflow.
Establish a Post-Use Cleaning Routine
Dedicate two minutes after each job to proper cutter care. Wipe all surfaces with a clean, dry cloth to remove metal particles and cutting residue. Use compressed air to blow through roller assemblies, dislodging trapped debris that causes binding. Apply a single drop of lightweight machine oil to each roller axle and adjustment screw—enough to create smooth movement but not so much that it attracts metal shavings. This simple ritual extends your tool’s life by years and ensures consistent performance.
Create a Wheel Replacement Schedule
Don’t wait for complete failure before replacing cutting wheels. For professional use, check wheel sharpness every 25 cuts; for DIY projects, inspect before each use. Run your fingernail perpendicular across the wheel edge—sharp wheels produce noticeable resistance, while dull ones feel smooth. Replace wheels at the first sign of performance decline; continuing to use a dull wheel accelerates wear on the entire mechanism. Keep spare wheels organized in your toolbox with their protective covers intact until needed.
Optimize Storage Conditions
Store pipe cutters vertically in a dedicated rack rather than tossing them loose in your toolbox. Horizontal storage allows heavy tools to rest on cutter frames, causing subtle bends that ruin alignment. If your cutter came with a protective case, use it—this shields the delicate cutting wheel from accidental impacts. For long-term storage, apply a light coat of corrosion inhibitor to metal surfaces and store in a climate-controlled environment. Avoid leaving cutters on job sites overnight where temperature fluctuations cause condensation inside the mechanism.
Select the Right Cutter for Your Material
Using an inappropriate cutter for your pipe material causes immediate performance issues and rapid tool degradation.
Match Cutter to Pipe Hardness
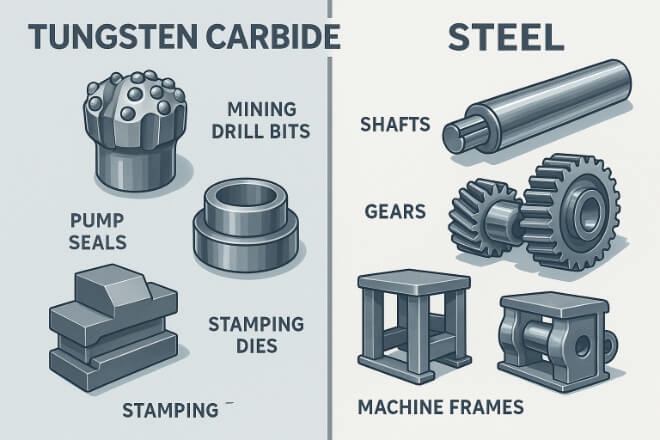
Standard pipe cutters with carbon steel wheels work perfectly for copper and PVC but fail quickly on stainless steel or black iron. For harder materials, invest in cutters with tungsten carbide wheels—they maintain sharpness 5-7 times longer when cutting demanding materials. Don’t try to save money by using a basic cutter on stainless steel; the rapid wheel degradation costs more in replacements than upgrading to the proper tool initially. When switching between materials, dedicate specific cutters to each type to prevent cross-contamination of wear patterns.
Size Cutter to Pipe Diameter
Using a 1-inch cutter on 3/4-inch pipe creates unstable positioning that produces angled cuts. Always verify the pipe diameter against your cutter’s specified range—most tools clearly mark their capacity on the frame. When in doubt, measure both pipe outer diameter and cutter specifications with calipers. Oversized pipes force excessive frame flexing, while undersized pipes won’t seat properly against all contact points. Maintain multiple cutter sizes in your kit to match common pipe dimensions rather than stretching a single tool beyond its capabilities.
Determine Repair Versus Replacement
Some failures justify component replacement while others demand a new tool altogether.
Recognize When to Replace Entire Units
Replace your pipe cutter when you notice persistent frame misalignment despite adjustments, stripped adjustment threads, or significant frame bending. If replacement parts cost exceeds 50% of a new cutter’s price, replacement makes economic sense. Modern cutters offer improved ergonomics, better materials, and enhanced cutting efficiency that older models can’t match. For professional plumbers, the time saved with a reliable new cutter quickly offsets the initial investment.
Calculate Cost-Benefit for Component Replacement
A new cutting wheel typically costs $5-15 and restores nearly all original performance, making this the most cost-effective repair. Roller replacements run $8-20 depending on cutter model. When multiple components need replacement simultaneously, calculate whether the cumulative cost approaches that of a new entry-level cutter ($25-40). For DIY users with infrequent needs, occasional replacement often makes more sense than maintaining multiple specialized cutters.
Restoring your pipe cutter’s performance requires systematic attention to its mechanical components and proper maintenance habits. By implementing these targeted solutions for specific failure modes, you’ll achieve clean, square cuts consistently without unnecessary tool replacement. Keep spare cutting wheels organized in your kit, establish a simple post-use cleaning routine, and match your cutter precisely to both pipe size and material—these practices separate professionals who work efficiently from frustrated DIYers battling malfunctioning tools. Remember that most “broken” cutters simply need the right maintenance attention to deliver years of reliable service.