
The moment you power up your CNC plasma cutter table, you’re standing at the threshold of precision metal fabrication. Yet many operators waste hours—and expensive consumables—by skipping critical setup steps that separate amateur cuts from professional results. Whether you’re working with 1/4″ steel plate or intricate automotive components, knowing exactly how to use a plasma cutter table transforms raw metal into precision parts with computer-controlled accuracy.
This guide delivers the exact sequence professional fabricators follow daily, eliminating guesswork that damages equipment and compromises cut quality. You’ll discover the 12-step protocol that ensures consistent performance, avoids common emergency signals, and extends consumable life—critical knowledge whether you’re cutting structural steel or detailed artistic metalwork.
Pre-Operation Safety Setup: The Non-Negotiable Foundation
Critical Power Verification Before First Activation
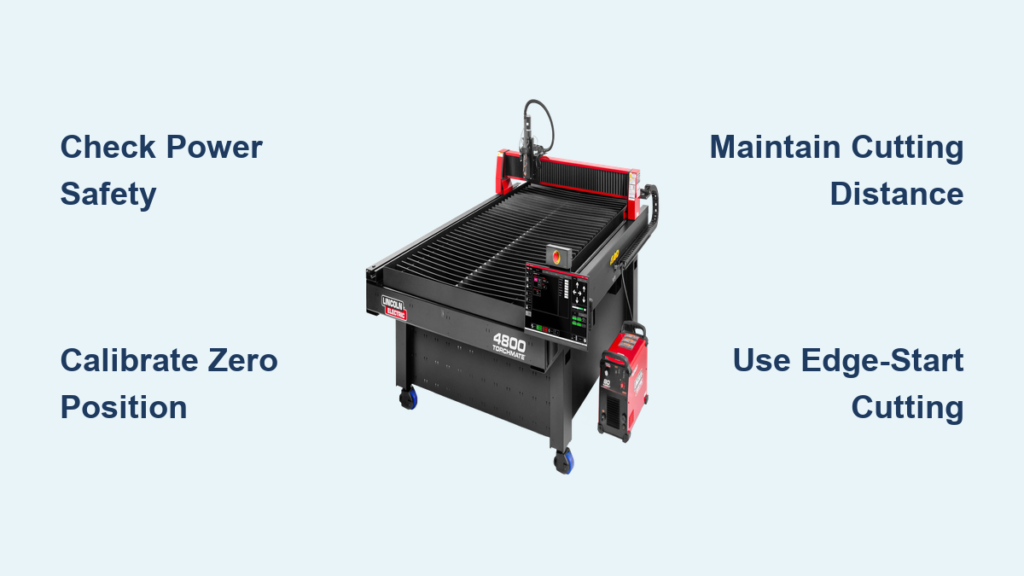
Before touching any controls, verify all safety switches remain in the OFF position. Check the rotary switch at the machine’s rear—this must sit horizontally before startup. The power sequence starts at the main electrical cabinet, ensuring both primary cables receive full current flow. Position the circuit breaker inside the plasma cutter’s electrical cabinet to ON—this single action energizes the entire system but only after confirming all safety protocols.
Pro Tip: Never skip the phase loss indicator check. If this light illuminates when powering up, immediately investigate three-phase power issues—continuing with phase loss will damage your plasma power supply.
Essential System Initialization Sequence
Turn the system control key switch to activate the main display. The interface should appear immediately, confirming proper system communication. Rotate the plasma power supply’s rear switch 90 degrees to vertical—this triggers the power indicator light, signaling readiness. Start the air compressor system, maintaining minimum flow of 1 m³/min. Adjust pressure controls to achieve 6.1-8.2 Bar output. This pressure range ensures consistent plasma arc stability throughout cutting operations.
Warning: Improper fan rotation direction indicates reversed input power phases. Correct this immediately—running with reversed phases causes catastrophic system failure.
Mastering the 12-Step Cutting Protocol for Professional Results
Step 1: Emergency Signal Prevention Before Ignition
Inspect plasma power supply intake pressure against specifications before activation. Verify no emergency signals appear during startup—these warnings prevent mid-cut failures that waste material and damage consumables. Many operators skip this check only to face costly nozzle replacements during critical projects.
Step 5: Zero Calibration and Consumable Inspection
Configure each axis for zero return positioning before loading your program. Inspect plasma consumables thoroughly—replace worn electrodes, nozzles, or shields before starting. Close the plasma power circuit breaker only after confirming consumable integrity. Critical Mistake: Using slightly worn consumables saves pennies but costs dollars in poor cut quality and accelerated component wear.
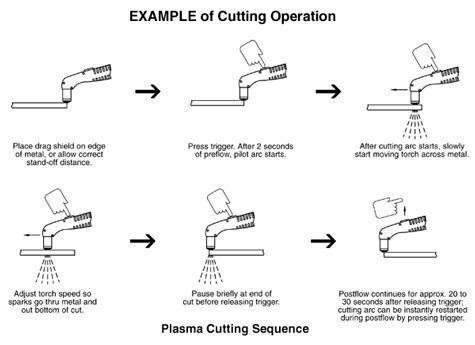
Step 9: Perfecting the Cutting Sequence Start
Press the start cutting button and watch the automated sequence: the system selects the plasma torch, raises to perforation height, and initiates arc ignition. The torch contacts the steel surface, then elevates for proper arc transfer before beginning the cut path. Time-Saving Tip: For complex patterns, verify the first 10 seconds of cutting visually before stepping away—catching alignment issues early prevents wasted material.
Precision Distance Control: The Secret to Clean Plasma Cuts
Maintaining Optimal Nozzle-to-Work Distance
Keep cutting distance exactly as specified in your manual—typically 1/8″ to 1/4″ depending on amperage. During perforation operations, use twice the standard cutting distance or maximum arc transmission height—whichever provides cleaner pierce points. Inconsistent distance causes dross buildup and uneven edges that require grinding.
Pro Tip: Install a digital height controller for automatic distance maintenance—this $200 upgrade pays for itself in saved consumables and reduced post-processing time.
Edge-Start Cutting Technique for Maximum Consumable Life
Always prioritize edge-start cutting over center perforation. Direct the nozzle precisely at metal edges before arc activation. This technique dramatically extends consumable life, especially on smaller CNC plasma tables where consumables cost proportionally more. Critical Fact: Center perforations increase nozzle wear by 300% compared to edge starts—reserve perforations only when absolutely necessary.
Performance Optimization: Gas Settings and Current Control
Gas Pressure Calibration for Different Material Thicknesses
Activate oxygen and compressed air supplies, maintaining 8.3 bar ±10% pressure for each gas. This dual-gas setup ensures optimal cut quality across different material thicknesses. Troubleshooting Tip: If you notice excessive dross on the bottom edge, increase gas pressure by 0.5 bar increments until clean cuts return.
Current Limitation Protocol to Prevent Premature Failure
Never exceed nozzle current ratings. Set amperage to 95% of nozzle capacity maximum. For 100A nozzles, maintain intensity at 9 or higher settings. Overloading nozzles causes immediate failure and poor cut quality that requires post-processing. Critical Mistake: Many operators crank amperage to cut thicker material—this destroys consumables faster than the time saved.
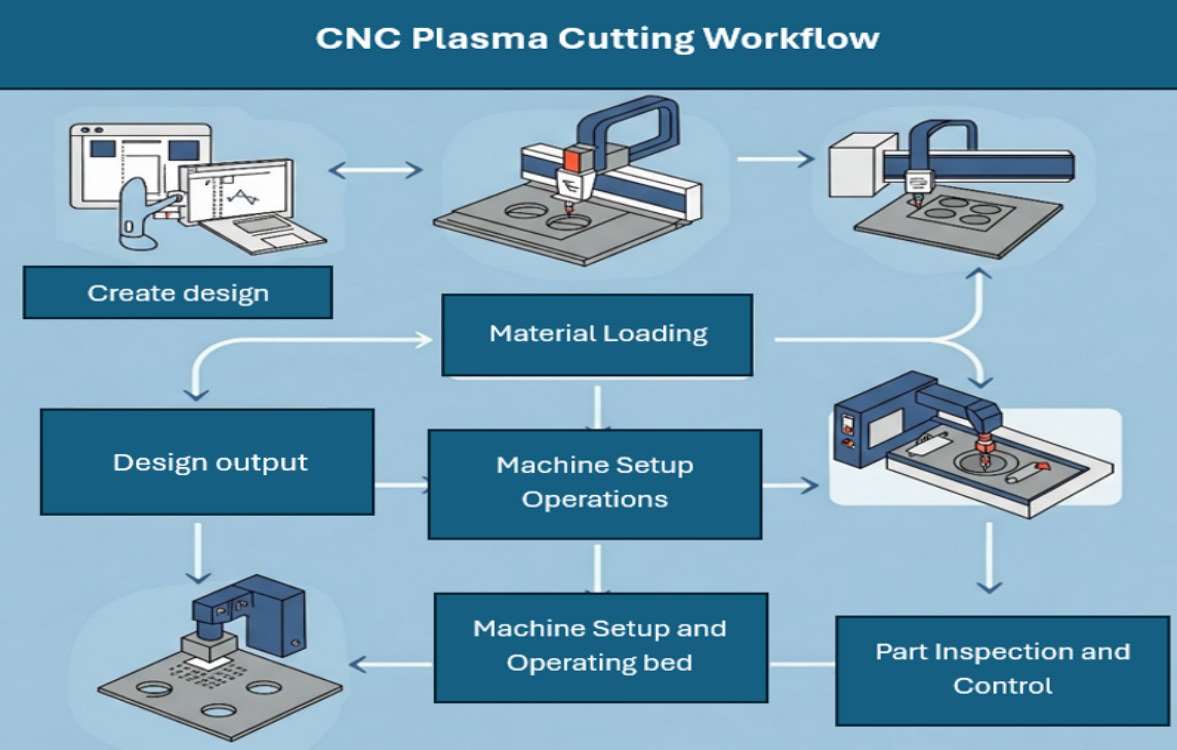
Software Integration: Transferring Programs Without Errors
Seamless CAD/CAM to Plasma Cutter Workflow
Modern CNC systems support comprehensive CAD/CAM compatibility. Use USB storage for seamless program transfer between design workstations and cutting table. This flexibility enables rapid file exchange without network dependencies. Time-Saving Shortcut: Create material-specific program templates with pre-set gas pressures and amperage—reducing setup time by 60% for repeat jobs.
Reference Point Setup for Perfect Alignment
Save your program starting point as the reference position before activating plasma power. Verify alignment by running the machine in simulation mode—this catches positioning errors before they waste material. Critical Step: Always double-check your material dimensions against program parameters—scaling errors cause costly misaligned cuts.
Post-Cut Maintenance: Preserving Your Table’s Cutting Precision
Immediate Cleanup to Prevent Slag Buildup
Clean the cutting table thoroughly after each use, removing all slag and debris. Slag accumulation affects future cut accuracy and creates electrical hazards. Pro Tip: Keep a dedicated brass brush for table cleaning—steel brushes contaminate the surface and cause electrical arcing during subsequent cuts.
Lubrication Schedule for Smooth Operation
Apply appropriate lubrication to moving components after every 8 hours of operation. Focus on rail systems and drive mechanisms where metal-on-metal contact occurs. Critical Mistake: Using standard machine oil instead of manufacturer-specified lubricants attracts metal particles that accelerate wear.
Critical Mistakes That Destroy Plasma Cutter Consumables
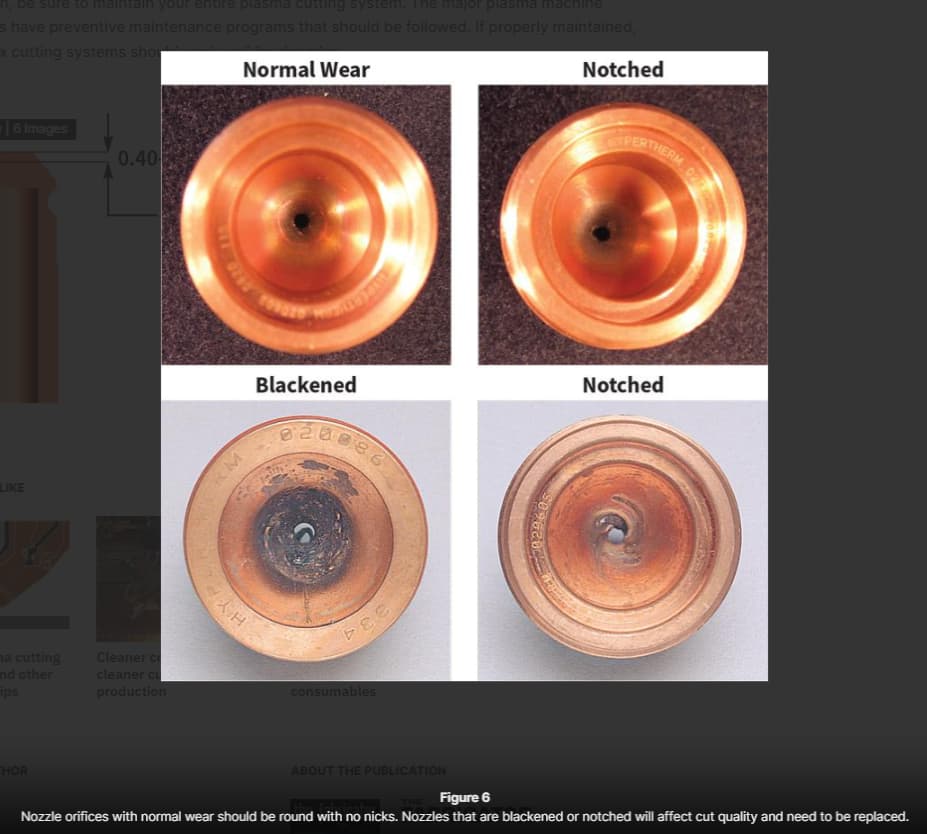
Perforation Thickness Violations
Respect perforation thickness limits—small CNC plasma cutters cannot perforate steel beyond 50% of their standard cutting thickness capacity. Standard cutting thickness ratings apply to edge-start operations only. Troubleshooting Tip: If your machine struggles with perforations, reduce material thickness or switch to edge-start cutting—forcing thick perforations destroys nozzles in minutes.
Non-Productive Arc Starting Damage
Position the torch within cutting proximity before arc activation. Both nozzle and electrode wear rapidly during non-productive arc starting sequences. Minimize this time to maximize consumable lifespan. Critical Fact: Every unnecessary arc start reduces consumable life by 3-5%—develop the habit of perfect positioning before ignition.
Daily Maintenance Checklist for Peak Performance
Establish routine intervals based on cutting frequency:
– After each use: Clean table surface, remove slag, inspect consumables
– Daily: Check gas pressure regulators, verify electrical connections
– Weekly: Deep clean torch assembly, inspect drive belts for tension
– Monthly: Full system calibration, replace air filters, check grounding
Pro Tip: Keep a maintenance logbook tracking consumable life—sudden drops in performance often indicate underlying issues before they cause catastrophic failure.
Mastering how to use a plasma cutter table transforms complex metal fabrication into efficient, precise operations. Following these exact procedures ensures consistent cut quality while maximizing equipment lifespan. Remember: professional results come from systematic adherence to proven protocols, not shortcuts. Implement this 12-step cutting protocol consistently, prioritize edge-start techniques, and maintain strict gas pressure control to achieve factory-quality cuts on your CNC plasma table—every time you power up.


