
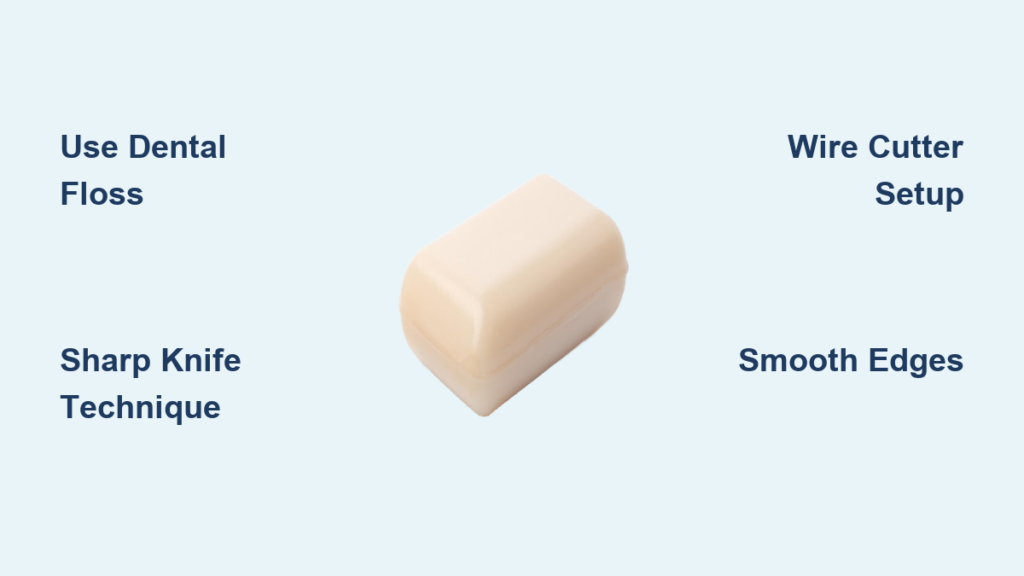
You’ve just unmolded your beautiful homemade soap loaf, but now faces a familiar dilemma: how to cut it into perfect bars without specialized equipment. Most soap makers discover they need reliable cutting techniques using only everyday kitchen tools, and this guide delivers exactly that. Whether you’re working with cold process soap fresh from the mold or harder cured bars, you’ll learn proven methods to create clean, consistent cuts using nothing more than a sharp knife, dental floss, and other common household items. No expensive soap cutters required—just practical solutions that transform your soap making results from amateur to professional.
Test Your Soap’s Readiness Before Cutting
Determine Perfect Cutting Timing
Cold process soap needs 24-48 hours of curing before it reaches the ideal cutting consistency—firm enough to hold its shape but still yielding slightly when pressed. Test readiness by gently pressing your finger into the surface; properly cured soap should show a slight indentation without sticking to your skin, similar to medium-firm cheese. Hot process soap, having completed saponification during cooking, typically requires just 4-6 hours of cooling before it’s ready for cutting.
Set Up an Effective Cutting Station
Create a stable workspace using a large cutting board positioned at comfortable height for consistent downward pressure. Place your soap loaf parallel to the counter edge to maximize control during cutting. Keep a ruler or measuring tape nearby for consistent thickness measurements, and position paper towels within reach for cleaning tools between cuts. This simple setup prevents uneven pressure that causes ragged edges and inconsistent bar sizes.
Master the Sharp Knife Cutting Technique

Prepare Your Kitchen Knife Properly
Select a non-serrated chef’s knife at least 8 inches long with a straight edge for clean cuts. Run hot water over the blade for 30 seconds to warm it, then dry completely—warm steel glides through soap without creating drag marks or uneven surfaces. Hold the knife perpendicular to the soap surface, positioning both hands for maximum control: dominant hand on the handle, other hand gently guiding the blade’s spine.
Execute Flawless Knife Cuts
Mark your cutting lines using a ruler and water-soluble marker, or lightly score the soap surface with the knife tip as a guide. Apply steady, even pressure using both hands while pushing downward and maintaining forward motion—let the soap’s weight assist the cut rather than forcing the blade. For uniform bars, make your first cut perpendicular to the loaf’s length, then rotate the sections 90 degrees for secondary cuts to achieve standard 3.5 x 2.5 x 1 inch dimensions.
Perfect the Dental Floss Cutting Method
Create Optimal Floss Tension
Unwaxed dental floss provides exceptional cutting control without compressing the soap. Cut an 18-inch length and wrap the ends around your index fingers, maintaining taut tension between them. Position the floss perpendicular to the soap surface at your marked cutting line, ensuring it sits straight across the entire width of the loaf. This technique creates minimal waste and works especially well with softer soap formulas that crumble when cut with rigid tools.
Apply the Correct Sawing Motion
Pull the floss taut and use gentle, controlled sawing motions while applying slight downward pressure. Unlike knife cutting, this method requires minimal force—let the floss do the work by maintaining consistent tension. For thicker soap loaves, cut from both sides meeting in the middle to prevent floss deflection. Monofilament fishing line (10-20 pound test) serves as a durable, reusable alternative that maintains tension better than standard dental floss.
Build a Wire Cutting System
Construct a Simple Wire Cutter
Create an effective wire cutter using 12 inches of picture hanging wire secured between two wooden dowels. Heat the wire slightly with warm water to reduce friction against the soap surface. Position the wire at your cutting mark, then pull downward at a consistent speed for smooth, professional results. This method excels with harder, fully cured soap that resists knife cutting.
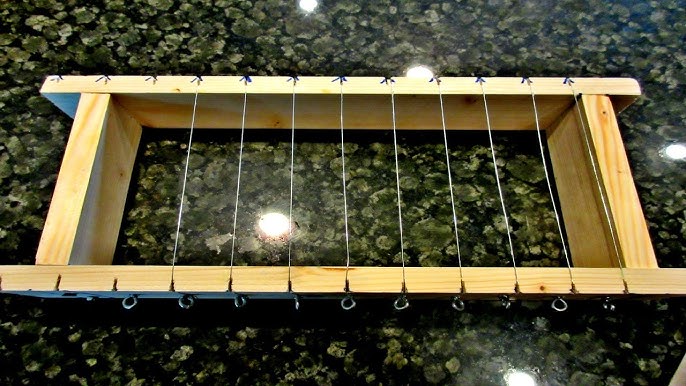
Upgrade with Guitar String Precision
Thread a high-E guitar string (0.010 inch diameter) through eye screws on wooden dowels to create an adjustable tension system. Use wing nuts to fine-tune the wire tension for different soap hardness levels. This setup produces minimal kerf (cut width), reducing waste while creating exceptionally smooth surfaces across full soap loaves—perfect for professional-looking bars without professional tools.
Troubleshoot Common Cutting Problems

Fix Crumbling and Breakage Immediately
Crumbling during cutting indicates either excessive dryness or incomplete saponification. For dry soap, lightly mist the cutting surface with distilled water 30 minutes before cutting to add minimal moisture to the exterior. If your soap feels soft or sticky, allow additional curing time of 12-24 hours before attempting cuts—never force cuts through under-cured soap as this creates drag marks and uneven surfaces.
Correct Uneven Cuts in Seconds
Uneven cuts typically result from inconsistent pressure or blade angle variations. Maintain your knife perpendicular to the cutting surface throughout the entire cut. For severely uneven edges, trim using a sharp knife held at a 45-degree angle, removing minimal material to achieve straight edges. Alternatively, use a bench scraper to smooth rough surfaces after initial cutting.
Achieve Professional Results with Alternative Tools
Transform a Bench Scraper into a Precision Cutter
Your metal bench scraper doubles as an excellent soap cutter for smaller blocks. Mark cutting lines using the scraper’s straight edge as a guide, then position it perpendicular to the soap surface. Apply firm pressure with both hands while rocking slightly to initiate the cut, then continue with steady downward motion. This technique offers superior control for creating straight edges and works well for trimming uneven surfaces.
Repurpose Creative Household Items
Turn everyday kitchen tools into effective soap cutters:
– Cake leveler: Adjustable wire ensures consistent thickness across the entire loaf
– Manual paper cutter: Provides precise measurements for smaller soap blocks
– Cheese slicer: Repurpose adjustable models for uniform bar thickness
– Mandoline slicer: Set to desired thickness using the safety guard for consistent cuts
Perfect Post-Cutting Care for Professional Results
Smooth Edges Immediately After Cutting
Use clean fingers to gently smooth sharp edges right after cutting while the soap remains slightly pliable. For firmer soap, lightly shave rough edges with a vegetable peeler to create professional beveled corners. Alternatively, rub cut bars together using circular motions—this naturally rounds edges while creating minimal waste and giving your soap a polished appearance.
Cure and Store for Maximum Longevity
Freshly cut bars need 4-6 weeks of additional curing for optimal hardness and longevity. Place bars on ventilated racks with 1/4 inch spacing between each, rotating weekly for even curing. Store cured bars in breathable containers like cardboard boxes lined with parchment paper—never use plastic containers which trap moisture and cause sweating. Properly cured soap lasts 12-18 months while maintaining its quality and lather.
Maintain Safety While Cutting Soap
Handle Tools with Professional Care
Always cut away from your body with secure footing, keeping fingers clear of cutting paths using guides instead of hand placement. Sharpen knives before each cutting session—dull blades require excessive force and significantly increase injury risk. When using wire methods, maintain consistent tension to prevent sudden snaps that could cause injury.
Protect Yourself During Cutting
Wear cut-resistant gloves when using wire or sharp knife methods, especially when cutting multiple loaves. Safety glasses protect against soap fragments that may fly during cutting, while long sleeves provide additional protection against accidental contact with sharp tools. Work in well-ventilated areas when cutting large quantities to avoid inhaling soap dust particles.
Mastering these household cutting techniques transforms your soap making from a simple hobby into a professional craft. With practice, you’ll create perfectly uniform bars that rival those cut with expensive specialized equipment—proving that exceptional results don’t require professional tools, just proper technique and patience. Each method offers unique advantages depending on your soap’s condition and available tools, so experiment to find your preferred approach. Remember that consistent pressure, proper timing, and attention to detail make all the difference between amateur-looking chunks and professional-quality bars. Your perfectly cut soap awaits—no special cutter required.


