

That intimidating KitchenAid pasta attachment box gathering dust in your cabinet holds the secret to restaurant-quality meals at home. Many home cooks hesitate to tackle fresh pasta, fearing torn sheets, tangled noodles, or dangerous attachment mistakes. But mastering how to use KitchenAid pasta roller and cutter transforms weeknight dinners with just flour, eggs, and your stand mixer. You’ll discover why professional chefs swear by this system and learn the exact techniques to avoid common pitfalls that ruin texture and consistency. Within 60 minutes, you’ll be rolling silky sheets and cutting clean noodles like a pro.
Fresh pasta shouldn’t be frustrating. The key lies in understanding your attachment’s unique mechanics and following precise dough-handling techniques. This guide reveals the exact sequence professional pasta makers use with KitchenAid attachments – from the critical 14-pass kneading method to the perfect flour application trick. You’ll never wonder why your dough tears or won’t catch again. Let’s unlock your stand mixer’s full potential and turn simple ingredients into stunning homemade pasta.
Safety Steps Before Using Your KitchenAid Pasta Attachment
Never operate your pasta roller without these critical safety measures. Loose clothing, scarves, or long necklaces can instantly wrap around rotating rollers, pulling your hand toward the mechanism with dangerous force. Secure long hair with a tight clasp and roll sleeves past your elbows before starting. The polished steel rollers generate significant torque – even a loose thread can become a hazard.
Clear your workspace of towels, recipe cards, or any items that could drift into the attachment. Position your mixer on a stable counter with 12+ inches of clearance on all sides. Remember: the pasta attachment adds 4+ inches of height, so check for overhead cabinet interference. Never reach near moving rollers – use the included food pusher for all adjustments.
Identify Your KitchenAid Pasta Roller and Cutter Components
Your system includes three essential attachments connecting to your mixer’s power hub. The pasta sheet roller creates uniform sheets from 1/8 inch to paper-thin. Separate cutter attachments (fettuccine, spaghetti, etc.) slice these sheets into specific shapes. Some models feature a 3-in-1 unit combining roller and cutters.
Critical pre-use check: Both rollers must rotate when the mixer runs. If only the motor-connected roller turns while the adjustment roller stays static, the unit is defective. Stop immediately and replace the attachment – using it damages dough and risks mixer failure. Inspect rollers for dents or flour buildup that could cause uneven rolling.
Make KitchenAid’s Perfect Pasta Dough Recipe
KitchenAid’s Exact Dough Ingredients and Ratios
This tested formula yields ideal consistency for smooth rolling:
– 3½ cups sifted all-purpose unbleached flour
– ½ teaspoon salt
– 4 large eggs, beaten
– 2 tablespoons water
Total time: 1 hour 15 minutes | Yield: 1¼ pounds dough
Mixing Pasta Dough in Your Stand Mixer
Add ingredients to your mixer bowl in this exact order: eggs, water, flour, then salt. Attach the flat beater and mix at speed 2 for 30-60 seconds. The dough should form a shaggy mass pulling away from bowl sides. If crumbly, add water in ½-tablespoon increments.
Switch to the dough hook and knead at speed 2 for exactly 2 minutes. Transfer to a floured surface and knead by hand for 2 more minutes. Your finished dough should feel smooth, slightly tacky, and spring back when poked. Over-kneading creates tough pasta – stick to the 4-minute total.
Resting and Dividing Dough for Smooth Rolling
Wrap dough tightly in plastic and rest 20-30 minutes. This relaxes gluten, preventing shrinkage during rolling. After resting, divide into four equal pieces. Keep unused portions covered – even 5 minutes of exposure causes drying that leads to tearing. Work with one piece at a time while others rest under plastic.
Set Up Your Pasta Roller Attachment Correctly
Setting Roller to Position 1 for Kneading
Pull the adjustment knob straight out – never twist while pulling. Turn to setting “1” and release until you feel the pin engage. The knob must sit flush against the housing; gaps cause misalignment and inconsistent rolling. Set mixer to speed “2” for most tasks, but use speed “1” for initial passes to prevent edge curling.
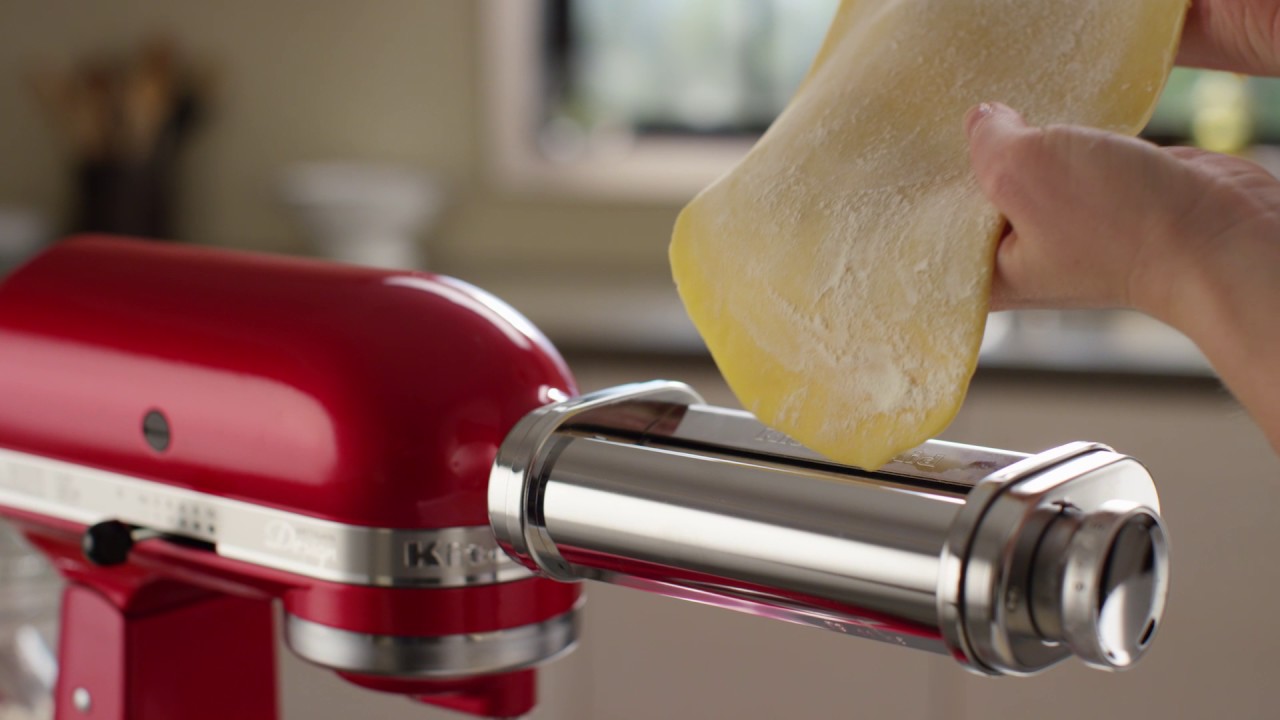
Roll Pasta Sheets Without Tears or Wrinkles
14-Pass Kneading Technique at Setting 1
Flatten one dough piece to ¼-inch thickness. Lightly flour both sides (over-flouring toughens pasta). Feed through rollers at setting “1”, fold in half, and repeat. Complete exactly 14 passes, alternating fold direction each time (vertical, horizontal, vertical…). This cross-folding builds even gluten strength. Dust minimally between passes – just enough to prevent sticking.
Step-by-Step Thinning from Setting 2 to 8
After kneading, progress systematically:
– Setting 2: 3 passes without folding
– Setting 3: 2 passes without folding
– Settings 4-8: Single pass per setting
Critical adjustment: Stop regular flouring after setting 3 – add only when dough feels sticky. For fettuccine, stop at setting 6; ravioli requires settings 7-8. Never skip settings – rushing causes tearing. Support the emerging sheet with both hands to prevent sagging.
Fix Common KitchenAid Pasta Roller Problems
Why Your Dough Slides Through Rollers and How to Fix It
If dough won’t “latch on,” flatten it more aggressively before feeding. The polished steel rollers need sufficient surface contact to grip. Press dough into a wider rectangle with your palms – think credit-card thickness. Too-narrow pieces won’t engage properly.
Stop Pasta Dough Tearing During Early Rolling
Early tearing is normal as gluten develops. Layer torn pieces together and continue rolling – the dough will strengthen within 3-4 passes. Persistent tearing means under-kneaded dough – return to setting 1 for 4-5 additional passes. If both rollers aren’t rotating, replace the attachment immediately.
Prevent Dough Edge Curling at Initial Passes
Curling edges indicate dough is too dry or speed is too high. Drop to speed “1” for the first 3 passes. If curling continues, lightly mist dough with water and hand-knead 30 seconds. Never add water directly to the mixer – moisture adjustments must happen off-machine.
Attach and Use Pasta Cutters for Clean Noodles
Switching from Roller to Cutter in 30 Seconds
After achieving desired thickness, stop the mixer. Remove the pasta sheet roller and attach your chosen cutter – fettuccine for wider noodles, spaghetti for thin strands. Push firmly until you hear a distinct click, then tug gently to confirm secure seating. Misaligned cutters create jagged edges.
Feed Sheets Smoothly to Avoid Tangled Pasta
Guide pasta sheets steadily into the cutter at speed “2”. Support emerging noodles with your other hand – let them drape over your forearm rather than falling freely. Immediately dust cut pasta with flour using the three-finger technique (index, middle, ring fingers) to prevent sticking. Catch long noodles mid-stream to avoid breakage.
Dry and Store Fresh Pasta for Best Results
Hang Pasta to Dry Without Sticking
Drape cut noodles over clean plastic hangers or a dedicated drying rack for 30-60 minutes. Ensure 2+ inches between strands for air circulation – touching noodles stay damp and mold. Lightly toss with flour if any sticking occurs. Never dry pasta in direct sunlight – it dries unevenly and cracks.
Refrigerate or Freeze Fresh Pasta Properly
- Same-day use: Rest 30 minutes before cooking for optimal texture
- Refrigeration: Store in airtight containers up to 3 days, separated by parchment
- Freezing: Form portion-sized nests on a baking sheet, freeze 1 hour, then transfer to freezer bags for up to 8 weeks. Cook directly from frozen – no thawing needed.
Pro Techniques for Restaurant-Quality Pasta
The Three-Finger Flour Technique for Perfect Sheets
Dip three fingers in flour, tap off excess, and lightly stroke both sides of pasta sheets. This controlled application prevents over-flouring that toughens noodles. Apply after each pass during settings 1-2, then only when dough feels tacky for thinner settings.
Which Roller Setting for Fettuccine vs Ravioli
- Settings 1-2: Gluten development phase only
- Settings 3-4: Pappardelle or wide noodles
- Settings 5-6: Standard fettuccine and spaghetti
- Settings 7-8: Ravioli sheets or ultra-thin preparations
Clean and Maintain Your Pasta Attachments
Clean immediately after use – never let dough dry on rollers. Use the provided cleaning brush (or soft toothbrush) to remove flour residue from crevices. Never immerse in water or use soap – moisture causes rust in precision-machined rollers. Wipe with a barely damp cloth if needed, then air-dry completely for 24 hours before storage. Store in original boxes to prevent dents that cause uneven rolling.
KitchenAid Pasta Troubleshooting Cheat Sheet
| Issue | Cause | Solution |
|---|---|---|
| Dough tears repeatedly | Under-kneaded | Return to setting 1 for 4-5 additional passes |
| Sticking to rollers | Too wet | Dust with flour, hand-knead 30 seconds |
| Won’t thin evenly | Uneven thickness | Re-roll from setting 1, flatten thoroughly |
| Cutter jams | Over-thick sections | Thin further at roller setting 5+ |
Next Steps: Flavor Variations and Advanced Shapes
Once you’ve mastered basic pasta, experiment with spinach (add ½ cup puree to egg mixture), tomato, or squid ink doughs. Try specialty cutters for pappardelle or angel hair – the same rolling principles apply. Your KitchenAid pasta system unlocks endless creativity, turning simple weeknight dinners into memorable culinary experiences. Remember: perfect pasta requires patience with rest times and rolling sequences. Your first batch might challenge you, but by the third attempt, the process becomes intuitive. Fresh pasta isn’t just food – it’s the superpower that transforms your kitchen into a trattoria.


