

Struggling to get clean edges around your fence posts? You’re not alone. Most homeowners either damage their wooden structures or leave unsightly grass patches when using a weed cutter. This frustration stems from improper technique and inadequate preparation—not your equipment. Learning how to use a weed cutter correctly transforms this chore from a destructive hazard into precision landscaping. By the end of this guide, you’ll know exactly how to protect your property while achieving crisp, professional edges that boost curb appeal and extend fence lifespan.
The truth is, a weed cutter (also called a string trimmer or weedwacker) isn’t just for weeds—it’s your secret weapon for tackling grass in tight spots where lawnmowers dare not tread. But without the right approach, you’ll waste time repairing nicks in fence posts or replacing frayed trimmer lines. Whether you’re battling overgrowth near deck supports or trimming along garden borders, mastering how to use a weed cutter prevents costly mistakes. Let’s turn your weekend struggle into a smooth, efficient process that delivers results you can be proud of.
Essential Safety Gear First
Before you squeeze that trigger, gear up properly. A weed cutter’s spinning string hurls debris faster than you can blink—think rock chips at highway speeds. Skipping protection risks serious injury from flying objects or accidental contact with the cutting head. Always prioritize safety over speed; it takes just 60 seconds to suit up but prevents lifelong damage.
Must-Have Protection
- Closed-toe shoes (non-negotiable for foot protection against rocks and debris)
- Impact-rated safety glasses (regular sunglasses shatter on impact—demand ANSI Z87.1 certification)
- Long pants and sleeves (denim or thick fabric blocks grass clippings and minor impacts)
- Ear protection (gas models hit 90+ decibels—use foam plugs or earmuffs during operation)
Quick Property Check
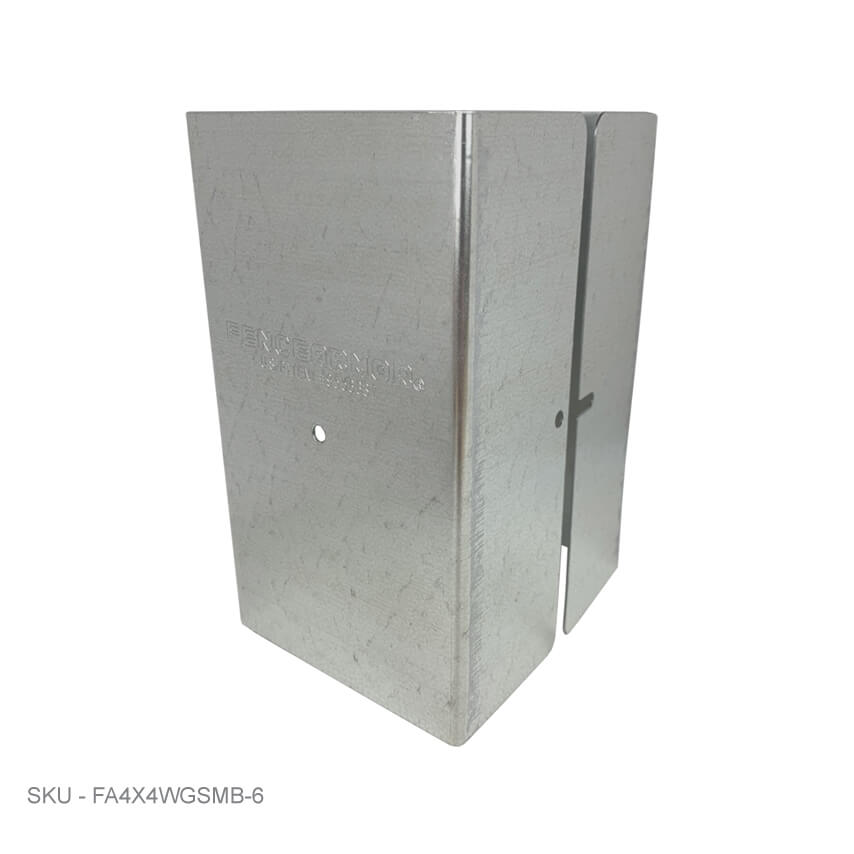
Walk your work area and relocate any loose stones, toys, or garden hoses. For fence protection, install galvanized steel post shields before starting—Fence Armor® rounded-edge shields deflect debris while guiding your trimmer safely along fence lines. Never assume the yard is clear; hidden hazards like buried irrigation lines or broken glass can cause catastrophic kickback.
Prep Your Cutting Zone
Visual Inspection Walk
Remove visible rocks and sticks, but accept you’ll miss some. That’s why protective gear matters more than perfect debris removal. Pay special attention to fence post bases where soil erosion often exposes hidden hazards. If you spot cracks in wooden posts, address them first—trimming near compromised structures accelerates damage.
Fence Line Setup
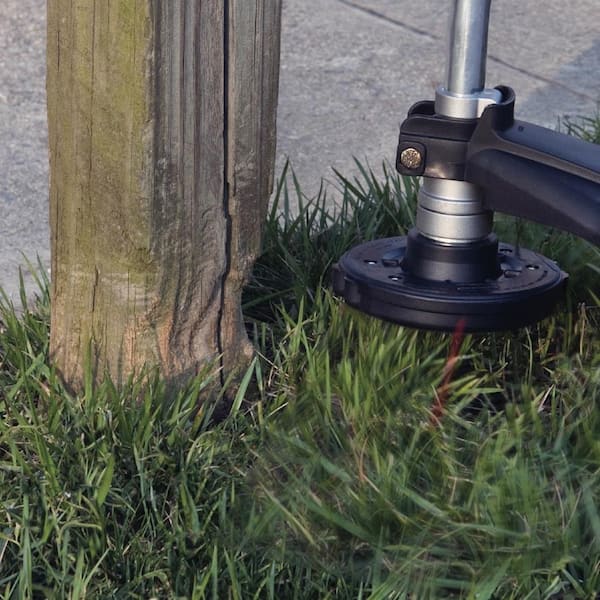
Position galvanized shields flush against posts. These rounded-edge protectors serve dual purposes: preventing direct string contact with wood and creating a smooth guide for consistent cutting height. Ensure shields are securely fastened; loose protectors shift during operation, leaving vulnerable gaps. For curved fence sections, use flexible shield variants that conform to the contour without leaving exposed wood.
Master Basic Cutting Technique
Height Setting Made Simple
Hold the cutting head 1 inch above soil level for standard grass. Raise it to 2 inches during drought stress or for delicate grass varieties. Keep this height consistent—your lawn will thank you. Cutting too low scalps roots, while excessive height leaves ragged tips that invite disease. Adjust your stance, not the machine; bend knees slightly to maintain steady elevation as you move.
Movement Pattern
- Start position: Hold trimmer at 10 o’clock angle (cutting head tilted toward uncut grass)
- Sweep motion: Gentle side-to-side swings, 6-8 inches wide—never force the head forward
- Advancement: Short, controlled steps forward matching your stride length
- Overlap: Each new pass overlaps previous by 2 inches to avoid missed strips
- Turnaround: Complete path, turn, cut parallel swath without backtracking
Pro tip: Let the string tip do the cutting—pushing too deep stalls the motor and scalps your lawn. If grass clumps form, you’re advancing too fast.
Edge Trimming Like a Pro

Fence Line Technique
Rotate the head 90 degrees away from you when trimming edges. This angle deflects debris from fence posts and your face while using the shield as a cutting guide. Keep the trimmer head lightly touching the shield’s rounded edge; this maintains perfect distance from the wood without risking direct contact. Never angle the head parallel to the fence—that grinds string into wood grain.
Post Navigation
Let the rounded edge of your galvanized shield guide the trimmer head. The curved surface prevents catching and creates consistent spacing from the fence post. When circling posts, move clockwise for right-handed operators (counter-clockwise for lefties) to control debris direction. Pause briefly at each 90-degree turn to clear built-up grass from the head.
Post-Cut Cleanup Routine
Equipment Care
- Power down completely (unplug electric models or let gas engines cool)
- Remove grass clumps from cutting head while warm—dried debris hardens into cement-like buildup
- Inspect string—replace if frayed or worn below 2 inches for optimal cutting power
- Quick wipe-down with a damp cloth prevents grass sap corrosion on metal parts
Lawn Finishing
Rake cut debris immediately to prevent thatch. Check fence posts for new nicks despite your precautions—early damage detection saves costly repairs later. Pay special attention to shield seams where debris can work behind protectors. If you spot fresh wood exposure, reposition shields before your next cut.
Fence Protection Strategy
Why Galvanized Steel Wins
Unlike plastic alternatives, galvanized steel shields withstand accidental contact without cracking. The rounded edges reduce damage even when your trimmer bumps them. Steel also resists UV degradation that makes plastic brittle over time. Invest in 18-gauge minimum thickness; flimsy shields warp under string impact, compromising protection.
Maintenance Checklist
After each use:
– Inspect shields for dents or displacement (tap dents flat with a rubber mallet)
– Tighten any loose mounting screws with a Phillips head driver
– Note areas needing better protection (e.g., where grass overgrowth pushes shields away)
– Plan shield upgrades for vulnerable spots like corner posts that take repeated impacts
Common Mistakes to Avoid
Don’t cut wet grass—it clogs the head and creates uneven results. Never run the string parallel to fence surfaces (it’ll chew into wood). Avoid the temptation to “dig out” weeds—the string cuts grass, not roots.
Do overlap passes slightly, maintain consistent height, and use your shields as cutting guides rather than obstacles to avoid. Most beginners hold trimmers too high; the sweet spot is where the string tip kisses the grass blades. If you hear a “thwacking” sound instead of a clean “zzzzip,” you’re hitting debris or cutting too deep.
When to Replace String
Your cutting effectiveness drops dramatically when string wears below 2 inches. Most bump-feed heads release 6 inches of fresh line—tap the head gently on firm ground while running at full throttle. For auto-feed models, check tension settings monthly; loose springs cause premature line release. Always match line diameter to your model (check manual)—oversized string jams the head, while undersized won’t cut thick grass.
Seasonal Maintenance Schedule
Spring: Install fresh galvanized shields before first cut; replace any damaged from winter storage
Summer: Check shield positioning monthly as ground settles from rain; tighten loose mounts
Fall: Inspect fence posts for any summer damage; repair nicks with wood filler before winter
Winter: Store equipment clean with dry string; remove batteries from cordless models to prevent drain
Quick Troubleshooting
String keeps breaking: Check for hitting hard objects or using wrong line diameter. Also inspect for sharp edges on the shield that fray string—sand rough spots smooth.
Uneven cutting: Verify consistent head height and steady advancement speed. If grass leans in one direction, you’re tilting the trimmer—keep the head perpendicular to the ground.
Motor bogs down: Reduce cutting depth and check for grass buildup around the head. For gas models, replace the air filter if it’s caked with debris.
Master these techniques and you’ll achieve professional results while protecting your fence investment. The key lies not in forcing the tool, but in letting the string do the work while your galvanized shields handle the precision guidance. Your neighbors will notice the difference—and your fence posts will last years longer. Remember: how to use a weed cutter effectively isn’t about power, but precision. Implement just one tip from this guide on your next mow, and you’ll immediately see cleaner edges, less equipment wear, and zero fence damage. Start with shield installation today, and transform a frustrating chore into satisfying landscaping mastery.


