
That glorious moment arrives—your homemade pizza emerges bubbling hot from the oven. You’re ready to dig in, but wait. No pizza cutter in sight. Whether you’re at a vacation rental, camping, or simply don’t own this specialized tool, you’re not out of luck. This guide reveals exactly how professional chefs and resourceful home cooks slice perfect pizza portions using everyday kitchen items you already have. Discover how to cut a pizza without a pizza cutter using tools already in your kitchen drawer, ensuring clean slices every time.
Best Chef’s Knife Method for Perfect Slices

An 8-10 inch chef’s knife transforms into your most reliable pizza-cutting tool when technique meets timing. This approach delivers restaurant-quality slices without specialized equipment, making it the go-to solution for most home cooks.
Choose Your Knife Wisely
Select the longest, sharpest knife in your drawer—ideally one that spans your pizza’s diameter in one clean motion. A shorter blade forces multiple passes that tear cheese and displace toppings. Dull knives require excessive pressure that compresses your perfectly baked crust. Always opt for a chef’s knife with a comfortable grip that allows precise control during the cutting motion.
Perfect Cutting Technique
Position the knife’s tip at the pizza’s center point. Press down firmly while rocking the blade back and forth in a gentle arc, letting the knife’s weight do the work. Avoid sawing motions that drag toppings across the surface. For round pizzas, make your first cut vertically through the center, then rotate the pizza and repeat horizontally to create quarters before dividing into smaller slices.
Prevent Cheese Stickage
Lightly coat the blade with olive oil or cooking spray before cutting. This simple step creates a barrier that prevents molten cheese from clinging to the metal. Wipe the blade clean between cuts with a damp cloth for consistently clean slices. Pro tip: Wait 2-3 minutes after baking—this brief rest firms the cheese structure without letting the pizza cool too much, preventing the stretching that ruins presentation.
Kitchen Scissors Precision Cuts for Thin Crusts
Professional pizzerias often favor scissors for their unmatched control and ability to create custom slice sizes. This method excels particularly with thin-crust varieties where traditional cutters might tear the delicate base.
Master the Scissor Technique
Lift the pizza edge slightly with a spatula to create clearance. Cut from the outer rim toward the center in straight, decisive lines, allowing the scissor action to naturally separate toppings without pushing them across the surface. Keep the blades fully open during the cut for maximum effectiveness and clean separation.
Slice Size Customization
Need smaller portions for kids or larger slices for adults? Simply adjust your angle between cuts. The precision of scissors allows unlimited flexibility—cut traditional triangles, squares for sheet pizzas, or even custom shapes for special occasions. Safety note: Always use dedicated kitchen shears—not your everyday household scissors. Food-grade blades ensure clean cuts and prevent contamination from previous non-food uses.
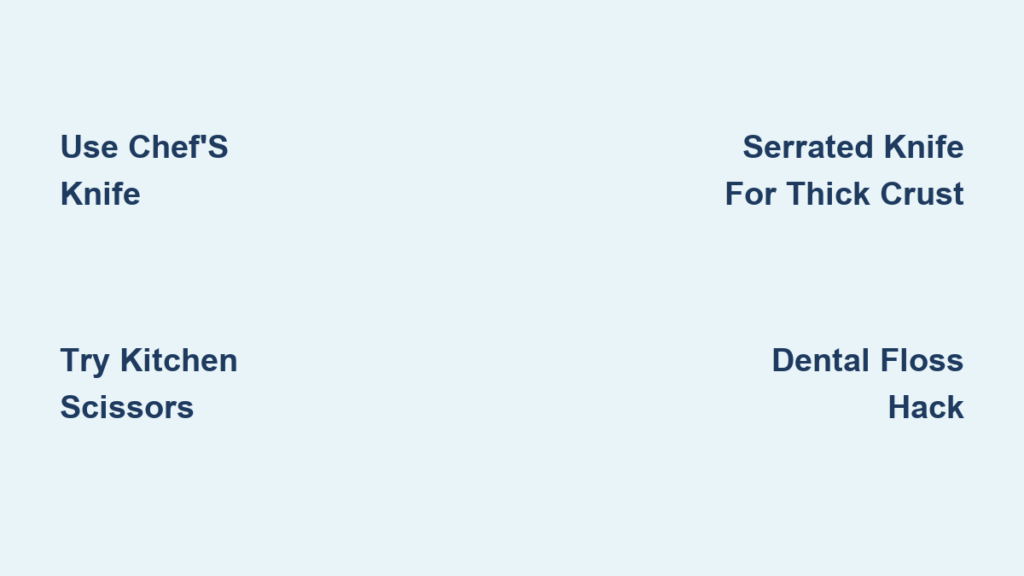
Serrated Knife Technique for Thick Crusts
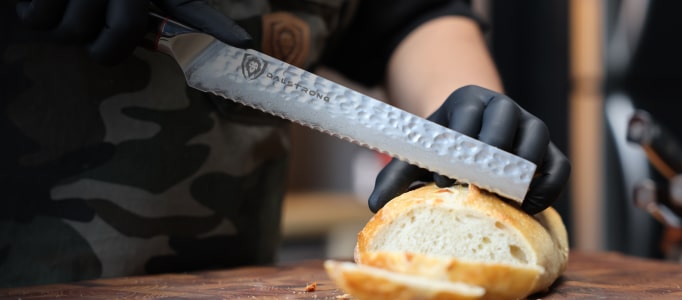
Your trusty bread knife transforms into a pizza-slicing champion when dealing with deep-dish or thick-crust varieties. The serrated edge grips and cuts without compressing your carefully crafted crust layers.
Sawing Motion Mastery
Place the serrated knife at your cutting line with the tip at the pizza’s center. Use gentle, consistent sawing motions—let the teeth do the work without pressing down hard. Apply even pressure throughout the motion to prevent crushing your crust. This technique works especially well for artisan pizzas with irregular shapes where straight cuts aren’t necessary.
Deep-Dish Challenges Solved
For Chicago-style thickness, employ a two-stage approach. First, score the top cheese layer with light pressure to create a guide. Then complete the cut with firm, even pressure through the entire depth. This prevents cheese separation from the crust below and maintains the structural integrity of your deep-dish masterpiece.
Cleaver Power Cuts for Thick Pizzas
When brute force meets precision, a meat cleaver delivers incredibly clean cuts through any pizza thickness. This method requires confidence but produces professional results with minimal effort.
One-Motion Technique
Position the cleaver exactly where you want the cut. In one decisive downward motion, bring the blade through the pizza. The cleaver’s weight eliminates the need for sawing or rocking motions that disturb toppings. Start with the blade’s tip at the pizza’s center and bring it down in a straight line to the edge.
Thick Crust Advantages
Deep-dish pizzas with substantial toppings submit easily to cleaver cuts. The wide blade prevents cheese displacement while the weight powers through resistant crusts. Warning: Ensure your cutting surface is stable and use both hands on the cleaver handle for maximum control and safety—this isn’t the time for one-handed techniques.
Creative Household Solutions That Work
Dental Floss Hack for Delicate Crusts
Unflavored dental floss creates the cleanest possible cuts for delicate crusts. Stretch 12-18 inches taut between your hands with your thumbs and index fingers. Pull downward through the pizza in one smooth motion. The thin filament slices without crushing or displacing toppings—perfect for gourmet pizzas with fragile arrangements.
Bench Scraper Magic for Square Pizzas
Metal bench scrapers excel with square or rectangular pizzas. The straight edge provides perfect 90-degree angles for professional-looking portions. Press firmly downward with even pressure—no sawing needed. This method works exceptionally well for Sicilian-style or grandma pizzas baked directly in sheet pans.
Fishing Line Precision for Presentation
Clean fishing line works similarly to dental floss but offers greater strength for thicker crusts. The monofilament creates surgically precise cuts ideal for presentation-focused serving at dinner parties or special occasions where perfect slices matter.
Handle Different Pizza Styles Like a Pro
Thin Crust Strategies That Prevent Cracking
Ultra-thin crusts crack under pressure. Use minimal downward force with a sharp knife, creating shallow scoring cuts first. Connect the scores with gentle pressure to complete separation. Allow extra resting time (3-5 minutes) for thin crusts to firm up before cutting.
Stuffed Crust Special Care Techniques
Preserve those cheese-filled edges by cutting from center outward. This approach maintains crust integrity while ensuring even slices. Kitchen shears work exceptionally well for trimming stuffed edges cleanly without compressing the filling. Cut slowly and deliberately to prevent the cheese from oozing out.
Rectangular Pizza Patterns for Uniform Portions
For sheet-pan pizzas, establish your longest dimension first. Use a ruler or straight edge as a guide for uniform squares. Cut lengthwise strips, then crosswise to create your desired grid pattern. Mark measurements on the pan’s edge before baking for perfect post-bake portioning.
Troubleshoot Common Pizza Cutting Problems
Stopping Cheese Stickage Immediately
When cheese sticks to your blade, chill it in ice water for 30 seconds before cutting. Alternatively, dust the blade lightly with flour or cornstarch between cuts. Both methods create an effective barrier between metal and melted cheese without affecting flavor.
Fix Uneven Slices with Precision
Mark your pizza’s center point first using a light score. From this reference, measure equal angles for consistent slice sizes. Six slices require 60-degree intervals; eight slices need 45-degree spacing. Use the pan’s edge as a guide for straight cuts if you don’t have a protractor handy.
Prevent Topping Displacement During Cutting
Work from the center outward rather than edge-to-edge. This technique minimizes the pushing motion that slides toppings across the surface. Allow extra resting time (4-5 minutes) for heavily topped pizzas to let ingredients set before slicing.
Safety and Tool Care Essentials
Proper Hand Positioning for Accident Prevention
Never steady the pizza with bare hands. Use a spatula or oven mitt to hold the edge while cutting. This prevents blade contact and absorbs heat from the hot pan. Keep your fingers well clear of the cutting path at all times.
Immediate Cleaning Protocol for Longevity
Cheese hardens quickly on blades. Rinse tools immediately with hot water to prevent stubborn residue buildup. For scissors, separate blades for thorough cleaning between uses. Never put pizza-cutting tools in the dishwasher immediately after use—let them cool first.
Surface Protection to Preserve Your Tools
Avoid cutting directly on stone surfaces—they’ll dull your blades rapidly. Use wood, plastic, or the inverted baking sheet method to preserve knife edges. A stable cutting surface prevents slips that could lead to injuries or ruined pizza.
Final Slice: Mastering how to cut a pizza without a pizza cutter transforms you from dependent home cook to resourceful kitchen expert. These techniques work anywhere—from cramped apartment kitchens to outdoor camping setups. Keep your knives sharp, let the pizza rest briefly, and remember: the best tool is the one you already have. Your next pizza night just became significantly more flexible, no pizza cutter required. With these proven methods in your culinary arsenal, you’ll never face pizza paralysis again—just perfect slices every time.


