
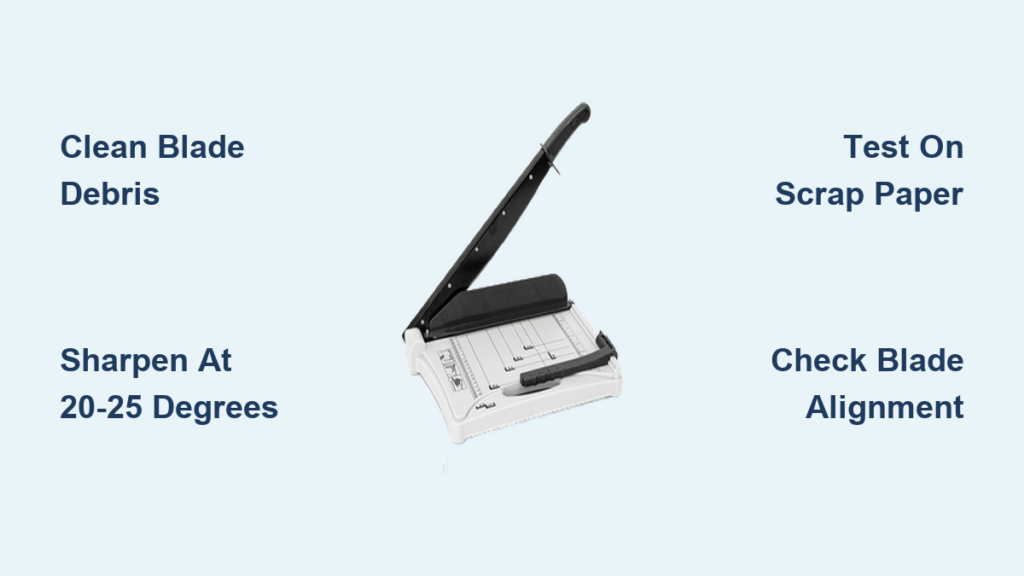
Your guillotine paper cutter once delivered crisp, professional cuts with minimal effort, but now it’s tearing paper and creating ragged edges. That urgent presentation stack looks like it went through a shredder instead of your trusted paper cutter. Before you consider replacing your entire machine, know this: a dull blade doesn’t mean your cutter is finished—it just needs sharpening.
Learning how to sharpen a guillotine paper cutter properly restores that factory-fresh cutting performance without the expense of a new machine. Whether you’re working with a vintage high-carbon steel blade or a modern stainless steel model, the sharpening process follows straightforward principles you can master at home. This guide will show you exactly how to transform your torn-edge nightmare back into the precision cutting tool it was designed to be.
Signs Your Guillotine Cutter Needs Immediate Sharpening
Paper tears instead of cleanly cutting is the most obvious indicator your blade needs attention. When you notice jagged edges on your documents—especially when cutting through multiple sheets—the blade has lost its keen edge. You’ll also feel increased resistance during cutting operations; what once sliced through smoothly now requires noticeable downward pressure that strains your wrist.
Wavy or uneven cut edges signal blade dullness, particularly in specific spots along the cutting surface. Paper shredding or smudging at cut edges suggests microscopic burrs or nicks disrupting the clean shearing action. If you find yourself needing multiple passes to complete a single cut through standard paper stacks, your blade demands immediate sharpening attention before the problem worsens.
Critical Safety Setup Before Blade Sharpening
Essential Protective Gear for Safe Operation
- Cut-resistant gloves prevent serious hand injuries when handling the sharp blade edge
- Safety glasses protect your eyes from metal particles during sharpening
- Stable work surface ensures consistent sharpening angles without slippage
- Bright task lighting illuminates blade edge details and sharpening progress
Required Sharpening Tools and Materials
- Fine grit sharpening stone (1000-3000 grit) for precise edge restoration without material removal
- Proper lubrication for your stone type (oil for oil stones, water for water stones)
- Lint-free microfiber cloths for cleaning debris and checking edge sharpness
- Soft mallet or rubber hammer for gentle blade adjustments during reassembly
- Angle guide or protractor maintains the critical 20-25 degree sharpening angle
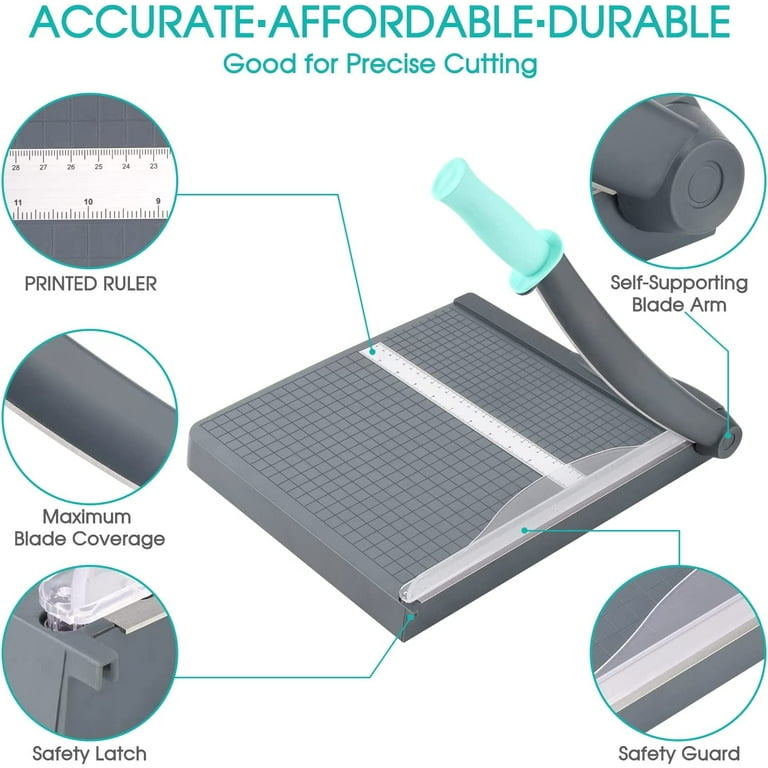
How to Safely Remove and Clean Your Cutter Blade
Disconnect power completely for electric models before touching any components. Loosen securing screws carefully while supporting the blade’s weight as you extract it from the assembly—guillotine blades are heavy and can slip unexpectedly. Clean thoroughly using lint-free cloths to remove paper dust, adhesive residue, and accumulated debris from both the moving blade and fixed base blade.
Inspect both blades for nicks, chips, or visible damage that might require professional attention. Clean the fixed blade surface as well—debris here causes cutting problems even with a sharp moving blade. Note any areas requiring extra attention during sharpening, particularly spots where paper consistently tears during cuts. If you notice significant damage like cracks or large chips, stop immediately and seek professional sharpening services.
Step-by-Step Guillotine Blade Sharpening Process
Prepare Your Sharpening Stone Properly
Soak water stones for 10-15 minutes before use to prevent premature wear. Apply appropriate oil to oil stones according to manufacturer instructions—using the wrong lubricant can damage your stone. Position your stone on a stable surface with good lighting and easy access to the blade, ensuring it won’t shift during sharpening.
Establish and Maintain the Correct Sharpening Angle
Set your angle guide to 20-25 degrees for optimal cutting performance on most guillotine blades. Consistency matters more than exact angle—maintaining the same angle throughout sharpening creates uniform edge quality. Mark the blade edge lightly with permanent marker to track sharpening progress and ensure you’re removing material evenly across the entire edge.
Execute Proper Sharpening Strokes for Maximum Effectiveness
Begin at the blade base, drawing the stone smoothly toward the tip in a single, fluid motion. Apply light, consistent pressure—let the stone do the work rather than forcing it against the metal. Complete 3-5 strokes on one side before switching to maintain balanced edge geometry. Progress systematically along the blade length, checking edge sharpness frequently by carefully running your finger perpendicular to the edge (never across it).
Repeat on both sides if your blade features dual cutting edges, though most guillotine blades only require sharpening on the primary bevel. Finish with a fine grit stone (3000+) to polish the edge and remove microscopic scratches from coarser grits that can cause tearing. Test sharpness by attempting to shave hairs from your arm—a properly sharpened blade should cleanly cut fine hairs.
Quick Maintenance Alternatives Between Full Sharpenings
Activate Self-Sharpening Mechanism (Tonic Brand Models)
Perform 5-10 cutting motions rapidly without paper to engage the built-in sharpening action. Push the arm slightly toward the stationary metal bar during each motion to create the honing effect. This simple technique restores edge sharpness for minor dullness between full sharpening sessions, extending your blade’s life significantly.
Aluminum Foil Honing Method for Minor Edge Restoration
Cut through aluminum foil 8-10 times to remove debris and address dead spots in the cutting edge. This technique provides light honing action that’s perfect for maintaining sharpness between full sharpening sessions. Test on scrap paper immediately after to verify improvement before cutting your important documents.
Temporary Lubrication Enhancement for Stiff Blades
Apply foam dish soap along the blade length, removing excess bubbles before cutting. This temporary solution reduces friction and improves cutting performance on light cardstock when a full sharpening isn’t immediately possible. Clean thoroughly afterward to prevent soap residue buildup that attracts more paper fibers.
Proper Reassembly and Performance Testing
Reinstall the blade carefully, ensuring precise alignment with the fixed cutting surface—misalignment causes uneven wear. Tighten securing hardware firmly but avoid over-torquing, which can warp the blade or damage threads. Test on multiple scrap paper stacks—a properly sharpened blade should cut cleanly through paper stacks with minimal downward pressure.
Check blade alignment by examining cut edges across the entire cutting width—any variation indicates misalignment. Adjust as needed using gentle taps with a soft mallet on the blade end that’s producing imperfect cuts. Verify all hardware is properly tightened before regular use to prevent loosening during operation.
Prevent Future Dullness with Smart Maintenance Habits

Establish a Blade Cleaning Schedule That Works
Clean blades after each use to prevent debris accumulation that accelerates dulling. Use rubbing alcohol on cotton swabs for stubborn adhesive removal without damaging the blade surface. Include thumb guard cleaning since adhesive buildup here affects cutting performance by misaligning paper during cuts.
Optimize Storage Conditions for Blade Longevity
Store in a dry environment to prevent rust formation that damages the cutting edge. Avoid cutting sticky, thick, or non-paper materials that quickly degrade blade sharpness. Schedule regular inspections to catch dullness early before it impacts work quality—waiting too long requires more aggressive sharpening that reduces blade life.
Follow Usage-Based Sharpening Intervals
Home/office use: Sharpen every 12 months for occasional users
Small business: Sharpen every 6-9 months with regular use
Print shop: Sharpen every 3-6 months with heavy daily use
Professional environments: Sharpen monthly for production-level cutting
Troubleshooting Common Post-Sharpening Problems
Incomplete Cuts After Blade Sharpening
Check blade alignment with the fixed cutting surface using a straight edge. Remove adhesive buildup from both blades that might be interfering with proper contact. Tighten all securing hardware to eliminate blade movement during cutting that causes inconsistent performance.
Uneven Cutting Across the Blade Width
Inspect blade for warping by placing it on a known flat surface—any gaps indicate bending. Verify cutter base stability on your work surface; an uneven foundation affects cutting performance. Check paper positioning consistency throughout the cut—paper shifting during operation creates uneven results.
Excessive Force Required After Sharpening
Test blade sharpness through controlled test cuts on different paper weights. Examine for visible nicks or damage that might have been missed during sharpening. Consider professional evaluation for significant blade degradation or complex issues beyond home sharpening capabilities.
A properly sharpened guillotine paper cutter transforms frustrating paper destruction into satisfying, clean cuts that make your work look professional. By following these sharpening techniques and maintenance schedules, you’ll extend your cutter’s lifespan significantly while ensuring consistent cutting performance. Remember that regular cleaning after each use prevents 80% of sharpening needs—making blade maintenance far less frequent. Your documents will thank you with crisp edges, and your cutter will perform like new for years to come with proper care.


