

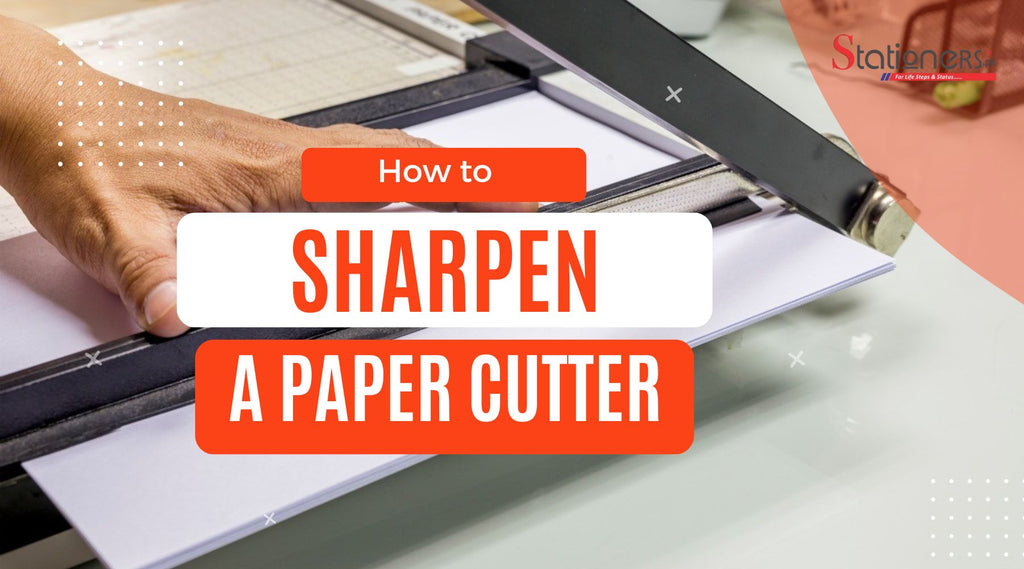
That ragged edge on your freshly cut paper stack isn’t just frustrating—it’s your paper cutter screaming for attention. When your once-precise guillotine starts tearing instead of slicing, you know it’s time to restore that razor-sharp edge. Whether you’re running a print shop or maintaining office equipment, learning how to sharpen a paper cutter blade saves money and ensures professional-quality cuts every time. A single dull blade can ruin expensive paper jobs and slow productivity to a crawl.
This guide walks you through proven sharpening techniques, from simple DIY methods to professional-grade restoration. You’ll discover when to sharpen, which tools work best, and how to avoid common mistakes that damage expensive blades. With proper maintenance, your cutter will deliver hairline precision for thousands of cuts—no replacement needed.
Signs Your Paper Cutter Blade Needs Sharpening
Visual Indicators to Watch For
Ragged paper edges signal immediate attention. Your blade should slice through 20-sheet stacks like butter—any resistance means dullness. Check for these warning signs:
- Torn paper fibers instead of clean cuts
- Paper pushing rather than cutting cleanly
- Visible nicks or burrs along the blade edge
- Inconsistent depth across cutting length
- Increased force required for standard paper
These issues stem from blade wear against the nylon cutting stick. When fibers tear instead of severing, microscopic dull spots prevent the blade from penetrating paper stacks completely. Ignoring these signs accelerates damage—paper dust clogs the cutting stick, forcing you to press harder and creating uneven wear patterns.
Performance Testing Methods
Test your blade’s condition quickly: cut through standard copy paper. Sharp blades produce whisper-quiet, effortless cuts. Dull blades create grinding sounds and require excessive pressure. For high-volume users, test every 50-100 cuts. Hold paper vertically and slice—it should separate cleanly without support. If the blade catches or folds paper at the leading edge, sharpening is urgent. Coated or cardstock papers magnify dullness; always inspect after cutting abrasive materials.
Essential Tools for Sharpening Your Paper Cutter Blade
Basic Manual Toolkit
Gather these before starting:
– Honing stone (1000-3000 grit)
– Honing oil or water (match stone specifications)
– Cut-resistant gloves (non-negotiable for safety)
– Allen wrenches for blade removal
– Microfiber cloth for residue removal
– Straight edge for alignment verification
This $30 toolkit pays for itself after three sharpenings. The honing stone must be fine-grit—coarse stones remove too much metal. Always use lubricant to prevent overheating and metal buildup. Never substitute household items like knives or sandpaper; they alter the critical 15-20 degree bevel angle.
Professional Equipment Options
Industrial settings need precision tools:
– Bench grinders with diamond wheels
– Arkansas stones for burr removal
– Magnetic angle guides (maintains exact bevel)
– Plywood blade sheaths for transport
– Precision calipers (measures material removal)
Professional sharpeners remove only 0.015-0.032 inches of metal per session. This preserves blade lifespan—quality blades withstand 20-30 sharpenings. Without these tools, DIY attempts risk uneven angles that cause paper folding or blade wobble.
Safe Blade Removal Process
Lock-Down Safety Steps
Never attempt sharpening while mounted. Electric cutters require complete disconnection. Follow this sequence:
- Power down and unplug electric models
- Engage safety lock in raised position
- Lower blade partially, then stop descent
- Remove bolts outside-to-inside (left, right, repeat)
- Return to up position—blade lifts free
- Install handling screws for heavy industrial blades
Skipping lock-down steps causes catastrophic accidents. Always wear cut-resistant gloves—dull blades still slice skin. If the blade sticks during removal, never force it; recheck bolt sequence. One missed safety step risks severed fingers.
Transport and Storage
Wrap removed blades in plywood sheaths immediately. Store flat on padded surfaces, never on edge. Even “dull” blades retain surgical sharpness at microscopic levels. Transport blades vertically in locked containers—never loose in toolboxes. A single slip during handling causes deep lacerations. Treat blades like loaded firearms: always assume they’re ready to cut.
Step-by-Step Guide to Sharpening Your Paper Cutter Blade
Cleaning Before Sharpening
Remove paper dust and adhesive first. Use rubbing alcohol on cotton swabs for sticky residue—especially near the cutting stick interface. Clean blades cut better and sharpen evenly. Skip this step, and embedded fibers create false dull spots that reappear after sharpening. For stubborn buildup, cut folded aluminum foil 5-10 times; the foil acts as a mild abrasive.
Sharpening Technique Steps
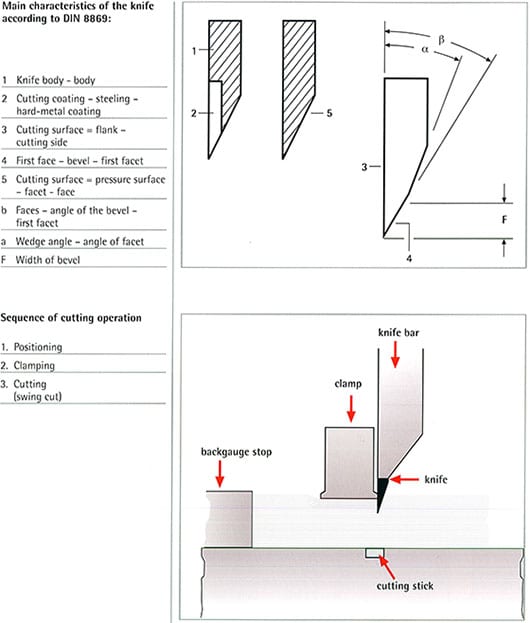
Maintain 15-20 degree angle throughout process:
- Secure stone on non-slip surface with lubricant
- Start at heel with firm, even pressure
- Stroke to tip in single motion—15 strokes per side
- Check edge every 5 strokes for uniformity
- Flip blade and repeat identical stroke count
- Polish edge with 3000-grit stone using lighter pressure
Angle consistency is critical. Tilting the blade even slightly creates a rounded edge that tears paper. Test sharpness by slicing vertically held paper—if it cuts cleanly without support, you’ve succeeded. Uneven sharpness means redoing strokes with stricter angle control.
Professional Paper Cutter Blade Sharpening Options
When to Seek Expert Service
Industrial-grade cutters or precision printing equipment benefits from professional sharpening. Service centers maintain exact angle specifications impossible to achieve manually. Consider professional service for:
– High-volume production equipment
– Blades with visible nicks beyond light dulling
– Precision requirements measured in thousandths
– Self-sharpening mechanism failures
Professionals use milling machines to straighten warped edges and calibrate tension systems. They also correct the critical 3-degree relief angle—DIY attempts often misalign this, causing grating sounds during cuts.
Service Process Expectations
Professional turnaround allows blade rotation systems. Sharp blades install while dull blades service off-site. Expect 3-5 day turnaround for local centers. Shipping services require plywood sheaths and padded boxes—never ship bare blades. Costs ($40-80) beat replacement ($200+), but factor in shipping time for production workflows.
Quick Maintenance Methods Between Sharpenings
Aluminum Foil Emergency Sharpening
Cut through folded aluminum foil 5-10 times. This cleans minor buildup and addresses small dull spots by micro-abrading the edge. Works best for maintenance between full sharpenings. For sticky residue, apply foam dish soap to the blade, clean bubbles, then test cut—the mild abrasive action mimics professional degreasers.
Self-Sharpening Activation
For models with built-in systems:
1. Execute 5-10 cutting motions without paper
2. Apply slight pressure toward stationary bar
3. Complete full strokes to engage entire blade
4. Test with paper to verify restored sharpness
This monthly ritual maintains edge sharpness by realigning microscopic teeth. Never skip this—it prevents 70% of premature sharpening needs.
Troubleshooting Common Problems
Cutting Issues and Solutions
Uneven cuts across width:
– Check blade alignment with straight edge
– Verify even bolt tension during reassembly
– Adjust relief angle to 3 degrees via shimming
Grating sounds during cuts:
– Indicates improper blade contact angle
– Check for burr formation on edge (feels like wire)
– Remove burrs with fine Arkansas stone
Paper folding at start:
– Ensure proper leading edge on handle blade
– Verify cutting stick condition (replace if grooved)
– Check spring tension system
Edge Damage Assessment
Burr removal requires light Arkansas stone strokes. Small nicks sharpen out; large ones need professional grinding. If the blade bends when pressed against a straight edge, replacement is unavoidable—never attempt to straighten bent blades.
Maintenance Schedules for Long Blade Life
Regular Care Timeline
- Daily: Visual inspection and surface cleaning
- Weekly: Hardware tightening and alignment check
- Monthly: Aluminum foil sharpening and lubrication
- Every 6-12 months: Comprehensive sharpening based on usage
High-volume operations sharpen every 2-3 months. Light office use extends to 12-18 months. Always sharpen after cutting cardstock or coated papers—they accelerate dulling 300%. Document each sharpening to track blade history against the 20-30 sharpening lifespan limit.
Safety Protocols During Sharpening
- Wear cut-resistant gloves during all blade handling
- Use safety glasses for grinding operations
- Secure work surfaces with non-slip mats
- Ensure bright lighting to spot microscopic burrs
- Store blades locked down with guards when not in use
A single moment of distraction causes permanent injury. Never sharpen blades on unstable surfaces—vibrations alter angles and create dangerous kickbacks.
Sharp paper cutter blades transform frustrating cutting sessions into effortless, precise work. Whether you choose DIY sharpening or professional service, regular maintenance prevents costly blade replacement and ensures professional results. Start with visual inspections today—your paper edges will thank you tomorrow. By mastering how to sharpen a paper cutter blade, you extend equipment life, save hundreds in replacement costs, and guarantee cuts measured in thousandths of an inch. Don’t wait for ragged edges—schedule your next sharpening now.


