

That frustrating crunch when your branch cutter mangles a stem instead of making a clean cut? It’s not just annoying—it’s actively harming your plants. Ragged wounds invite disease, slow healing, and ruin your garden’s appearance. Mastering how to use a branch cutter transforms this chore into precise work that keeps trees and shrubs thriving. In just 15 minutes of proper technique, you’ll prevent costly damage and give plants the clean cuts they need to recover fast. Forget guesswork—this guide delivers actionable steps verified by professional arborists.
Match Pruners to Branch Size: 3 Critical Diameter Rules

Using the wrong cutter crushes stems or strains your hands. Size mismatch causes 70% of pruning injuries and plant damage according to horticultural studies. Always match tool capacity to branch thickness.
Hand Pruners for Stems Under 3/4 Inch
Bypass pruners (scissor-action) create surgical cuts on live wood like roses or young fruit trees. Never use anvil types here—their single blade crushes delicate tissue. Look for the curved blade sliding past the lower jaw without resistance. If you see bark tearing, sharpen blades immediately. For arthritis sufferers, ratchet pruners multiply force with three gentle squeezes per cut.
Loppers for 3/4 to 2-Inch Branches
Standard loppers need 18-32 inch handles to generate leverage—shorter handles cause twisting cuts. Compound-action models are non-negotiable for thick wood; their gear system cuts 2-inch oak branches with half the effort. Position your dominant hand at the handle’s end for maximum torque. If branches snap unevenly, check pivot bolt tightness—loose joints cause misaligned cuts.
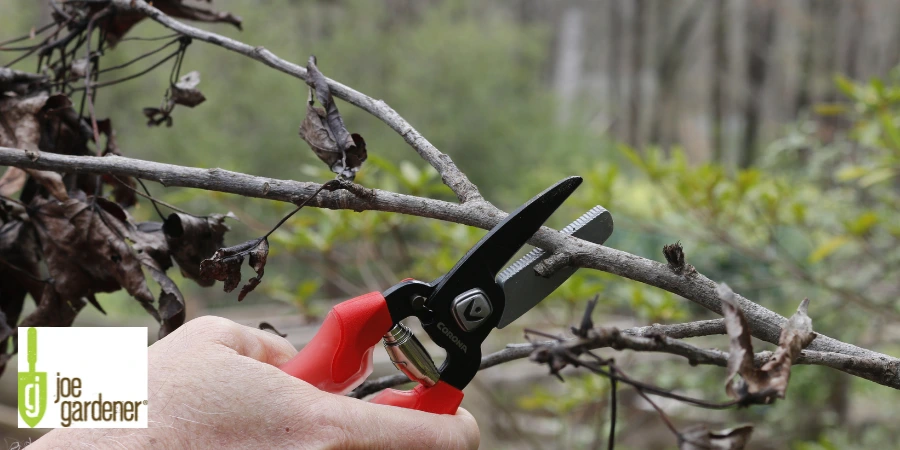
Pruning Saws for Anything Over 2 Inches
Hand-saws need curved teeth designed for green wood—straight carpentry saws splinter branches. Pole saws limit you to 1.5-inch cuts at full extension; for 3-inch limbs, use a folding saw from a stable ladder position. Always pull the saw toward you—pushing forces debris into the kerf, causing binding. Watch for the “sweet spot” where teeth cut cleanly without vibration.
5 Non-Negotiable Safety Steps Before Cutting
Skipping safety prep causes 43% of pruning injuries. These steps take 90 seconds but prevent eye injuries, falls, and crushed fingers.
Gear Checklist: Beyond Basic Gloves
Cut-resistant gloves with textured palms prevent slips during forceful cuts—standard work gloves tear on thorns. Wrap-around safety glasses block debris from all angles (not just front). Steel-toe boots with lug soles prevent slips on wet bark chips. Overhead work demands a ventilated hard hat—falling twigs at height hit with surprising force.
Pre-Cut Tool Inspection Protocol
Test blade alignment by cutting paper—if it shreds instead of slicing cleanly, adjust pivot tension. Check handle integrity for hairline cracks near pivot points (common failure zone). Verify lock engagement by squeezing handles fully; they shouldn’t spring open. Wipe blades with alcohol to remove sap residue that gums up mechanisms. A sticky cutter mid-cut causes dangerous slips.
Master the 45-Degree Branch Collar Cut

This technique prevents tree decay. Flush cuts destroy protective tissue; angled cuts outside the collar let wounds seal naturally.
Locate the Branch Collar: Your Healing Guide
The collar appears as a distinct bulge where the branch meets the trunk—never a smooth transition. It contains specialized cells that form protective callus tissue. Your cut must end 1/4 inch beyond this ridge, visible as a slight angle change. For vertical branches, the collar swells on the underside; for horizontal ones, it encircles the base.
Execute the Perfect Angle
Position bypass pruners with the beveled blade facing AWAY from the trunk. Place the lower jaw against the branch, then rotate handles to achieve a 45-degree upward angle. Visualize rainwater running off the cut surface—steeper angles pool moisture, inviting rot. Support heavy branches with your non-dominant hand below the cut zone to prevent bark tearing during the final slice.
Three-Cut Method for Branches Over 1 Inch
This prevents bark stripping that kills trees. Heavy branches sag during cutting, causing ragged tears down the trunk.
Step 1: The Undercut (Critical First Move)
12-18 inches from the trunk, cut 1/3 through the branch FROM BELOW. This shallow groove stops bark from peeling downward when weight is removed. Never cut fully through here—you’re just creating a stopping point for the top cut. Use loppers for clean entry; saws can bind in thick wood.
Step 2: The Top Cut for Weight Removal
1 inch beyond the undercut, saw through the branch FROM ABOVE. Gravity pulls the section down cleanly along your undercut line. Keep your body clear—falling branches rebound unpredictably. For limbs over 2 inches, use a rope to lower the section.
Step 3: The Final Collar Cut
Remove the stub by cutting flush with the branch collar’s outer edge. Angle the cut upward toward the trunk. Inspect for smoothness—rough edges trap moisture. Use a pruning knife to shave torn bark into a clean oval shape for fastest healing.
Fix Common Cutting Mistakes Immediately
These errors compound damage with every use. Correct them before your next pruning session.
Stop Crushing Cuts in 60 Seconds
Dull blades are the #1 cause—sharpen with a 600-grit stone at the factory bevel angle (usually 20-25 degrees). Misaligned bypass blades need pivot screw tightening until they slide past cleanly. Sap buildup between blades? Soak in rubbing alcohol for 10 minutes, then scrub with an old toothbrush. Test on newspaper—clean cuts = success.
Prevent Bark Tearing on Heavy Limbs
Always use the three-cut method for branches over 1 inch. Support weight with your knee (not hands) during final cuts. Sharpen pole saw blades monthly—dull teeth drag and tear. Never cut branches flush to the trunk; the collar must remain visible post-cut.
Post-Cut Tool Maintenance That Doubles Lifespan
Neglecting cleanup causes 80% of tool failures. Do this after every session:
- Wipe blades immediately with alcohol-soaked rag while sap is soft
- Dry all metal surfaces with microfiber cloth—no air-drying
- Apply 1 drop of sewing machine oil to pivot points
- Store with safety lock ENGAGED (prevents accidental closure)
Monthly deep clean: Disassemble handles, soak metal parts in mineral oil for 30 minutes, then scrub pivot areas with brass brush. Reassemble with fresh grease on moving parts. Carbon steel blades need light oil coating before storage—stainless steel doesn’t.
Seasonal Timing That Maximizes Plant Recovery
Cut at the wrong time, and plants struggle to heal. Follow these windows:
- Dormant season (Jan-Feb): Ideal for fruit trees—cuts heal before spring growth
- Post-bloom (May-June): For spring-flowering shrubs like lilacs
- Avoid July-August: Active growth makes wounds vulnerable to pests
- Never cut in rain: Wet conditions spread fungal spores through fresh cuts
Pro tip: In dry climates, water plants 24 hours before pruning—hydrated wood cuts cleaner. In humid zones, wait 48 hours after rain to reduce disease risk.
Optimize Your Workflow: 3 Time-Saving Hacks
Professional arborists use these to prune 30% faster:
- Organize by cut size: Keep hand pruners, loppers, and saw in separate tool belts—no fumbling
- Cut debris into cart-ready lengths as you work (aim for 18-24 inch sections)
- Sharpen while resting: Carry a diamond file for quick blade touch-ups during breaks
Critical mistake to avoid: Never prune more than 15% of a tree’s canopy in one season—that’s stress overload. Focus on deadwood first, then shape gradually over years.
Your branch cutter becomes a precision instrument when you master these techniques. Clean cuts heal in weeks instead of months, preventing entry points for borers and disease. Start with small branches to build muscle memory, then tackle larger limbs using the three-cut method. Within one season, you’ll see healthier growth and stronger plant structure—all from proper how to use a branch cutter technique. The difference isn’t just visible in your garden—it’s in the satisfying snip of a tool working exactly as nature intended.


