
Nothing ruins a carpet installation faster than jagged edges or misaligned seams. Whether you’re tackling your first DIY carpet project or upgrading your flooring business toolkit, mastering carpet cutting techniques saves time, money, and countless headaches. Sharp, precise cuts separate amateur results from professional finishes—and it all starts with knowing how to wield your carpet cutter properly. The phrase “how to use a carpet cutter” might seem simple, but the reality involves specific techniques that transform ordinary cuts into flawless installations.
This guide walks you through everything from selecting the right blade to executing complex curved cuts. You’ll learn the exact techniques professionals use daily, avoid the costly mistakes that waste expensive carpet, and discover safety practices that protect both your project and your hands. By the end, you’ll understand precisely how to use a carpet cutter for results that look professionally installed.
Select the Right Carpet Cutter for Your Project

Utility Knife-Style Cutters
These versatile tools resemble standard utility knives but feature enhanced blades specifically designed for carpet work. Look for models with retractable blade mechanisms that lock securely in place during use. High-carbon steel construction ensures clean cuts through dense carpet backing without tearing fibers. The ergonomic handles with non-slip grips prevent slips during extended cutting sessions. Most professional models include built-in blade storage compartments—keep this stocked with fresh blades for seamless mid-project changes. These cutters excel at detailed work around doorways and floor vents where precision matters most.
Rotary Carpet Cutters
Perfect for long, straight cuts across room-width carpet sections, rotary cutters utilize a circular blade that rolls smoothly along your marked line. This continuous cutting action significantly reduces hand fatigue during extended installation projects. Choose between different blade diameters—28mm blades offer precision for detailed work, while 60mm blades handle thicker commercial carpet with ease. The rolling motion creates cleaner edges than knife-style cutters on straight lines, making them indispensable for professional installers tackling large residential or commercial projects.
Implement Critical Safety Measures Before Cutting
Essential Protective Gear
Never begin cutting without proper safety equipment. Cut-resistant gloves protect your hands from accidental blade contact—one slip can end your project and require medical attention. Safety glasses prevent carpet fibers from irritating your eyes during cutting. Knee pads make floor-level work more comfortable for extended periods, while long sleeves protect your arms from abrasive carpet backing. This basic safety gear costs less than $50 but prevents injuries that could cost thousands in medical bills and lost work time.
Prepare Your Workspace Properly
Clear your cutting area completely—loose debris causes uneven cuts and creates tripping hazards. Lay your carpet face-down on a stable surface like a workbench or clean garage floor to prevent shifting during cutting. Ensure 3-4 feet of clearance around the carpet perimeter for comfortable tool maneuvering. Always cut away from your body and keep bystanders at least 6 feet away. Proper lighting is essential—without adequate visibility, even experienced installers make costly measurement errors.
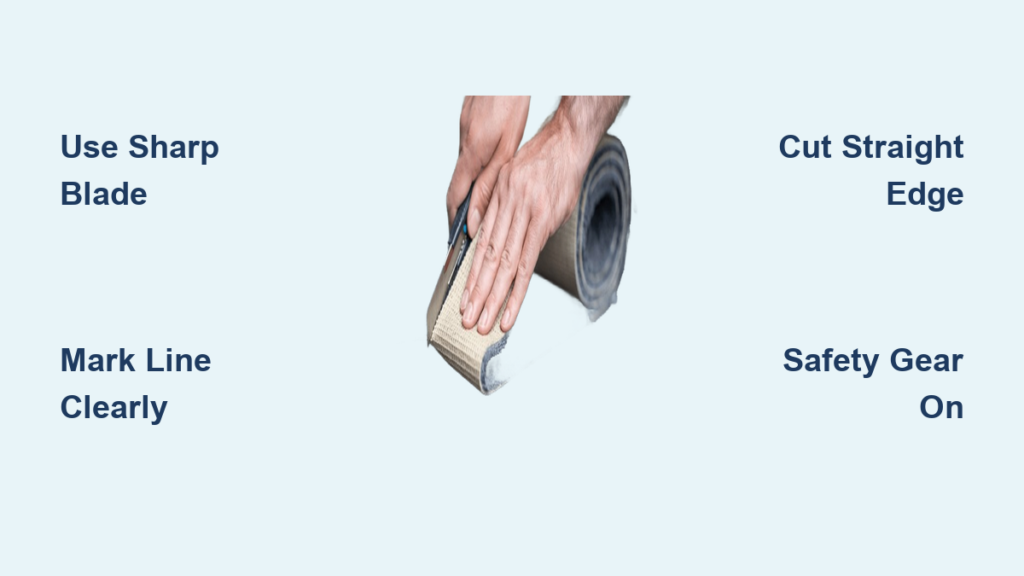
Measure, Mark, and Cut with Precision
Master Straight Cutting Technique
Position your carpet backing-side up on a completely flat surface. Mark your cutting line clearly using chalk or washable markers on the backing side. Place a metal straight edge along the marked line, holding it firmly with your non-dominant hand. Position the cutter blade against the straight edge at a 45-degree angle. Apply consistent pressure while pulling the cutter toward you in one smooth motion. Make multiple light passes rather than forcing one deep cut—this creates cleaner edges and reduces blade wandering. Check your cut edge against a light source to spot imperfections before installation.
Execute Clean Curved Cuts
For curved cuts around fireplace hearths or bay windows, sketch your curve on the carpet backing using a flexible template. Make relief cuts every 2-3 inches perpendicular to your curved line—these small cuts prevent the carpet from bunching during cutting. Use short, controlled strokes following your marked line, removing small sections progressively. For intricate patterns, create cardboard templates first and test fit them before cutting your expensive carpet. Professional installers always mark pattern alignment points to maintain continuity in patterned carpets, preventing mismatched seams that look amateurish.
Handle Corners and Obstacles Like a Pro
Perfect Corner Technique
Mark the precise corner point where two cuts intersect. Make your first cut stopping exactly at the corner mark. Insert the blade at this point and pivot smoothly for the second cut. Both cuts must meet precisely—any gaps create visible seams that collect dirt and debris. For inside corners, make small relief cuts at 45-degree angles to allow the carpet to lay flat without puckering after installation.
Cut Flawless Floor Vent Holes
Mark the hole center and diameter on carpet backing. Drill a small pilot hole at the center point. Insert your cutter blade through this hole and cut outward in a spiral pattern to your marked diameter. Clean edges with small trimming cuts—rough vent holes snag vacuum cleaners and look unprofessional. For multiple identical vents, create a template from cardboard to ensure consistent sizing and positioning across your installation.
Maintain Sharp Blades for Professional Results
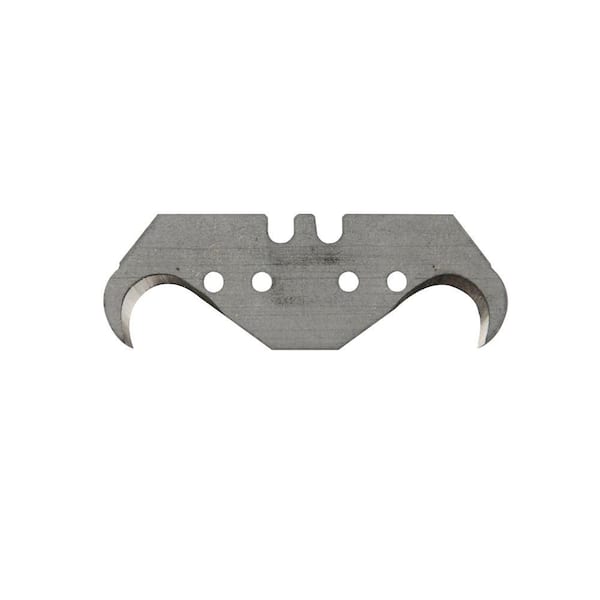
Match Blades to Your Carpet Type
Standard utility blades handle most residential carpet installations. Switch to hook blades for trimming edges and creating pull cuts. Scalloped blades reduce fraying on synthetic carpets with loose weaves. Heavy-duty blades tackle commercial-grade carpet and thick rubber backing without deflection. Never force a dull blade—replace it immediately at the first sign of resistance. Sharp blades cut cleanly; dull blades tear carpet and cause accidents. Keep spare blades organized in labeled containers for quick changes during projects.
Troubleshoot Common Cutting Problems
Frayed edges indicate a dull blade or excessive cutting speed—replace the blade and reduce your speed by 25%. Uneven cuts stem from unstable surfaces or inconsistent pressure—verify your cutting surface is perfectly level and maintain steady pressure throughout the cut. For thick carpet challenges, make four shallow passes instead of two deeper ones, or warm the material slightly with a hair dryer to soften backing materials. Blade wandering occurs when cut lines aren’t prominent enough—use a straight edge guide and mark lines more clearly before cutting.
Optimize Your Cutting Workflow
Professional Efficiency Techniques
Plan cuts to minimize carpet handling—group similar cuts together and work systematically. Maintain multiple sharp blades pre-loaded for instant changes. Use cutting guides for common dimensions like 12-inch and 24-inch strips. Practice new techniques on scrap material before cutting expensive carpet. Professional installers waste less than 2% of carpet through careful planning and measurement. Document successful techniques in a simple notebook for reference on future projects.
Quality Control Methods
Use backlighting from windows or shop lights to check cut quality—imperfections show clearly with strong side lighting. Feel edges for smoothness; professional cuts feel like factory edges. Make test cuts in inconspicuous areas to verify blade sharpness and technique before starting visible sections. Compare your cut edges to factory edges on carpet remnants—this visual reference helps maintain consistent quality throughout your project.
Store Tools Properly for Longevity
Essential Storage Practices
Store carpet cutters in dry locations using blade guards or retractable mechanisms—moisture causes rust that ruins precision-ground edges. Organize multiple cutters by type and size in labeled containers to save time when switching between tasks. Keep blade-changing tools with your cutters for quick mid-project changes. Remove carpet fibers from blade mechanisms after each use—accumulated debris causes binding and reduces cutting accuracy. Wipe handles with appropriate cleaners, avoiding harsh chemicals that degrade rubber grips.
Emergency Preparedness
Keep a comprehensive first aid kit stocked with bandages and antiseptic within 10 feet of your cutting area. Post emergency contact information prominently. Know your local urgent care locations—carpet cutting injuries often require stitches and updated tetanus shots. Never attempt to catch a dropped cutter; let it fall and retrieve it safely afterward. Proper blade disposal in designated sharps containers prevents injuries to unsuspecting hands.
Key Takeaway: Mastering how to use a carpet cutter separates professional installations from DIY disasters. Sharp blades, precise measurements, and controlled technique create edges that disappear after installation. Invest in quality tools, practice on scrap material, and never rush the cutting process. Your carpet’s appearance depends entirely on the accuracy of your cuts—follow these techniques and every project will achieve professional results. Remember to always prioritize safety while developing your cutting skills through consistent practice and attention to detail.


