
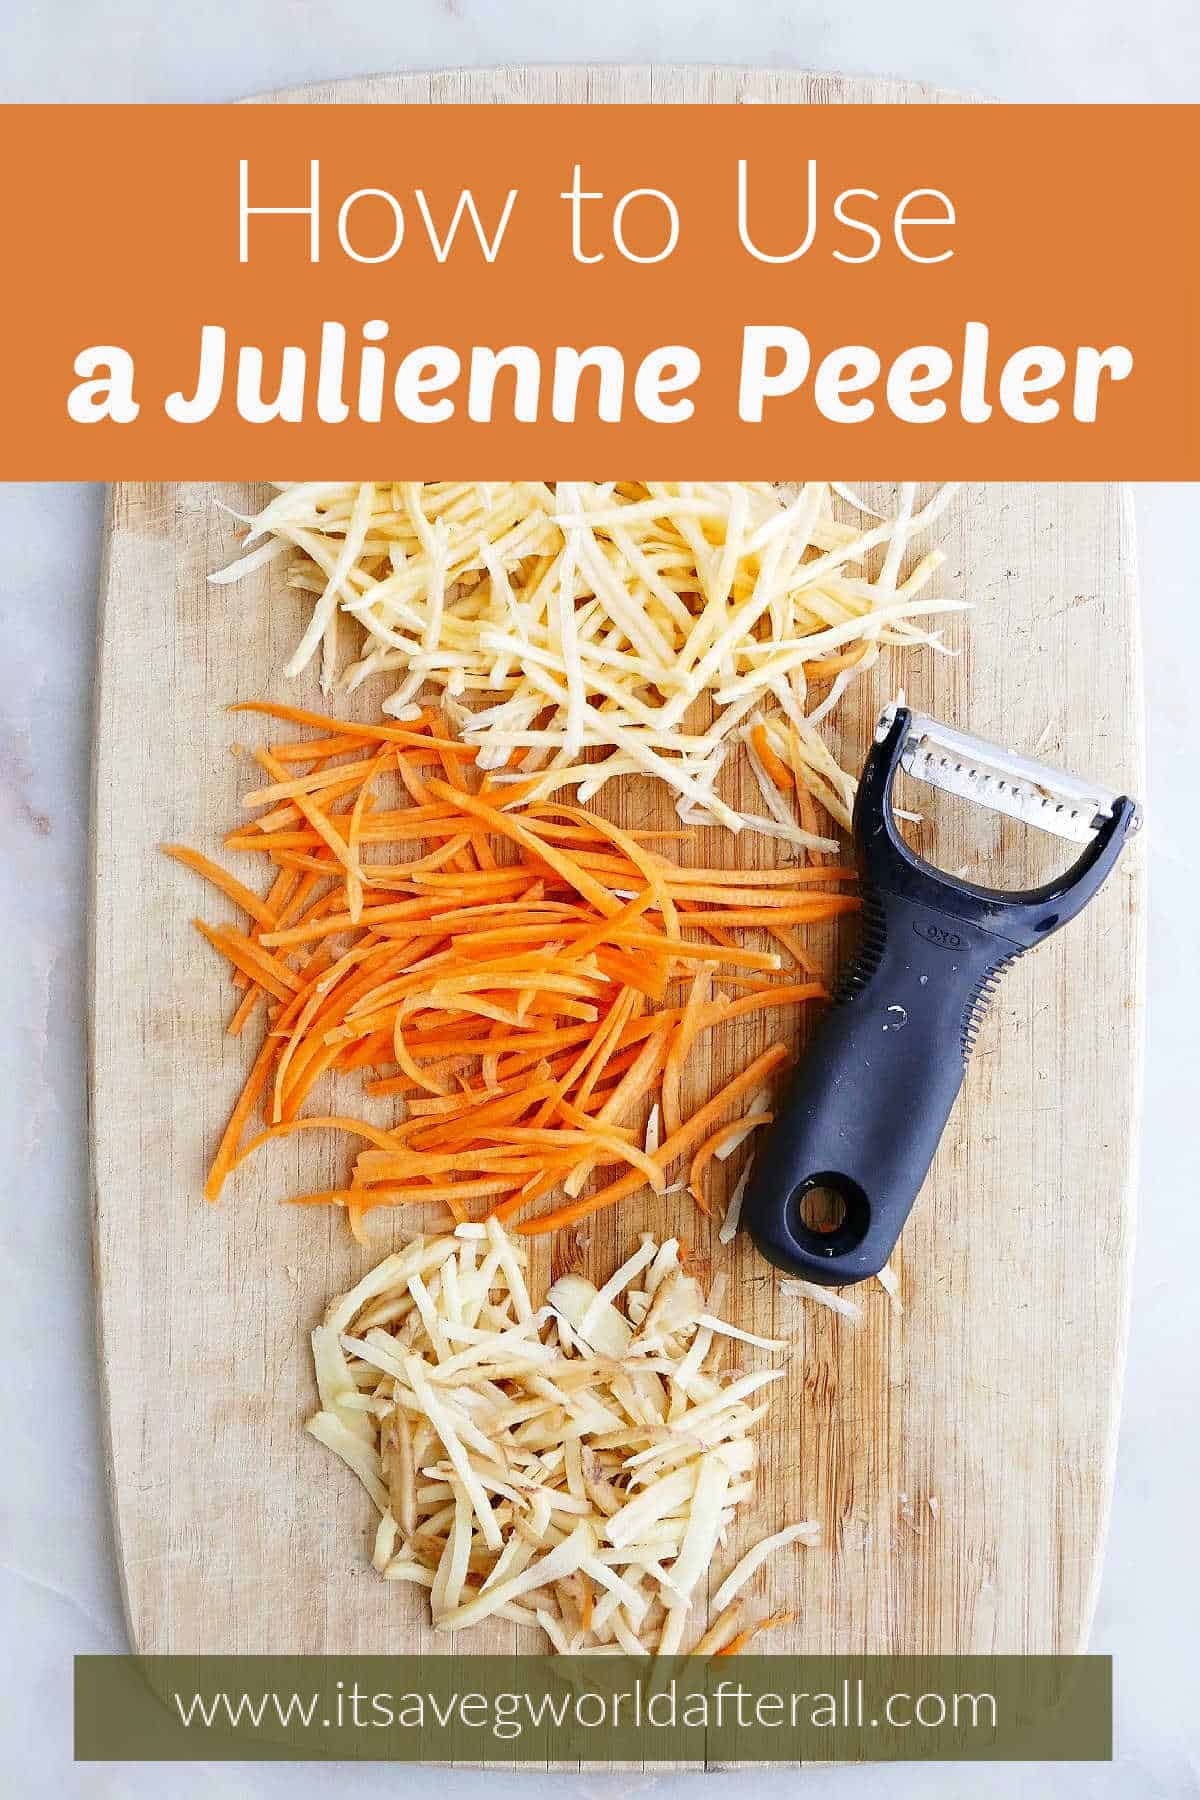
Ever watched a chef create perfect matchstick vegetables in seconds and wondered how they do it? That professional presentation on your plate comes from mastering the julienne cutter—a simple tool that transforms ordinary vegetables into restaurant-quality garnishes. Whether you’re prepping crunchy slaw toppings or elegant salad additions, this guide will turn you from julienne-curious to julienne-confident in just 10 minutes.
You’ll discover exactly which vegetables work best, the safety techniques that prevent sliced fingers, and the pro tricks that make every cut uniform and effortless. Forget complicated gadgets—this single tool, used correctly, elevates everything from weeknight stir-fries to gourmet pickles. Let’s dive into creating those picture-perfect vegetable strips that transform home cooking into chef-worthy artistry.
Essential Julienne Cutter Safety

Always cover the blade when storing your julienne cutter. The Oxo Julienne Peeler comes with a plastic cover that flips over the jagged edges—use it religiously. Those sharp teeth can slice through vegetables like butter, and they’ll do the same to your fingers if you reach blindly into a drawer. This simple habit prevents 90% of kitchen injuries with this tool.
Cutting Surface Setup
Never hold vegetables in your palm while cutting. This cardinal rule prevents the most common julienne cutter injury: sliced thumbs from small, round vegetables rolling under pressure. Instead, work exclusively on a stable cutting board that gives you complete control. Place a damp towel underneath slippery boards—this small trick keeps your workspace secure while you focus on clean cuts.
When to Switch Tools
Stop immediately when the peeler becomes difficult to push through the vegetable. This signals you’re reaching the end of what’s safely processable. Switch to a sharp knife for the remaining portion—your fingers will thank you, and you’ll get more usable vegetable strips. Trying to force the last inch often results in uneven cuts and dangerous slips.
Quick Setup and Equipment
What You Need
- Julienne cutter (Oxo Julienne Peeler recommended for its ergonomic handle)
- Stable cutting board (wood or composite, not glass)
- Sharp knife for finishing cuts
- 10 minutes total time—no complicated prep required
Pre-Cutting Checklist
Before making your first cut, ensure your vegetables are clean and dry. Wet vegetables slip under pressure, creating uneven cuts and safety hazards. Place your cutting board on a non-slip surface—put a damp towel underneath if your board tends to slide. Firmly grip the julienne cutter’s handle like a pencil for maximum control, and position your non-dominant hand to anchor the vegetable from above.
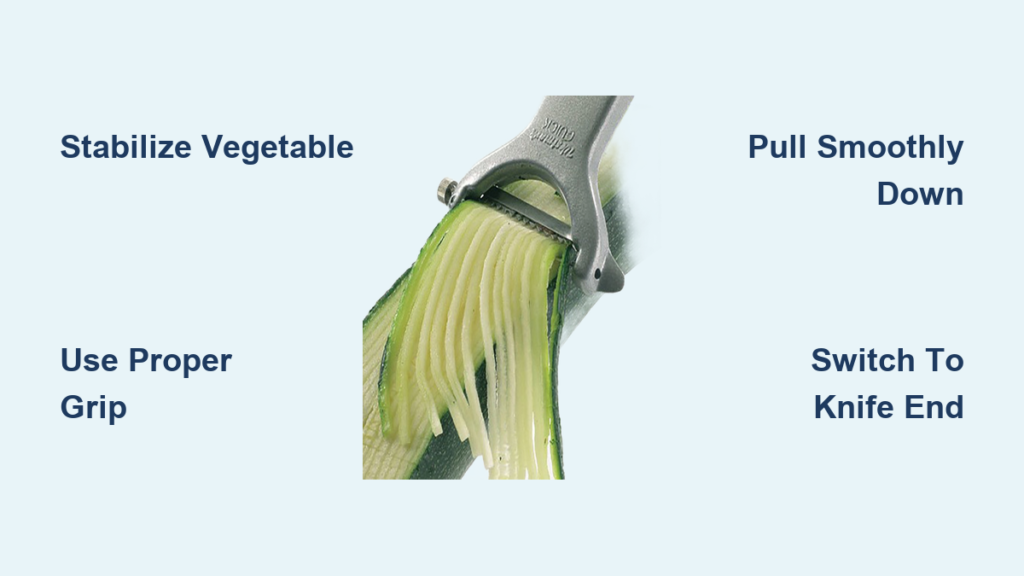
Master the Basic Julienne Technique
Step 1: Create Stability
Start with a flat surface. If your vegetable rolls—like carrots, zucchini, or potatoes—slice off one side to create a stable base. This prevents wobbling and gives you consistent, straight strips. For carrots, a single ¼-inch slice off one side turns an unstable cylinder into a steady platform.
Step 2: Hand Position
Hold the vegetable at the top with your non-dominant hand, keeping fingers well above the blade’s path. Your grip should be firm but relaxed, allowing the vegetable to move slightly as needed while maintaining control. Curl your fingertips inward like a “claw” to maximize safety—this classic chef’s technique keeps knuckles between the blade and your skin.
Step 3: Cutting Motion
Pull the julienne cutter from top to bottom in one smooth motion. Don’t saw back and forth—that creates uneven strips. Instead, use consistent downward pressure and let the sharp teeth do the work. Each pass creates multiple matchstick strips simultaneously, typically 1/8-inch thick. For best results, apply even pressure without pressing so hard that the vegetable bends.
Step 4: Rotate and Repeat
Turn the vegetable slightly after each pass to access fresh cutting surface. This rotation technique ensures you use the maximum amount of vegetable while maintaining uniform strip thickness. After three rotations, most vegetables will be fully processed except for the small core section—switch to your knife for this final portion.
Vegetable-Specific Techniques
Round Root Vegetables
Cut firm vegetables in half first. For rutabaga, turnips, and beets, slice them in half to create flat surfaces. Place one half cut-side down for maximum stability. This technique works particularly well with dense vegetables that might otherwise roll away. Rotate the half-vegetable after each julienne pass to expose new cutting areas while keeping the flat base anchored.
Carrots and Zucchini
Lay flat and stabilize. These longer vegetables often need just one side flattened to prevent rolling. Hold the vegetable at the top, keeping your grip well above the cutting zone. For zucchini, work from stem to blossom end in continuous strokes—its natural length makes these ideal for practicing your technique without frequent repositioning.
Potatoes Two Ways
Option 1: Cut in half like other round vegetables for maximum stability. Option 2: Cut lengthwise and hold at a 45-degree angle. This angle uses the potato’s own weight against the cutting board, providing natural support while you work. The angled approach creates slightly wider strips perfect for crispy hash browns.
Common Mistakes to Avoid
Over-Processing
Don’t force the peeler through the last inch of vegetable. This creates dangerous pressure points and often results in uneven, broken strips. Switch to a knife for these final portions. Forcing the tool also dulls the blade prematurely—preserve your cutter’s lifespan by respecting its limits.
Wrong Vegetable Choices
Skip soft vegetables entirely. Tomatoes, ripe avocados, and other soft produce will mush rather than cut. Stick to firm vegetables that maintain their structure under pressure. If a vegetable yields to gentle thumb pressure (like a ripe peach), it’s too soft for julienne cutting.
Improper Storage
Always replace the blade cover after use. Many injuries happen during cleanup when the sharp teeth catch on dish towels or fingers. Store the cutter vertically in a utensil holder with the cover secured—never loose in a drawer where it can snag clothing or skin.
Pro Tips for Perfect Strips
Temperature Matters
Chill vegetables slightly before cutting. Firm, cold vegetables create cleaner cuts and are easier to handle. Room temperature carrots, for example, can bend slightly under pressure, creating curved strips. Pop vegetables in the fridge for 20 minutes before prepping—they’ll yield straighter, crisper matchsticks.
Size Consistency
Sort strips by thickness as you work. Thicker strips take longer to cook, while thinner ones cook faster. Keeping similar sizes together ensures even cooking in stir-fries or salads. For presentation-focused dishes like garnishes, discard any uneven pieces—they work perfectly in soups where uniformity isn’t visible.
Batch Efficiency
Prep extra julienne vegetables and store them in cold water in the refrigerator. They’ll stay crisp for 2-3 days, making healthy additions to meals quick and easy. Add a squeeze of lemon to the water to prevent browning in vegetables like potatoes and carrots.
Creative Applications Beyond Salads
Hash Browns Reinvented
Transform julienne potatoes into gourmet hash browns by tossing the strips with salt and pepper, then cooking in a hot skillet with oil until tender and crispy. The uniform size ensures even cooking and professional presentation—no more burnt edges with raw centers.
Stir-Fry Game Changer
Add julienne vegetables to stir-fries for quick cooking and beautiful presentation. The thin strips cook in half the time of traditional cuts, making weeknight meals faster and more elegant. Carrots and zucchini julienne soften completely in just 90 seconds over high heat.
Pickling Projects
Julienne-cut vegetables pickle faster and more evenly than larger pieces. Try quick-pickled carrots or beets for colorful, healthy additions to sandwiches and grain bowls. The increased surface area absorbs flavors in 30 minutes—perfect for last-minute meal upgrades.
Maintenance and Care
Cleaning Protocol
Rinse your julienne cutter immediately after use. The jagged teeth can trap vegetable fibers, making cleanup harder if left to dry. Use a soft brush to gently clean between the teeth, taking care around the sharp edges. Never place in the dishwasher—the high heat and harsh detergents damage the blade’s precision edge.
Storage Solutions
Store your julienne cutter in a designated spot with the blade cover securely in place. Many cooks keep theirs in a utensil holder with other frequently-used tools, making it easily accessible for daily vegetable prep. If drawer storage is unavoidable, use a protective sleeve or wrap the blade in a paper towel before covering.
Troubleshooting Common Issues
Uneven Strips
Check your pressure. Inconsistent pressure creates thick and thin strips. Focus on maintaining steady, even pressure throughout each cut. Also verify your vegetable is properly stabilized—wobbling creates uneven results. For stubborn vegetables, try chilling them first to increase firmness.
Peeler Clogging
Clean between vegetables. Fibrous vegetables like older carrots can clog the cutting teeth. A quick rinse between vegetables prevents buildup and maintains cutting efficiency. If clogs occur, use a toothpick to dislodge trapped fibers before continuing.
Vegetables Cracking
Adjust your angle. Too steep an angle can split vegetables rather than cut them. Aim for a shallow, consistent angle that lets the teeth glide through smoothly. For particularly dense vegetables like beets, apply slightly more downward pressure while maintaining a fluid motion.
Master Your Next Dish
With these techniques, you’re ready to create restaurant-quality julienne vegetables in your own kitchen. Start with firm carrots or zucchini to practice your technique, then expand to other vegetables as your confidence grows. Remember: stable cutting surface, proper hand position, and smooth, consistent motion are your keys to success.
Your julienne cutter isn’t just for pretty salads—it’s your secret weapon for faster cooking, better presentation, and healthier eating. Those perfect matchstick vegetables you once admired in restaurants? You’re now equipped to create them at home, transforming everyday meals into something special. In just 10 minutes of prep, you’ve unlocked professional results that impress guests and simplify weeknight dinners. Grab your cutter, choose a firm vegetable, and make your next dish unforgettable—one perfect strip at a time.


