
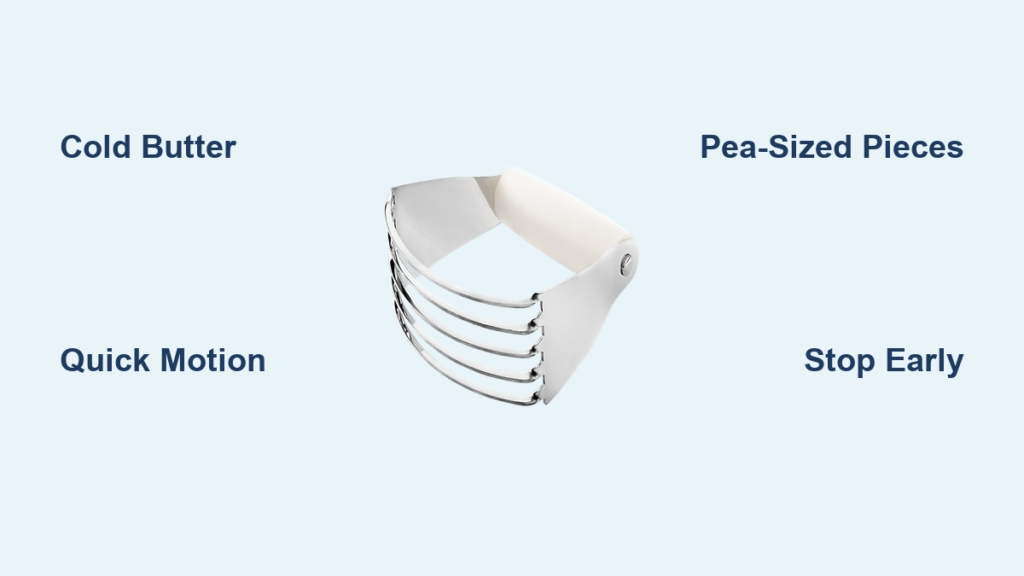
Nothing ruins fresh-baked pastries faster than tough, dense texture—and nine times out of ten, the culprit is poorly cut butter. Whether you’re crafting flaky pie crusts or tender scones, mastering your pastry cutter transforms intimidating baking projects into effortless successes. This guide walks you through every critical step, from butter temperature to final crumb consistency. Knowing how to use a pastry cutter properly separates bakery-quality results from disappointing, dense failures.
Prepare Cold Butter Properly
Start with refrigerator-cold butter, never softened. Temperature makes or breaks your pastry’s texture. Cut your butter into 1-inch cubes while still cold, working quickly to minimize handling time. If other ingredients need prep, pop the cubed butter back into the fridge—every second counts when preventing premature melting. Pastry cutters work best when cutting cold butter into dry ingredients, as the solid fat creates those essential steam pockets during baking that produce flaky layers.
Cube Cutting Technique
- Slice butter stick lengthwise into thirds
- Rotate 90 degrees, slice lengthwise again
- Cross-cut into 1-inch segments
- Work in small batches to maintain cold temperature
Pro tip: Freeze cubed butter for 10 minutes if your kitchen runs warm or you’re working slowly. The pastry cutter’s effectiveness depends entirely on maintaining that critical cold temperature throughout the process.
Set Up Your Workspace
Place measured dry ingredients in a wide mixing bowl before reaching for your pastry cutter. This sequence prevents butter softening during flour measuring. Position everything within arm’s reach—you’ll work continuously once cutting begins. Remember, a pastry cutter and pastry blender are two names for the same essential tool, so don’t worry if your recipe calls for a “pastry blender” while you have a “pastry cutter.”
Required setup checklist:
– Cold butter cubes ready
– Dry ingredients mixed in bowl
– Pastry cutter clean and dry
– Timer nearby (30-60 seconds max)
The curved metal tines of your pastry cutter allow you to work directly in your mixing bowl without scratching it, so select a bowl that gives you ample room to work without flour spilling over the sides.
Master the Cutting Motion
Add cold butter cubes atop your flour mixture. Grip the pastry cutter handle firmly, positioning tines perpendicular to the bowl bottom. Press straight down through butter and flour, then lift and repeat. This up-and-down motion creates the signature cutting action that coats butter pieces in flour without overworking. Unlike other tools, the pastry cutter’s curved tines work efficiently to create those perfect butter pockets that transform into flaky layers during baking.
Step-by-Step Cutting Process
- Initial press: Cut through largest butter chunks first
- Consistent rhythm: Maintain steady up-down motion
- Bowl rotation: Turn bowl quarter-turns for even mixing
- Final passes: Focus on remaining large pieces
Common mistake: Scraping motions or stirring circles overwork butter and create dense pastries. The entire cutting process typically takes just 30-60 seconds—set a timer if needed to keep yourself accountable.
Achieve Perfect Crumb Consistency

Your target texture varies by recipe. Watch visual cues carefully—overworking happens fast. The pastry cutter’s effectiveness is measured by how well it creates butter pieces of the precise size your specific recipe requires, all while keeping them cold and coated in flour.
Texture Guidelines by Recipe
- Pie dough: Pea-sized butter pieces visible throughout
- Scones: Small marble pieces (¼-inch) for tender texture
- Shortbread: Coarse sand with occasional larger pieces
Visual test: Pinch mixture between fingers—butter pieces should hold shape without smearing. Different recipes require different butter piece sizes, so always consult your specific recipe for guidance before you start cutting.
Troubleshoot Common Problems
Sticking Issues
Butter naturally clings to tines during initial cuts. Continue working—most pieces dislodge through motion. For stubborn buildup, pause briefly to scrape tines with a butter knife, then resume immediately. Don’t worry if butter sticks to the tines initially—continue working and most will dislodge naturally through the cutting motion.
Warning sign: Large dough balls forming indicate overworking—stop immediately. This is the most common mistake when learning how to use a pastry cutter properly.
Timing Troubles
Work continuously for 30-60 seconds maximum. Extended handling warms butter, creating greasy dough. Set a timer if needed—speed matters more than perfection. Time is crucial to prevent butter from softening, so have all your ingredients prepped before you begin cutting.
Handle Without Overmixing
Unlike bread dough, pastry benefits from incomplete incorporation. Stop cutting when butter pieces achieve recipe-specific sizes and flour appears crumb-coated. These intact butter pockets create steam pockets during baking, yielding flaky layers. The goal is to maintain cold butter pieces coated in flour, not to fully incorporate the fat.
Stop Signals
- Coarse crumbs with visible butter
- No dry flour patches remaining
- Mixture holds together when squeezed
- Butter pieces maintain shape
This is where many beginners go wrong—they keep cutting until the mixture looks uniform, which destroys the flakiness that makes pastries special.
Explore Alternative Methods
When your pastry cutter’s unavailable, these substitutes work in a pinch, though they require more effort and time:
Two-Knife Technique
Hold one knife in each hand, crossing blades through the mixture. Draw knives across each other in opposite directions, literally cutting butter into flour. This method demands more effort but achieves similar results to using a proper pastry cutter.
Fork Method
Mash cold butter against bowl sides using a sturdy fork. Continue pressing until desired consistency emerges. Expect 2-3 minutes of vigorous work—less efficient but functional when you don’t have a pastry cutter on hand.
Cheese Grater Hack
Grate frozen butter using the medium side of a box grater. Toss grated butter pieces in flour quickly to prevent clumping. While fast, this method creates smaller pieces that may overwork easily if not handled carefully.
Clean and Store Your Cutter
Post-baking cleanup prevents rust and maintains performance. Scrape remaining dough from tines using a spatula, working carefully between wires. Wash in warm, soapy water, drying thoroughly to prevent moisture damage. The pastry cutter’s metal components require proper care to ensure longevity.
Maintenance routine:
– Immediate scraping after use
– Warm water wash (never dishwasher)
– Air-dry completely before storing
– Monthly oiling of metal components prevents rust
Unlike many kitchen tools, pastry cutters shouldn’t go in the dishwasher as this can damage the metal components over time.
Apply Your Skills to Multiple Recipes
Your newfound technique elevates countless recipes beyond basic pie crusts. Master flaky biscuits, tender empanada dough, and buttery tart shells using identical cutting motions. The same cold-butter method works for crumb toppings on fruit crisps and coffee cakes. This technique works with both cold fats (chilled butter, lard) and softened fats (room temperature butter, shortening), though cold fats are preferred for optimal texture.
Quick wins to try:
– Classic buttermilk biscuits
– Savory galette crusts
– Streusel toppings
– Scone variations
The pastry cutter technique is essential for creating flaky pie crusts, tender scones, buttery biscuits, empanada dough, galette crusts, tart crusts, shortbread cookies, choux pastry, and crumb toppings for desserts.
Mechanical Alternatives for Larger Batches
For those making larger quantities of pastry, consider these mechanical options:
Food Processor: Pulse ingredients using short bursts to avoid over-processing. Available sizes range from 3.5-cup choppers for small tasks to 13-cup processors for larger batches. While not traditional, this method can save time when making multiple pie crusts.
KitchenAid Pastry Beater Accessory: An attachment for select KitchenAid stand mixers that cuts butter into flour using the mixer’s power. This accessory also functions for shredding meats, mashing potatoes and avocados, and making chunky jams, chutneys, and spiced applesauce.
Remember that mechanical methods require extra vigilance to prevent over-processing, as they work much faster than manual cutting.
Mastering how to use a pastry cutter transforms intimidating recipes into guaranteed successes. Remember: cold butter, quick hands, and visible butter pieces create the flaky texture that makes pastries memorable. Practice makes perfect—your next pie crust will thank you. The difference between dense, tough pastries and light, flaky perfection often comes down to just one critical step: properly cutting your butter with a pastry cutter. Whether you’re making pie crust, scones, or shortbread, the technique remains the same—keep it cold, work quickly, and stop before you think you’re done. Your pastries will never be the same once you’ve mastered this essential kitchen skill.


