
That moment when you try to crack a soft-boiled egg only to have shell fragments rain into your yolk and ruin the elegant presentation—it’s a breakfast frustration millions face daily. An egg topper cutter eliminates this chaos by creating a precise, clean opening that preserves the delicate egg underneath. Learning how to use egg topper cutter properly transforms your morning routine from messy struggle to restaurant-worthy perfection in under 15 seconds. You’ll discover exactly why this tool deserves permanent counter space and how to leverage it for consistently beautiful results every time you boil eggs.
Unlike haphazard knife or spoon methods that leave jagged edges and shell debris, a dedicated egg topper cutter applies even pressure around the circumference for surgical precision. This guide reveals professional techniques you won’t find in basic manuals—from temperature secrets to blade maintenance tricks that extend your cutter’s life. Whether you’re a breakfast novice or seasoned chef, mastering this $10 tool unlocks effortless poached-egg elegance without special skills.
Select Your Ideal Egg Topper Cutter Design

Scissor-Style Cutter Control Advantages
Scissor-style egg topper cutters give you complete command over cutting pressure and angle, making them perfect for beginners struggling with inconsistent results. The curved blades naturally conform to the egg’s dome shape, ensuring the blade maintains contact throughout the cut. When you squeeze the ergonomic handles, the pivoting action creates smooth rotational force rather than downward crushing—critical for preventing lateral cracks. Look for models with non-slip grips and spring-loaded openings; these reduce hand strain during repeated use and allow one-handed operation while stabilizing the egg cup with your other hand.
Spring-Loaded Cutter Efficiency Benefits
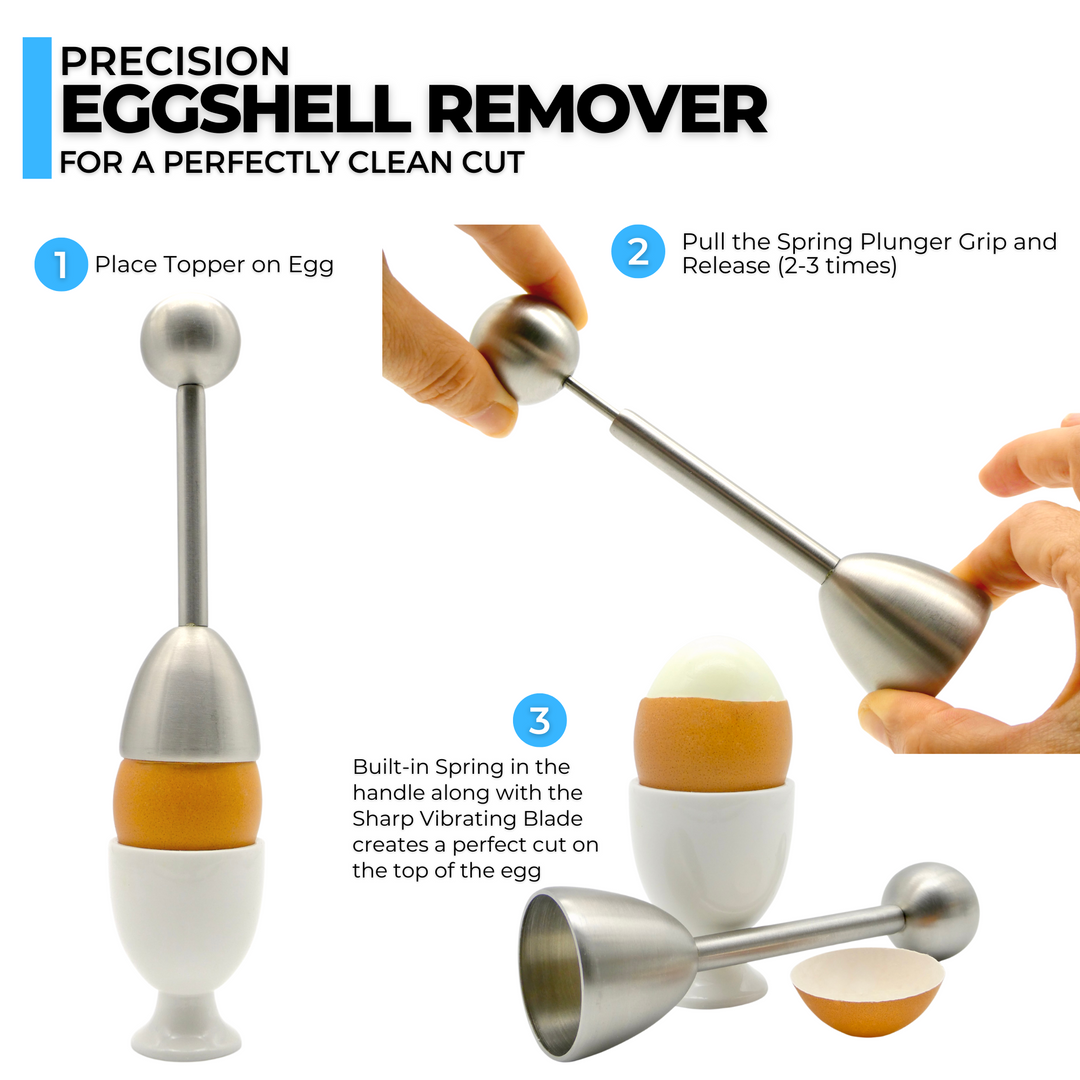
Spring-loaded cutters deliver instant, uniform cuts with minimal physical effort—ideal for those with arthritis or limited hand strength. These models feature a spring mechanism that stores energy when you compress the handles, then releases it as a continuous slicing motion around the egg. This design excels with older eggs (7-10 days old) whose thicker, more brittle shells resist standard cutting methods. For best results, position the cutter so the blade sits level with the egg’s equator before pressing down firmly; the spring action will complete the circle without requiring rotation. Avoid forcing the cutter if resistance occurs—this indicates either a dull blade or insufficient egg warming.
Lever-Action Cutter Precision Features
Lever-action cutters provide mechanical advantage through a fulcrum system that multiplies your hand pressure, slicing through even extra-large or double-yolked eggs with zero wobble. Professional kitchens favor these for high-volume brunch service because they produce identical openings every time. To maximize precision, place the egg in a stable cup first, then lower the cutter vertically until the blade contacts the shell. Pull the lever smoothly downward in one motion—rushing causes skipping, while hesitation creates micro-fractures. These cutters require less frequent sharpening than scissor models but demand exact vertical alignment; practice on hard-boiled eggs until you develop muscle memory for perfect positioning.
Prepare Eggs for Surgical-Grade Cutting
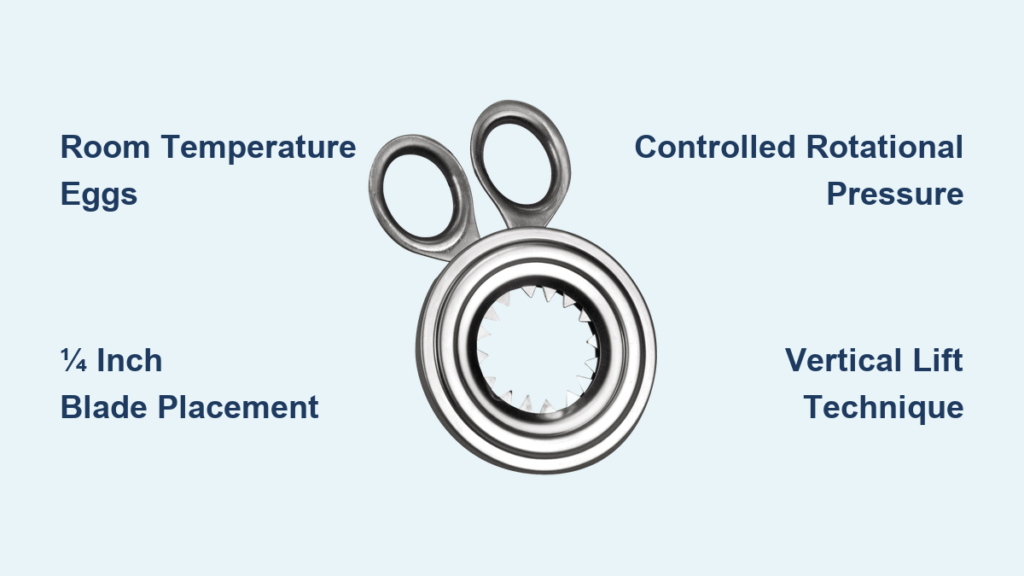
Room Temperature Egg Requirement
Never attempt cutting cold eggs straight from the fridge—thermal shock causes unpredictable shattering. Let boiled eggs rest at room temperature for 10-15 minutes after cooking; this slight warming reduces shell brittleness by equalizing internal and external temperatures. You’ll notice significantly fewer shell fragments clinging to the cut edge and smoother yolk access. For urgent needs, immerse eggs in warm (not hot) water for 2 minutes as a shortcut. Cold eggs produce jagged cuts because the shell contracts around the cooling contents, creating internal tension that explodes outward when cut.
Optimal Positioning in Egg Cup
Place the egg horizontally in a stable cup with the smaller, pointier end facing upward—this orientation creates the widest possible opening for spoon access while maintaining structural stability during cutting. The cup’s curvature cradles the egg, preventing dangerous rolling that leads to slipped blades and uneven cuts. If using a bowl, nestle the egg in a folded paper towel for grip. For soft-boiled eggs (6-minute boil), position the egg so the air pocket at the wider end sits at the bottom; this ensures the delicate yolk remains centered away from the cutting zone.
Shell Surface Preparation Protocol
Wipe the egg surface with a dry paper towel immediately before cutting to remove moisture or cooking residue. Any dampness creates lubrication that causes cutter slippage—a leading cause of failed attempts. If your eggs came straight from boiling water, pat them thoroughly with a clean kitchen towel first. For stubborn debris, gently rub with a soft-bristled toothbrush under cool running water, then dry completely. Never apply oil or cooking spray to the shell; this compromises grip and invites bacterial growth. A clean, dry shell surface ensures the cutter’s teeth engage properly for a seamless cut.
Execute the Perfect Cutting Motion
Blade Placement Measurement Technique
Position the cutter’s blade precisely ¼ inch below the egg’s apex for standard soft-boiled eggs—this creates an opening large enough for spoon access while preserving the shell’s integrity. Use your thumbnail as a quick visual gauge: place it at the egg’s top point, then slide down one thumbnail width. For larger eggs or extra-yolk access, adjust to ⅓ inch. Misplacement above this zone risks cutting into the yolk membrane, while positioning too low leaves insufficient opening. Always check alignment from multiple angles before applying pressure; even slight tilts cause uneven cuts.
Controlled Pressure Application Method
Squeeze handles with steady, even force—never jerk or stab. Apply consistent pressure for 3-5 seconds while gently rotating the egg 270-360 degrees. You’ll hear a distinct shift from a brittle “crack” to a smooth “shink” sound when the cut completes. Rushing creates spiderweb fractures that ruin presentation, while insufficient pressure leaves connected shell bridges requiring manual prying. If resistance increases mid-cut, pause and reposition; forcing it guarantees shattering. Ideal pressure feels like cutting thick butter—firm but yielding.
Full Circumferential Completion Check
After the initial cut, lift the cutter slightly and rotate the egg another 45 degrees to ensure complete separation. Some cutters require two overlapping passes for full detachment, especially with older eggs. Test separation by gently wiggling the top section—if it moves freely, the cut is complete. Never pull upward before cutting finishes; this tears shell fragments into the egg. For spring-loaded models, listen for the mechanism’s “click” that signals full circle completion.
Remove the Top Shell Without Damage
Vertical Lifting Technique
Once cut, lift the shell cap straight upward using your fingertips or the cutter’s built-in grips—never twist or tilt. Tilting shears the fragile shell edge, creating sharp shards that fall into your egg. If the cap sticks, gently insert a butter knife tip into the opening to break the membrane seal before lifting. The removed top should resemble a clean bowl shape, not a jagged fragment. For stubborn caps, tap the egg cup’s rim lightly on the counter to loosen the seal.
Edge Smoothing Protocol
Inspect the cut rim for sharp points or uneven sections before serving. Run a teaspoon gently around the inner circumference to sand down rough edges—this prevents accidental cuts while eating. For significant imperfections, use the cutter’s blade to carefully trim protruding shell fragments. Never serve with visible shell debris; a final quick rinse under lukewarm water removes microscopic particles, but pat dry immediately to maintain ideal serving temperature.
Fix Common Cutting Failures

Slipping Blade Solutions
When the cutter slides off instead of biting into the shell, moisture is always the culprit. Re-dry both the egg surface and cutter blades with a lint-free cloth. Check for worn rubber grips on scissor models—if smooth, replace them. Apply light downward pressure while initiating the cut to establish blade contact before rotational force. For persistent issues, lightly dust the shell with cornstarch for instant traction.
Sideways Cracking Prevention
Lateral cracks radiating from the cut line indicate excessive pressure or blade misalignment. Reduce squeezing force by 50% and ensure the cutter sits perfectly perpendicular to the egg. Warm eggs longer (up to 20 minutes) to reduce shell brittleness. If cracks persist, sharpen or replace the blade—dull edges crush rather than slice. For immediate fixes, wrap a rubber band around the egg below the cut zone to contain fractures.
Maintain Your Cutter for Decades of Service
Post-Use Cleaning Routine
Rinse under warm running water immediately after each use—dried egg residue corrodes blades within hours. Use an old toothbrush to scrub pivot points and blade grooves where protein builds up. Never soak metal cutters; residual moisture causes rust in hinges. Air-dry completely on a towel before storage; moisture trapped in crevices breeds bacteria. For plastic models, avoid dishwashers—heat warps precision components.
Monthly Deep Maintenance
Disassemble according to manufacturer instructions (typically by unscrewing pivot pins). Soak metal parts in vinegar-water solution (1:1 ratio) for 5 minutes to dissolve mineral deposits, then scrub with a soft brush. For wooden handles, condition with food-safe mineral oil monthly to prevent cracking. Reassemble only when bone-dry, checking for smooth operation. Store in a dedicated drawer—never toss in utensil crocks where blade edges get nicked.
Pro Techniques for Gourmet Results
Brunch-Ready Timing Formula
Boil large eggs for exactly 6 minutes 30 seconds, then plunge into ice water for precisely 30 seconds. This creates set whites with molten yolks that won’t spill during cutting. Overcooked eggs (7+ minutes) develop rubbery membranes that resist clean cuts. Undercooked eggs (5 minutes) have fragile whites that collapse when opened. Use a timer—not visual cues—for reproducible results.
Decorative Edge Customization
For special occasions, use cutters with patterned blades (scalloped, zigzag, or star-shaped) to create Instagram-worthy presentations. Practice on hard-boiled eggs first to master pressure control—patterned blades require 20% more force. Pair with colored egg cups and micro-herb garnishes for instant upscale appeal. Never force decorative cutters; let the blade’s weight do the work for crisp impressions.
Mastering how to use egg topper cutter transforms breakfast from chaotic chore to elegant ritual. Remember the golden triad: room-temperature eggs, precise ¼-inch blade placement, and patient rotational pressure. Clean your cutter immediately after use and store it dry to prevent corrosion. Within a week of practice, you’ll consistently create pristine egg openings that make brunch guests gasp. The perfect soft-boiled egg awaits—grab your cutter, warm those eggs, and slice your way to breakfast mastery today.


