
Nothing derails a plumbing project faster than a crooked copper cut. Whether you’re installing a new water heater or running refrigerant lines, the Kobalt copper cutter delivers the precision you need—but only when used correctly. This guide walks you through every step, from your first cut to professional-level batch operations, ensuring your copper work looks clean and lasts decades.
Learning how to use Kobalt copper cutter properly separates DIYers from professionals. A poorly executed cut creates burrs that restrict water flow, cause leaks, or even damage fittings. With the right technique, you’ll achieve square, clean cuts that make soldering effortless and connections leak-free.
In this comprehensive guide, you’ll discover the exact pressure to apply, how to handle different copper types, and maintenance secrets that keep your cutter performing like new. Whether you’re a weekend warrior or a seasoned plumber, these techniques will transform your copper work and save you costly callbacks.
Kobalt Copper Cutter Design: What Makes It Cut Cleaner Than Standard Models

The Kobalt copper cutter’s precision engineering gives you an edge over cheaper alternatives. Its hardened steel blades feature a titanium nitride coating that resists wear while maintaining a razor-sharp edge through hundreds of cuts. Unlike basic cutters that deform copper, the Kobalt model’s 30-degree blade angle slices cleanly without crushing the tube.
Key features you’ll rely on:
– Ergonomic grip: Textured rubber handles maintain control even with wet or greasy hands
– Precision adjustment: Smooth-turning wheel lets you incrementally advance the blade
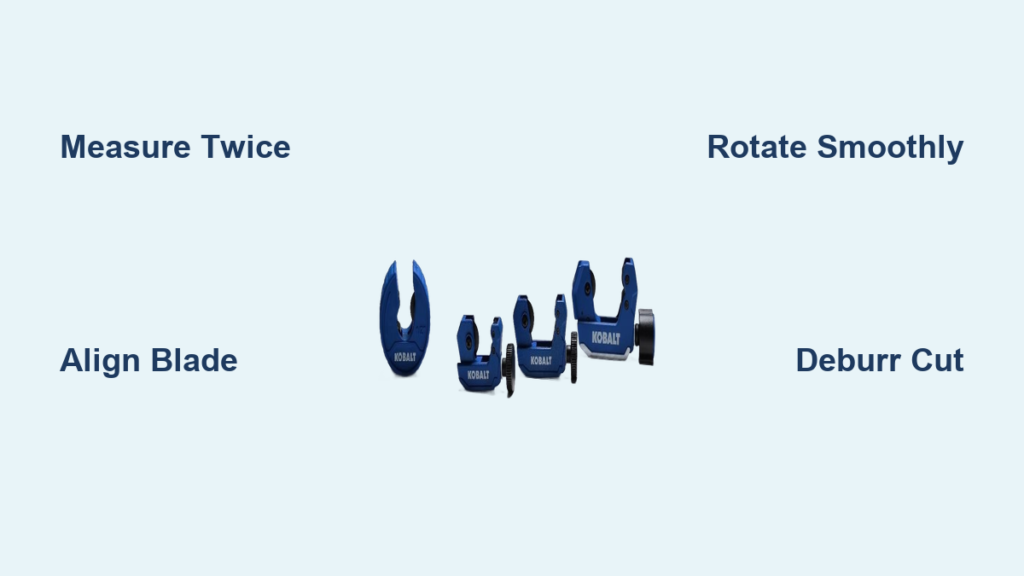
– Cutting capacity: Handles everything from delicate 1/8″ refrigerant lines to 1-1/8″ water pipes
– Replaceable blades: Swap out dull blades in seconds without special tools
Safety Essentials: Must-Have Gear Before You Cut Copper

Skipping proper PPE when using your Kobalt copper cutter risks serious injury—copper shavings fly at high speed and edges become razor-sharp after cutting. Before you touch that copper, gear up properly with these non-negotiable items:
- Impact-resistant safety glasses: Standard glasses won’t stop flying copper particles
- Cut-resistant gloves: Look for ANSI Level A5 or higher protection
- Long sleeves and pants: Prevent scratches from handling cut copper
- Steel-toed boots: Essential when working with larger copper pipes
Clear your workspace of clutter and ensure you have at least 500 lux of lighting—roughly equivalent to three 60-watt bulbs focused on your work area. Poor visibility causes misaligned cuts that waste materials and time.
Pre-Cut Setup: Measure, Mark, and Position for Perfect Results
Measure Twice, Cut Once: Avoid Costly Mistakes
Measure your required length using a steel tape measure for accuracy, then transfer that measurement to the copper with a fine-tip permanent marker. Pro tip: Draw two parallel lines around the circumference—this helps you spot any rotation while cutting. Always account for the kerf (material removed during cutting), which on the Kobalt cutter is approximately 1/16 inch.
Tool Positioning: Align for Square Cuts
Open the cutter jaws fully using the adjustment wheel, then position the copper so the cutting wheel aligns precisely with your marked line. Close the jaws until the blade barely kisses the copper surface—this prevents deformation during your first rotation. Check alignment from multiple angles before starting.
How to Use Kobalt Copper Cutter for Flawless, Burr-Free Cuts
Start the Cut with Proper Technique
Apply steady, moderate pressure and begin rotating the cutter around the copper’s circumference. Keep your motion smooth and continuous—jerky movements create uneven cuts that require rework. After each full rotation, tighten the adjustment wheel just 1/8 turn (about the thickness of a dime). You should hear a consistent scraping sound as the blade advances.
Maintain Cutting Pressure Like a Pro
Continue rotating with consistent pressure. Over-tightening deforms the tube; under-tightening creates jagged edges. You’ll feel the blade bite deeper with each rotation. Support both ends of the copper as you approach the final separation to prevent dropping. For rigid copper, expect a clean cut in 6-8 full rotations.
Complete the Cut and Inspect Results
When the copper separates, inspect the cut surface. A quality cut appears square and clean with minimal burrs. If you see jagged edges or an angled face, stop and troubleshoot before proceeding. Use a deburring tool immediately to remove internal burrs that restrict water flow.
Copper Type-Specific Cutting: Techniques for Rigid Pipe, Soft Tubing, and Fittings
:max_bytes(150000):strip_icc()/typesofcopperpiping-NEW-ecc4e905588f40499e2e3e8042a8089d.png)
Rigid Copper Pipe (Type L/M)
Standard technique applies—full rotations with consistent pressure. Type L and M copper pipes require slightly different pressure; Type L (thinner wall) needs about 20% less pressure than Type M. After cutting, always use a reaming tool to remove internal burrs that restrict water flow.
Soft Copper Tubing
Reduce pressure by 30% to prevent ovaling. Support the tubing close to the cut line, especially for thin-wall applications. For diameters under 1/2″, consider an internal support sleeve—improvise with a wooden dowel if you don’t have a professional sleeve. Rotate the cutter in shorter arcs (about 180 degrees) rather than full circles for better control.
Copper Fittings
Secure fittings in a vise before cutting. Position the cutter to clear fitting shoulders—angled cuts here compromise seal integrity. Use shorter cutting strokes for better control in tight spaces. Critical warning: Never attempt to cut copper directly attached to pressurized systems—always isolate and drain first.
Tight Space Cutting: How to Use Kobalt Copper Cutter in Confined Areas
Working between joists or near walls demands compact tool positioning. Short-stroke technique works wonders: rotate 1/4 turns instead of full rotations, maintaining blade pressure between strokes. Pre-cut copper before installation whenever possible—measuring and cutting on the bench saves hours of contortionist work.
For impossible angles, consider Kobalt’s compact models or angled head attachments. These specialty tools fit where standard cutters can’t reach. When space is extremely limited, position your body to maximize leverage while maintaining control—sometimes kneeling provides better access than standing.
Daily Maintenance: Keep Your Kobalt Copper Cutter Cutting Like New
Clean After Every Use
Remove copper residue with a stiff wire brush—copper buildup affects cutting precision. Apply a light coating of machine oil to the blade surfaces and adjustment mechanism to prevent corrosion. Wipe down handles with a damp cloth and dry thoroughly before storage.
Blade Replacement Made Simple
When cuts require excessive force or produce rough edges, replace the blade immediately:
1. Remove the retaining screw with a #2 Phillips screwdriver
2. Note blade orientation before removal
3. Clean the blade seat thoroughly with a wire brush
4. Install new blade ensuring proper alignment
5. Tighten retaining screw securely but don’t overtighten
6. Test on scrap copper before critical work
Pro tip: Keep spare blade kits on hand. A dull blade at 2 AM during an emergency repair turns a 10-minute job into a hardware store run.
Fix Common Kobalt Copper Cutter Issues: Slipping, Jagged Cuts, and More

Jagged or Angled Cuts
Cause: Dull blade or misaligned cutting wheel
Fix: Replace blade immediately or realign cutting mechanism. Check that copper is properly supported and not rotating during cutting.
Cutter Slips Without Cutting
Cause: Oil on copper surface or insufficient pressure
Fix: Clean copper with degreaser, increase pressure gradually. Ensure your hands have a firm grip on the textured handles.
Oval Tube After Cutting
Cause: Excessive pressure or poor support
Fix: Reduce pressure, support copper closer to cut line. For soft copper, use an internal support sleeve.
Batch Cutting Pro Tips: How to Use Kobalt Copper Cutter for Multiple Identical Lengths
Processing multiple identical lengths? Set up a measuring jig with adjustable stops. Mark every 5th piece for quality checks—this catches measurement drift before you’ve cut 20 wrong pieces.
Efficiency tips for batch cutting:
– Use a stop block system for consistent lengths
– Pre-mark all copper before cutting
– Maintain sharpness throughout the batch
– Quality-check every 10th cut with a square
– Keep a dedicated cutter for each common size
Pro Applications: Where Plumbers and HVAC Techs Rely on Kobalt Cutters
Plumbers trust the Kobalt copper cutter for residential water supply systems where clean cuts prevent leaks at solder joints. HVAC technicians depend on its precision for refrigerant lines—rough cuts cause restrictions that reduce system efficiency by up to 15%. Electricians use it for grounding systems where exact lengths ensure proper bonding conductivity.
The Kobalt cutter handles Type K, L, and M copper with equal precision. Its clean edges work perfectly with both soldered and compression fittings, making it indispensable for professional installations that must last decades without callbacks.
Preventative Care: Avoid Common Mistakes That Damage Your Copper Cutter
Weekly: Deep clean with degreasing solvent to remove built-up copper residue
Monthly: Inspect blade sharpness under magnification for micro-chips
Quarterly: Disassemble adjustment mechanism for thorough cleaning
Annually: Replace blades or have professionally sharpened
Store your cutter in a dry environment with the blade locked. Moisture causes corrosion that compromises cutting precision. A dedicated tool box with foam inserts keeps the cutter ready for your next project and prevents accidental damage.
Master the Kobalt copper cutter once, and every copper project becomes faster, cleaner, and more professional. Sharp blades, proper technique, and consistent maintenance separate amateur work from lasting installations. Your future self will thank you when those water lines flow freely and HVAC systems run efficiently—no leaks, no restrictions, no callbacks.


