
That frustrating moment when your tubing cutter slips off line or leaves jagged burrs can derail even the simplest plumbing repair. When you’re working with copper lines for a bathroom renovation or refrigeration coils for an HVAC system, a Lenox tubing cutter transforms this potential headache into a smooth, professional process. These precision tools deliver clean, square cuts that slide effortlessly into fittings—no more leaks from misaligned joints or flow restrictions from internal burrs. By mastering the exact techniques in this guide, you’ll achieve leak-proof connections on your first attempt while extending your tool’s lifespan. Discover how proper setup, pressure control, and maintenance turn routine cuts into flawless results.
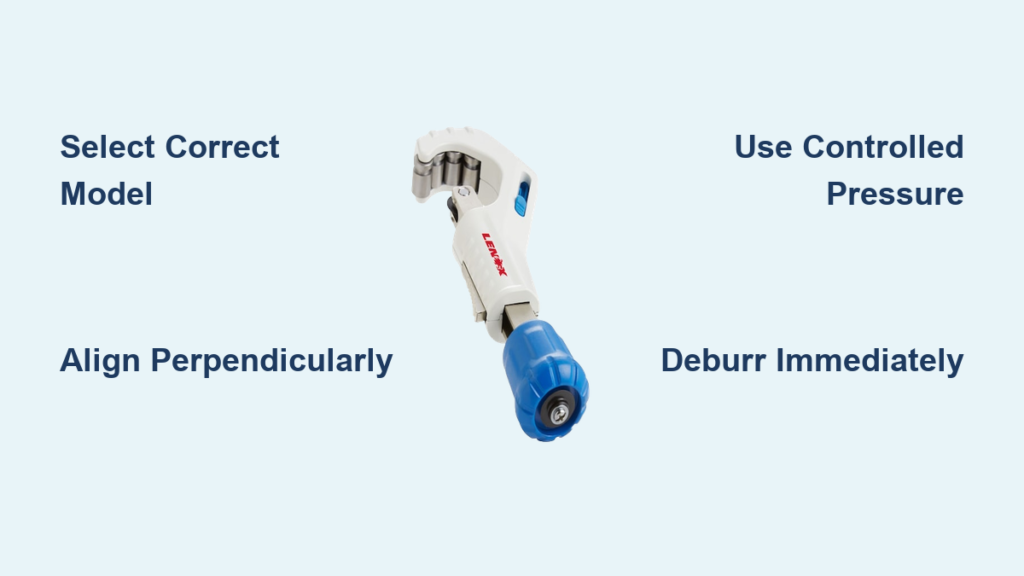
Select Your Exact Lenox Cutter Model
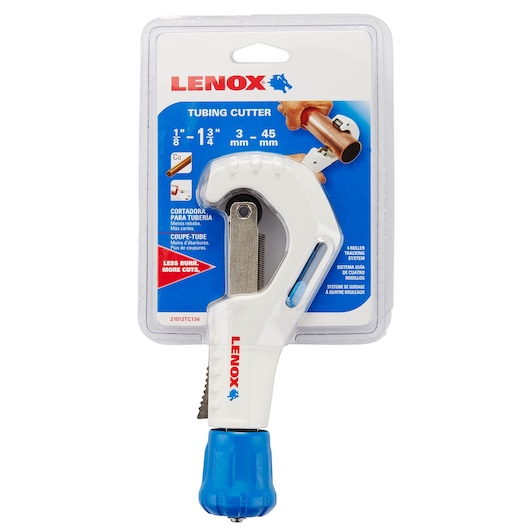
Choosing the wrong cutter size guarantees poor results and tool damage. Lenox offers four distinct models tailored to specific tubing diameters—using a cutter beyond its capacity causes tubing deformation and wheel breakage. Match your project needs precisely:
- 1-1/8″ capacity cutter: Handles 1/8″ to 1-1/8″ tubing for residential plumbing and small refrigeration lines
- 1-3/8″ capacity cutter: Processes 1/4″ to 1-3/8″ tubing ideal for standard HVAC and commercial refrigeration
- 2″ capacity cutter: Cuts 1/2″ to 2″ tubing for large commercial HVAC systems
- Mini cutter: Manages 1/8″ to 7/8″ tubing in tight spaces like under sinks or behind appliances
Pro tip: Always select a cutter with 1/4″ larger capacity than your largest tubing. A 1-3/8″ model handles 90% of residential jobs while accommodating unexpected larger lines.
Implement Critical Safety Protocols

Mandatory Safety Gear Checklist
Slip on ANSI Z87.1-rated safety glasses and level 3 cut-resistant gloves before touching tubing. Metal shavings fly unpredictably during cutting—especially on the final rotation—and can cause permanent eye damage. Position your work at waist height on a stable surface to maintain control. Never cut unsupported tubing; use V-blocks or pipe stands to prevent whipping upon separation.
Pre-Use Tool Inspection Sequence
Spin the cutting wheel to confirm smooth rotation without wobble. Check for chips or flat spots that cause uneven cuts—replace immediately if damaged. Roll the guide bearings; they must glide freely without grinding. Test the feed screw: turn clockwise and counterclockwise through its full range. If it feels gritty, apply two drops of lightweight machine oil and work it back and forth until smooth.
Warning: Never force a cutter with damaged components. A chipped wheel can shatter during use, sending metal fragments toward your face.
Mark Tubing with Professional Precision
Complete Circumferential Marking Method
Wrap your tape measure around the entire tubing circumference rather than measuring linearly. Mark a continuous line using a silver permanent marker—black ink disappears against copper surfaces. Verify measurements against your installation requirements before cutting. Add 1/8″ extra length for proper fitting engagement; you can trim excess later but can’t stretch short tubing.
Expert note: For critical applications like fuel lines, double-check marks with a tubing square to ensure perpendicular alignment. A slight angle here guarantees fitting leaks later.
Position Cutter for Flawless Alignment
Perpendicular Setup Verification
Open cutter jaws fully by turning the feed screw counterclockwise. Slide tubing between the cutting wheel and guide rollers, ensuring full support on both sides of the cut line. Center the wheel directly on your mark with guide rollers positioned 180 degrees opposite. View the cutter from two perpendicular angles (side and top) to confirm absolute perpendicular alignment—any tilt creates oval cuts that won’t seal.
Quick check: Place a combination square against the cutter body. The gap between square and tubing should be identical on both sides.
Execute Perfect Cuts with Progressive Pressure
Controlled Cutting Wheel Engagement
Turn the feed screw clockwise until the wheel barely kisses the tubing surface—this creates a shallow guide groove. Rotate the cutter clockwise only (never back-and-forth) while maintaining steady pressure. After each full rotation, advance the screw precisely 1/8 turn. Listen for a smooth, continuous cutting sound; grinding indicates excessive force.
The feel test: Proper pressure requires just 3-5 pounds of force. If your knuckles whiten, you’re applying too much pressure—let the hardened steel wheel do the work.
Breakthrough Technique for Minimal Burrs
As the wheel nears the inner wall (typically after 6-8 rotations on 1/2″ copper), reduce pressure by 50%. Complete 2-3 final rotations with feather-light pressure. The tubing should separate cleanly with no visible deformation. For thin-wall steel or brass, reduce pressure even further and apply cutting oil to prevent work hardening.
Diagnose and Fix Common Cutting Failures
Correcting Off-Track Cuts
Symptoms: Cut veers from your mark, creating angled or oval tubing ends
Immediate solution: Replace the cutting wheel—dull wheels cause walking. Restart with a fresh wheel, lighter pressure, and verify perpendicular alignment from two angles before cutting. If tubing is already damaged, cut 1/2″ past the flawed section.
Eliminating Rough Cut Edges
Symptoms: Torn metal surfaces, visible burrs, or inconsistent cut depth
Solution sequence: First, slow your rotation speed. If roughness persists, apply cutting oil for brass or hardened copper. Confirm you’re using the correct wheel type—carbide-tipped wheels handle tough materials better than standard HSS versions. Replace wheels showing uneven wear patterns.
Preventing Tubing Collapse
Symptoms: Flattened or oval cross-sections after cutting
Prevention protocol: Add support blocks within 2″ of the cut line on both sides. Reduce feed pressure to 1/16 turn per rotation for thin-wall tubing. For refrigeration lines under 1/4″, insert a tube straightener sleeve before cutting.
Achieve Professional-Grade Deburring
Two-Step Interior/Exterior Finishing
Deburr immediately after cutting while metal is warm. Insert a combination reaming tool into the tube and twist clockwise 3-4 full rotations to remove internal burrs that restrict flow. For the exterior edge, make one smooth pass around the circumference with the deburring blade. Run your gloved finger around the edge—it should feel uniformly smooth with no “catch points.”
Quality checkpoint: Hold the cut end toward a light source. No light should shine through internal burrs, and the edge should reflect light evenly without shadows.
Maximize Tool Longevity with Daily Care
Post-Use Maintenance Routine
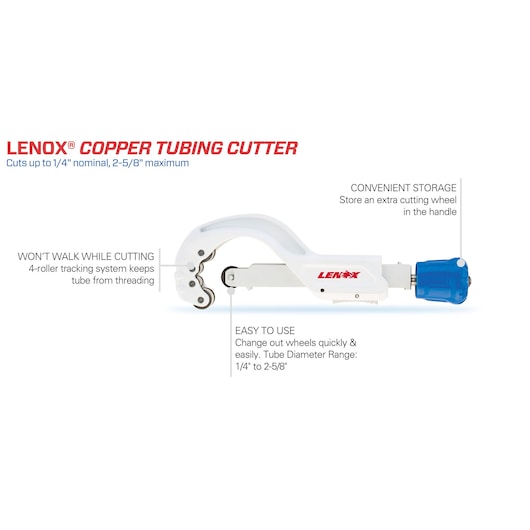
Wipe metal shavings from the cutting wheel and guide rollers with a clean microfiber cloth after every job. Apply one drop of lightweight machine oil to the feed screw threads and work it through the mechanism. Store the cutter with jaws slightly closed (about 1/4″ gap) to maintain spring tension without strain.
Strategic Wheel Replacement Timing
Replace cutting wheels when cuts require excessive force or produce visibly rough edges. Track usage: standard HSS wheels last 500-750 cuts on soft copper but only 100-150 cuts on steel. Always carry a spare wheel in the integrated handle compartment—carbide-tipped versions double lifespan on hardened materials.
Pro tip: Mark wheels with the installation date using a permanent marker. This helps identify premature failures covered under Lenox’s 90-day wheel warranty.
Accelerate Repetitive Cutting Jobs
Batch Processing Workflow
Pre-mark all tubing lengths before cutting to eliminate constant measuring. Set up adjustable tubing stands at waist height for consistent positioning. Organize cut pieces by size on labeled trays as you work—this prevents costly measurement errors during installation. Keep your deburring tool within arm’s reach to maintain rhythm.
Time savings: This system reduces cut time by 40% compared to single-piece processing. On a 20-piece job, you’ll save over 5 minutes while ensuring uniform quality.
Master Challenging Cutting Scenarios
Confined Space Solutions
When walls limit handle rotation, remove the T-handle and use an adjustable wrench on the feed screw’s hex head. For spaces under 1 inch from obstacles, deploy the Lenox mini cutter. In extremely tight spots (like behind toilets), the ratcheting cutter model requires only 1-1/2 inches of swing space—rotate the handle in short arcs without repositioning.
Cutting Hardened Materials Safely
Apply cutting oil liberally to brass or hard-drawn copper to reduce heat buildup. Reduce feed rate to 1/16 turn per rotation and expect cuts to take 2-3x longer than soft copper. Always use carbide-tipped wheels for these applications—they maintain sharpness 50% longer than standard wheels under high stress.
Final Takeaway: Your Lenox tubing cutter delivers professional results only when technique matches tool capability. Perfect cuts happen through controlled pressure, precise alignment, and respecting material limits—not brute force. Start every project with a fresh wheel and proper setup, then practice on scrap tubing until the smooth cutting sound becomes second nature. Remember: a single burr-free cut saves ten times the frustration during installation. Keep this guide handy until these steps become your muscle memory, and you’ll transform cutting from a chore into your most reliable plumbing skill.


