
Crooked mat cuts ruining your framing projects? A properly operated Logan mat cutter delivers gallery-quality results that make store-bought mats look amateurish. Whether you’re preserving precious family photos or preparing artwork for exhibition, mastering this precision tool saves hundreds compared to professional framing services while giving you complete creative control.
This guide reveals exactly how to use Logan mat cutter equipment to achieve crisp, professional results from your very first project. No more wasted mat boards or frustrating alignment issues—just clean, precise cuts that elevate your artwork instantly.
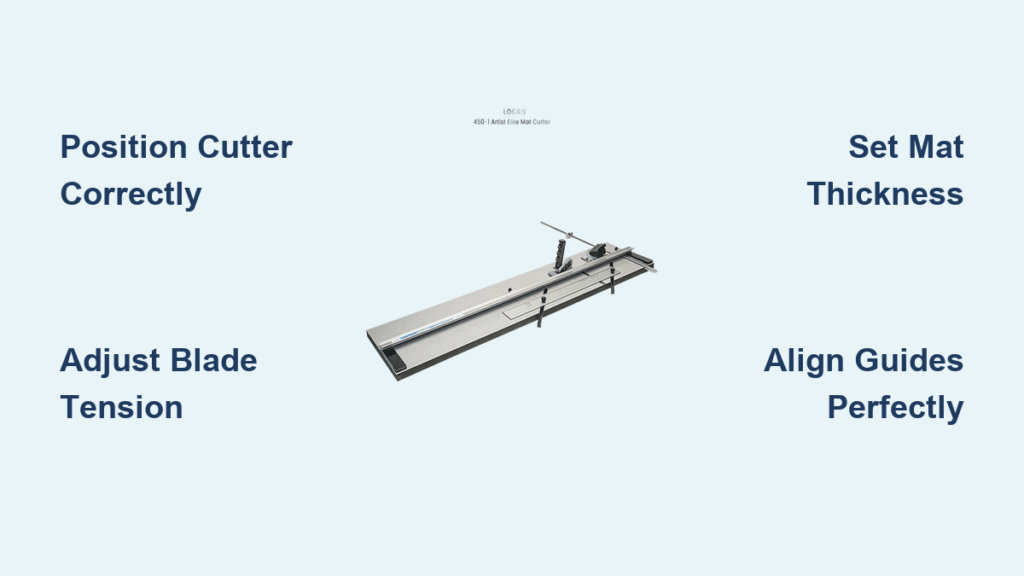
Position Your Cutter Correctly Before Cutting
Set up your Logan mat cutter on a stable work surface at comfortable height—wobble during cutting guarantees crooked lines. Extend the cutting rail fully without obstruction to prevent flexing that ruins precision. Your dominant hand should move freely along the entire rail length while your support hand stabilizes the mat board near the cutting line.
Ensure adequate lighting directly above your workspace; shadows hide guide marks and create alignment errors. Keep measuring tools within arm’s reach and maintain a clutter-free area—distractions lead to costly mistakes when working with expensive mat boards. Always verify your surface supports the entire mat board to prevent flexing during cuts.
Adjust Blade Tension for Clean Cuts Every Time
Test blade tension on scrap mat board identical to your project material before committing to your actual piece. Push the cutting head forward with moderate pressure—the blade should glide smoothly without requiring excessive force. Ragged edges indicate insufficient tension, while blade skipping signals over-tightening that can damage your cutter.
The ideal tension creates clean cuts with minimal resistance. When adjusting, make small incremental changes and test frequently—dramatic tension adjustments often overshoot the sweet spot. Remember that different mat board densities require different tension settings, so recalibrate whenever switching materials.
Set Mat Thickness Accurately to Prevent Damage

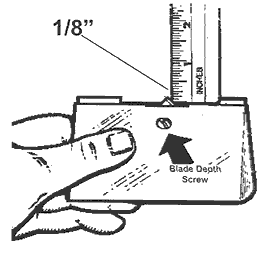
Measure your mat board thickness with calipers or use the built-in thickness gauge on your Logan cutter. Adjust the depth setting to cut 80% through the material—this creates a clean bevel without cutting into your backing board. Over-penetration causes frayed edges and potential damage to underlying surfaces.
Always recalibrate when switching between different mat board brands or thicknesses. Premium mat boards often require slightly different settings than economy options due to varying fiber densities. Test your depth setting on scrap material first—the perfect adjustment leaves a slight uncut portion that breaks cleanly when you fold the bevel.
Align Guides Perfectly for Straight Cuts
Verify guide alignment using a framing square before every project—this single step prevents 90% of crooked cut issues. Position the straightedge guide exactly at your measured mark, then lock it firmly in place with both hands to ensure no movement during cutting. For angle cuts, double-check both the angle guide and straightedge positioning, as misalignment compounds into visible errors.
Mark your cut lines using a sharp pencil and quality ruler, measuring twice from opposite edges to confirm accuracy. Apply light pressure when marking to avoid visible indentations on your finished mat. Always position yourself directly above the cut line to eliminate parallax errors when aligning your blade.
Execute Smooth Cutting Motion Like a Professional
Hold the cutting head firmly with your dominant hand while supporting the mat board near the cut line with your other hand. Start slowly at the beginning of the cut, then maintain steady speed throughout—stopping mid-cut creates visible ridges that ruin your mat’s appearance. Apply consistent downward pressure while moving the cutter forward in one fluid motion.
Approach corners by slowing your cutting speed slightly, then continue the cut 1/16 inch past the corner mark before lifting the blade cleanly. This slight over-cut prevents corner bunching and creates crisp 90-degree angles without tearing. Keep your free hand well away from the blade path at all times for safety.
Troubleshoot Ragged Edges Immediately
Ragged edges typically indicate dull blades or incorrect tension settings. Replace the blade immediately—dull blades require excessive pressure that tears mat fibers and ruins your project. Verify your thickness setting matches your board thickness, as over-penetration also causes fraying along cut edges.
Before discarding a ruined mat, diagnose the problem systematically: test blade sharpness on scrap material, check tension settings, and verify guide alignment. Most ragged edge issues stem from one of these three factors. Keep spare blades readily available to avoid project delays when performance degrades.
Prevent Crooked Cuts Before They Happen
Crooked cuts almost always stem from misaligned guides or uneven pressure during cutting. Recheck guide positioning with a square before each cut, especially after repositioning for subsequent cuts. Ensure your cutting surface supports the entire mat board—flexing during cutting creates curved lines that appear straight until you mount your artwork.
Develop muscle memory through practice on scrap material. Consistent hand position and pressure create uniform results across multiple projects. Record your successful settings for quick reference on similar jobs, noting mat board type, thickness, and blade tension combinations that work best for your technique.
Maintain Your Cutter for Long-Term Precision
Replace blades at the first sign of resistance or edge quality degradation—don’t wait for complete failure. Logan blades typically last 50-75 standard cuts depending on mat board density. Keep spare blades stocked to avoid project delays, storing them in a dedicated case to prevent damage.
Clean the blade channel and guide surfaces after each project using compressed air or a soft brush—never metal tools that scratch precision surfaces. Apply a single drop of light machine oil to the cutting head rail every 20-30 uses, wiping away excess immediately to prevent dust accumulation. Proper maintenance extends your cutter’s lifespan for decades of reliable service.
Select the Right Logan Model for Your Needs
Choose your Logan mat cutter based on the largest mat you’ll realistically cut, considering both current and future projects. Entry-level models like the Logan 650 series deliver professional results for occasional use with simplified operation ideal for beginners. Mid-range options add production stops and enhanced measuring capabilities for regular framers.
Professional users justify premium models through increased efficiency and precision for high-volume work. Evaluate which features are essential for your specific applications—basic models provide straight cuts and 45-degree bevels, while advanced systems offer custom angle options and replaceable cutting heads. The right model pays for itself through reduced material waste and consistent quality.
Create Multi-Opening Mats Without Structural Damage

When cutting mats with multiple openings, plan your sequence from smallest to largest openings to maintain structural integrity. Start with the tightest internal cuts, working outward to prevent accidental cracking between openings. Use low-tack painter’s tape to reinforce areas between openings during cutting.
For multi-layer projects, clamp layers together with registration pins before cutting as a single unit. This technique ensures perfect alignment between layers while creating dramatic depth effects. Always support the entire mat assembly during cutting—flexing between layers creates misaligned openings that ruin the professional appearance.
Master Advanced Techniques for Gallery-Quality Results
Beyond standard 45-degree bevels, Logan cutters handle custom angles from 30 to 60 degrees for specialized framing applications. Mark your angle precisely, then adjust both the angle guide and straightedge before cutting. Practice on scrap material first—steep angles require adjusted cutting pressure and slower motion.
For oversized projects exceeding your cutter capacity, divide the mat into manageable sections using registration marks. Maintain alignment by cutting from both directions while ensuring continuous support across the entire board. This technique requires patience but produces seamless results indistinguishable from single-pass cuts.
Mastering how to use Logan mat cutter equipment transforms framing from frustrating guesswork into precise, repeatable craftsmanship. Start with basic straight cuts on scrap material, gradually progressing to complex multi-opening designs as your confidence grows. With proper technique and regular maintenance, your Logan cutter will deliver professional results for decades of framing projects, making every investment in quality materials worthwhile. Remember that consistent practice builds the muscle memory needed for flawless execution—your first few attempts may not be perfect, but each project brings you closer to gallery-quality results that rival professional framing services.


