
That sinking feeling when sandwich fillings explode in your child’s lunchbox is all too familiar. Leaky sandwiches waste food, create messes, and turn mealtime into a cleanup chore. The solution? Mastering how to use sandwich cutter tools transforms ordinary sandwiches into perfectly sealed, spill-proof creations ideal for packed lunches, picnics, or party platters. Whether you’re a busy parent or entertaining host, this guide delivers actionable techniques from bread selection to creative presentations. You’ll learn exactly how to use sandwich cutter tools to create professional-looking pocket sandwiches that stay intact until the first satisfying bite.
Choose Your Sandwich Cutter Type

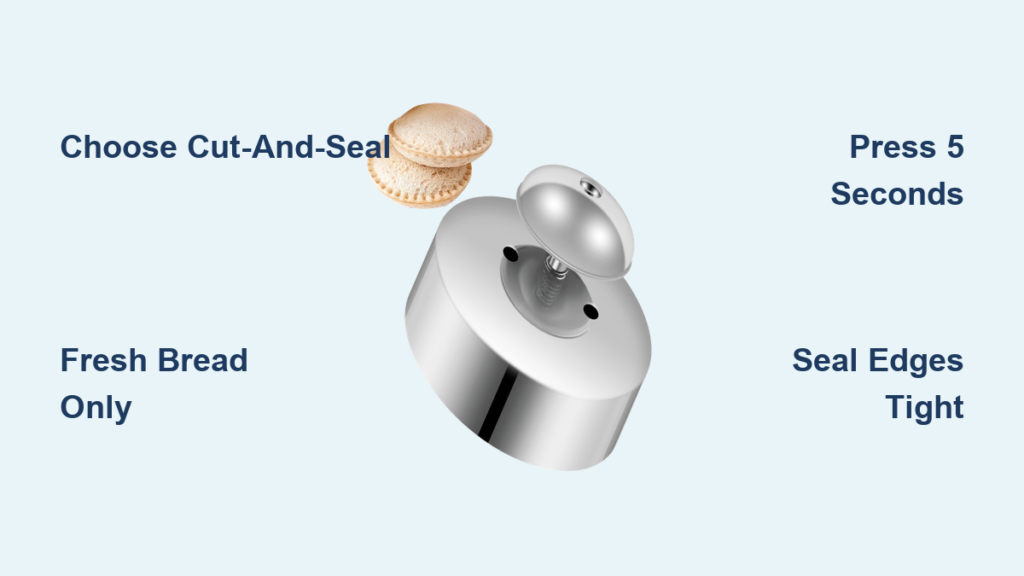
Basic vs Cut-and-Seal Models
Basic cutters are single-piece tools that slice shapes but leave sealing to you. They’re perfect for decorative cuts on tea sandwiches but require manual edge pressing to prevent leaks. Cut-and-seal models solve this with two-piece systems that simultaneously cut and crimp edges. When you press down, the top piece slices while the base seals the perimeter—creating leak-proof pocket sandwiches in one motion. For reliable results with minimal effort, cut-and-seal models are worth the small investment, especially for daily lunch prep.
Size Compatibility Matters
Your cutter must match your bread size for clean cuts and proper sealing. Standard sandwich bread pairs perfectly with 3-4 inch cutters. Using oversized cutters on small bread causes ragged edges that won’t seal. For thick artisan loaves, choose larger cutters (4.5+ inches), while mini versions (1.5-2 inches) work best for cocktail bread. Always select cutters slightly smaller than your bread slices—this ensures the cutter fully penetrates both layers without tearing. Test compatibility by placing the cutter on bread; it should leave at least a ½-inch margin around all edges.
Essential Pre-Use Prep Steps
Bread Selection Secrets
Fresh, soft sandwich bread seals dramatically better than stale or crusty varieties. Day-old bread lacks the moisture needed for edges to fuse. Standard white or wheat bread delivers ideal flexibility—thick-cut options require 10 seconds in the microwave to warm and soften. For round cutters, bread slices must exceed the cutter diameter by at least half an inch on all sides. Skip crust removal; most modern cutters cleanly slice through crusts while sealing edges. If bread resists sealing, lightly dampen edges with water before pressing.
Smart Filling Placement
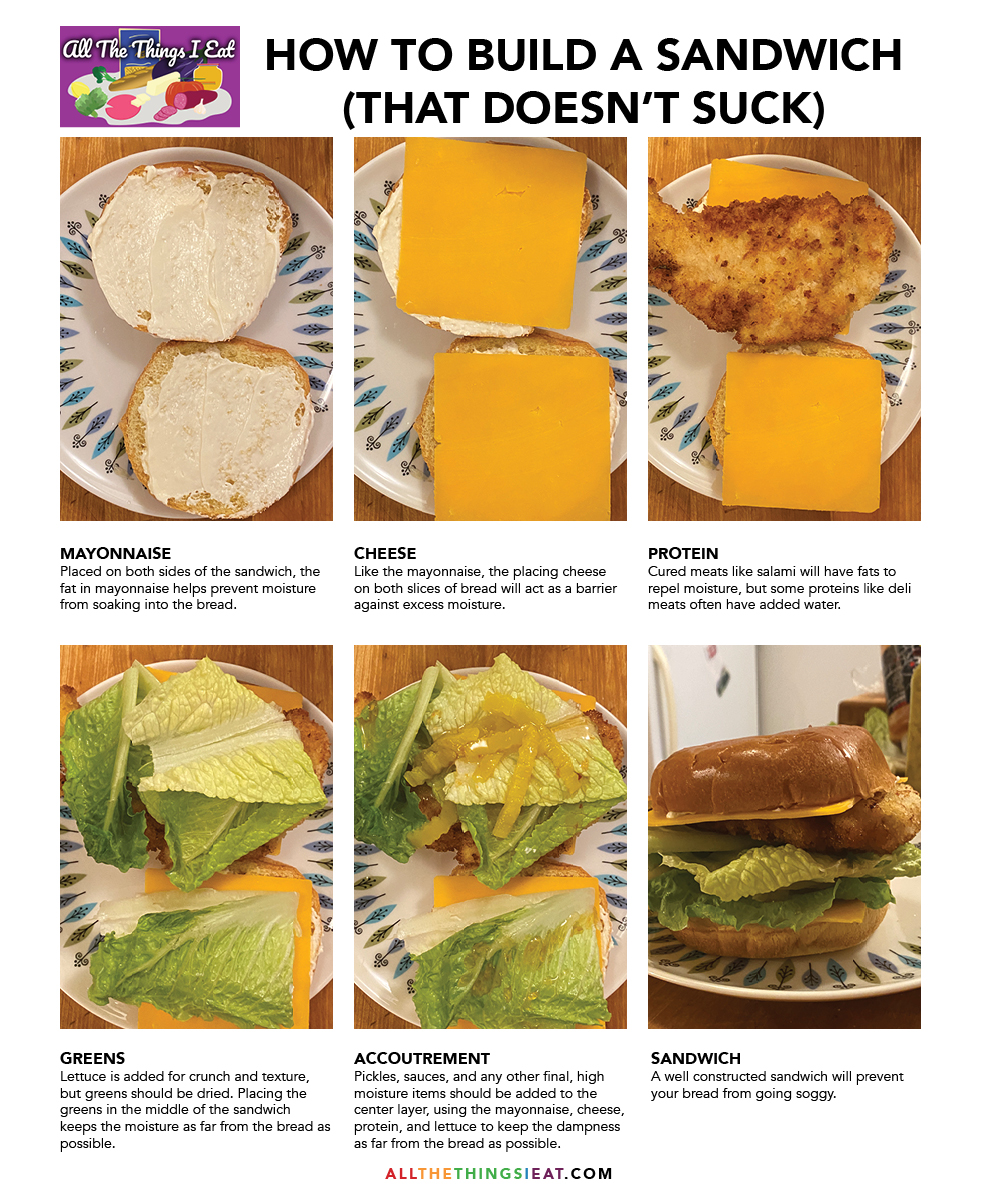
Position fillings like a pro to prevent blowouts. Create a strict ½-inch border around bread edges—this empty zone is crucial for sealing. Place cheese slices directly against the bread perimeter; they melt slightly during pressing to form natural barriers. Avoid overfilling: single layers of meat/cheese only, with spreads applied thinner than butter on toast. For wet ingredients like tomatoes, sandwich them between dry layers (e.g., lettuce-meat-tomato-meat-lettuce). Keep all moisture-heavy items centered, surrounded by absorbent ingredients like lettuce or spinach.
Master Basic Cutter Technique
Step-by-Step Cutting Process
- Assemble sandwich with fillings between two bread slices
- Position cutter centered over the sandwich—wobble causes uneven cuts
- Press firmly with both palms applying even downward pressure
- Rock gently in small circles to slice completely through layers
- Lift straight up to avoid tearing the cut shape
- Pinch edges with thumb and forefinger for 10 seconds to seal
Edge Sealing Without Tools
After cutting, immediately seal edges manually for leak-proof results. Press your thumb along one edge while using your forefinger as a backstop underneath. Work slowly around the entire perimeter, applying firm pressure to fuse bread layers. For stubborn gaps, place the sandwich on your cutting board and use the back of a spoon to crimp edges—this leverages extra force without tearing. Check seals by gently squeezing; if filling oozes, re-press those spots immediately.
Perfect Cut-and-Seal Results
Professional Pressing Method
Achieve flawless seals with this technique: Place the bottom bread slice on a non-slip surface. Add fillings precisely within the ½-inch border zone. Top with the second slice, aligning edges perfectly. Center the cutter over the sandwich and press down firmly until you feel resistance (about 5 seconds). Hold steady pressure—this heat and compression activates the bread’s natural starches to create a watertight seal. Lift straight up to reveal a pocket sandwich with cleanly crimped edges.
Timing Your Press
Count “one-Mississippi, two-Mississippi” while pressing—under 3 seconds risks weak seals, while over 7 seconds can tear bread. Cold bread often resists sealing; warm slices for 10 seconds before assembly if needed. If edges still separate, your pressure is uneven—practice pressing with both palms simultaneously. For visual confirmation, hold the cutter down until you see a slight bulge of filling near the crimped edge, indicating proper fusion.
Fix Common Cutting Problems

Solve Poor Sealing Issues
When edges won’t stay sealed, first check bread freshness—stale slices lack sealing moisture. Reduce filling volume by 25%; overstuffing physically prevents edges from meeting. Apply even pressure across the cutter; leaning to one side creates weak spots. For persistent issues, lightly brush bread edges with water before assembly—this adds crucial moisture for adhesion without making bread soggy.
Correct Uneven Cuts
Ragged edges usually mean a dull cutter or unstable surface. Test sharpness by cutting a plain bread slice—it should slice cleanly without tearing. Place a damp towel under your cutting board to prevent slipping. For plastic cutters, replace them if you spot nicks or warping along the blade edge. Always press straight down; angling the cutter causes one side to cut deeper than the other.
Prevent Filling Leaks
Avoid liquid-heavy fillings like ranch dressing or juicy fruits. If using moist ingredients, create barriers: place lettuce leaves directly against both bread surfaces. After cutting, inspect edges and press any gaps closed immediately. Let sealed sandwiches rest 2-3 minutes before packaging—this critical “setting time” solidifies the seal. Never stack sealed sandwiches until fully set; pressure from stacking breaks fragile seals.
Clean and Store Properly
Quick Cleaning Method
Rinse cutters immediately after use—dried filling hardens in crevices. Hand wash with warm, soapy water using a soft toothbrush for intricate edges. For stubborn cheese residue, soak for 5 minutes before scrubbing. Dry thoroughly with a microfiber towel; trapped moisture causes rust on metal cutters. Never dishwasher unless specified—high heat warps plastic models.
Smart Storage Solutions
Store cutters vertically in a utensil holder or lay flat in a drawer. Stack similar sizes together (small inside large) to save space. If your set includes a protective case, use it—this prevents blade nicks. For plastic cutters, check monthly for warping; heat exposure from dishwashers or hot cars distorts shapes over time. Keep cutters away from sharp knives that could damage edges.
Safety First Every Time
Handle With Care
Always grip the cutter’s top surface—not the sides—to keep fingers clear of cutting edges. Work on wooden or rubberized cutting boards; glass surfaces cause dangerous slippage. Inspect cutters before each use for cracks or bent edges—replace damaged tools immediately. Supervise children closely; even plastic cutters have sharp rims that can cut skin.
Food Safety Rules
Wash cutters between different food types (e.g., meat to veggie) to prevent cross-contamination. For allergy-safe meals, assign color-coded cutters to specific diets. Consume sealed sandwiches within 24 hours—extended storage risks bacterial growth in the sealed pocket. Never seal hot fillings; cool ingredients to room temperature first to avoid steam buildup that bursts seals.
Pro Tips for Perfect Results
Temperature and Texture Tricks
Warm bread slices for 10 seconds to boost sealing—microwaved bread fuses 40% better according to kitchen tests. Chill assembled sandwiches for 5 minutes before cutting; this firms fillings for cleaner edges. Lightly toast bread before assembly for a satisfying crunch contrast against soft interiors. For extra security, spread a thin moisture barrier (like butter) along bread edges before adding fillings.
Portion Control Mastery
Use mini cutters (1.5-2 inches) for diet-friendly appetizer portions. Create uniform sizes across multiple sandwiches for professional platters—consistency matters more than shape. For meal prep, cut 5-6 sandwiches at once and store sealed portions in labeled containers. Stack different shapes vertically on serving trays to add visual height without extra calories.
Equipment Upgrade Guide
Plastic cutters ($3-8) suit occasional use and kids’ kitchens but dull faster. Stainless steel sets ($10-25) deliver professional durability and cleaner cuts for daily users. Premium lever-press systems ($25-50) minimize hand strain and include multiple shapes—ideal for large batches. Prioritize cutters with rounded handles; they reduce hand fatigue during repeated pressing.
Mastering how to use sandwich cutter tools turns lunch prep from chaotic to effortless. Start with basic sealing techniques, then experiment with heart-shaped party sandwiches or stacked presentation styles. Remember: fresh bread, precise filling placement, and firm 5-second presses create leak-proof perfection every time. Your days of soggy lunchboxes end now—grab your cutter and transform ordinary sandwiches into sealed masterpieces ready for any adventure.


