Your pasta cutter suddenly stops slicing through fresh dough like a hot knife through butter, leaving you with ragged, uneven strands instead of perfect fettuccine. That smooth, satisfying glide you’ve come to expect from your pasta machine has turned into a frustrating struggle where dough tears and sticks instead of cutting cleanly. Whether you’re using a classic hand-crank model passed down through generations or a shiny new electric pasta maker, this cutting failure can derail your entire meal preparation.
Most home chefs face this issue at some point, but the good news is that 90% of pasta cutter problems stem from just a few common culprits that you can diagnose and fix in under 15 minutes using tools you already have in your kitchen. This guide walks you through the exact troubleshooting process professional pasta makers use to restore cutting performance without damaging your equipment.
Immediate Checks for Non-Working Pasta Cutters
Identify Your Specific Cutting Failure Pattern
Different cutting problems reveal specific underlying issues. When your pasta cutter fails, examine the results closely: Are noodles partially connected with thin strands of dough? This indicates misaligned blades. Do edges look ragged rather than smooth? Your blades have likely dulled. Is dough sticking to the cutter without separating at all? You’re probably dealing with dough consistency issues or hardened residue buildup. Each failure pattern requires a different solution, so accurate diagnosis comes first.
Verify Proper Dough Thickness Before Cutting
Running dough through your cutter at the wrong thickness setting is the most common preventable mistake. Pasta sheets must reach the ideal thickness—typically between settings 6-7 on most machines—before they’ll cut cleanly. Too thick, and the cutter struggles to penetrate; too thin, and delicate strands tear during the cutting process. Always roll your dough to uniform thickness across the entire sheet, checking multiple points with your fingers to ensure consistency before attempting to cut.
Critical Cleaning Procedures for Stuck Pasta Cutters

Remove Hardened Dough Without Damaging Blades
Dried pasta residue clinging between cutting blades is the silent killer of smooth pasta cutting. Start by using a soft-bristled pastry brush to dislodge loose flour and crumbs from all accessible areas. For stubborn buildup, take a wooden skewer or blunt plastic scraper and gently work parallel to the blade edges—never perpendicular—to avoid rolling or nicking the delicate cutting surfaces. This careful approach removes hardened dough without accelerating blade wear.
Deep Cleaning Between Blade Teeth
The tiny spaces between cutter teeth trap microscopic dough particles that gradually build up into performance-killing residue. Create a cleaning paste using equal parts flour and water, then work this mixture into the cutting mechanism by turning the handle slowly. The abrasive action of the flour paste helps dislodge stubborn particles. Follow with thorough brushing to remove all traces of the cleaning paste before your next use.
Lubrication Points That Actually Need Oil
Contrary to popular belief, most pasta cutters require minimal lubrication—only on specific pivot points and bearing surfaces. Apply a single drop of food-grade mineral oil to the main drive shaft where it enters the housing and to any visible gear junctions. Wipe away all excess oil immediately, as residual lubricant attracts more flour and dough particles, creating a gummy buildup that worsens cutting performance over time.
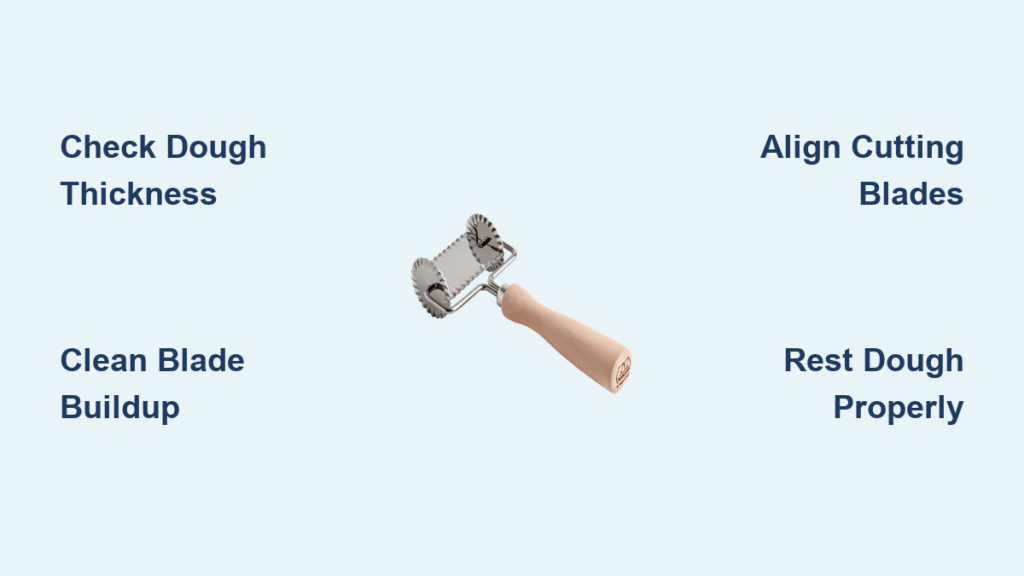
Precision Blade Alignment and Tension Adjustments
Diagnose Misalignment Through Test Cuts
Run a narrow strip of dough through your cutter and examine the results carefully. If one side cuts cleanly while the other tears or doesn’t cut at all, you’re dealing with misaligned blades. This often happens after cleaning or if the machine has been bumped. Most quality cutters have visible adjustment screws on both ends of the cutting mechanism—these control blade alignment across the entire width.
Micro-Adjustment Technique for Perfect Cuts
Turn adjustment screws in quarter-turn increments only, testing with dough after each adjustment. Over-tightening creates excessive friction that damages both blades and dough. The ideal tension allows the cutter to slice through dough with moderate hand pressure—about the same force needed to slice soft butter with a knife. If you’re using an electric model, listen for changes in motor strain as you adjust; smooth operation indicates proper tension.
Dough Preparation Fixes That Solve Cutting Problems
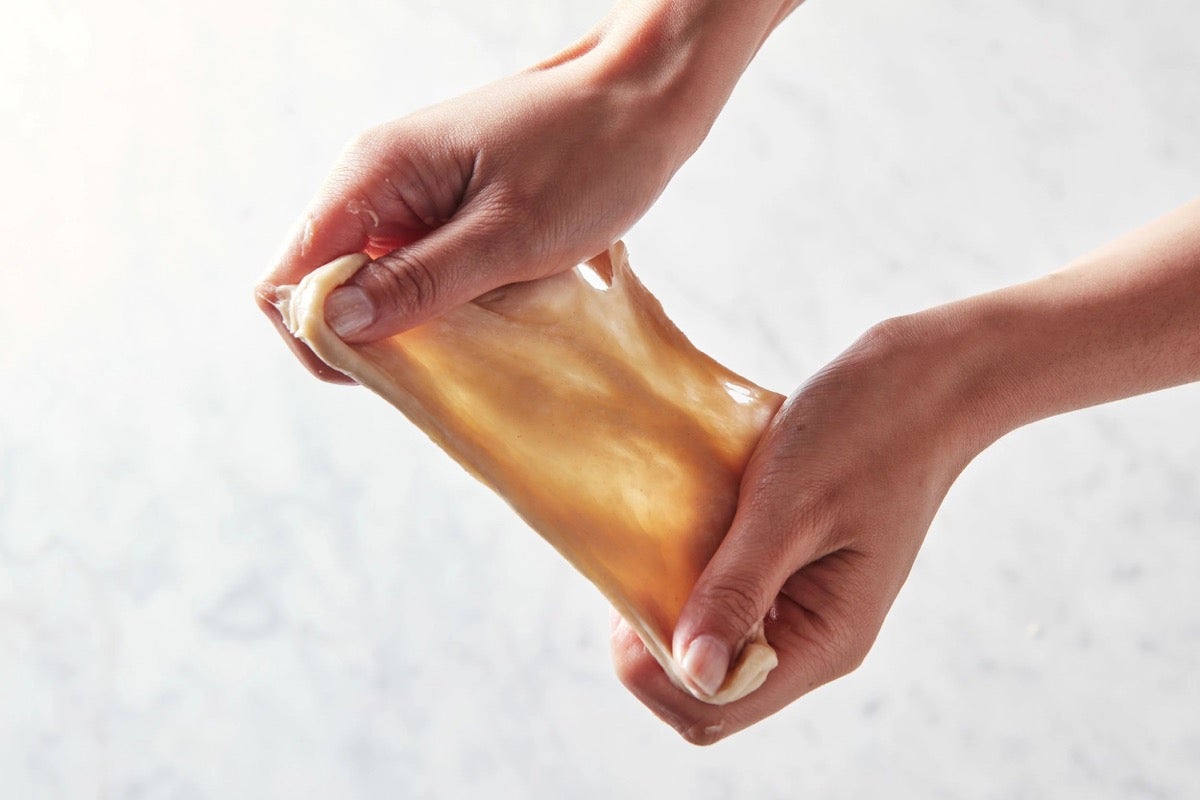
The Perfect Dough Hydration Test You Can Do Now
Properly hydrated pasta dough should feel like firm playdough that yields slightly under finger pressure but springs back slowly. Too wet, and dough gums up cutting edges; too dry, and it resists cutting entirely. Perform the windowpane test: stretch a small piece of dough between your fingers. It should thin enough to see light through without tearing immediately. Adjust with teaspoon amounts of water or flour until you achieve this ideal consistency.
Critical Resting Period Before Cutting
Skipping the dough resting phase is a common mistake that sabotages cutting performance. After rolling but before cutting, let pasta sheets rest on a floured surface for 10-15 minutes. This crucial step allows gluten strands to relax, preventing the dough from shrinking or deforming as it passes through the cutter. Rested dough maintains its shape during cutting, resulting in uniform, clean-edged noodles rather than distorted, tearing strands.
When to Replace Blades Instead of Repairing

Recognizing Irreparable Blade Damage
Certain damage patterns mean replacement is your only option. Deep nicks that catch your fingernail, bent blade sections that don’t straighten with gentle pressure, or visible cracks in the blade mounting points all require new components. If you’ve tried proper cleaning and adjustment but still get inconsistent cuts across the entire width of the cutter, the blades have likely reached the end of their service life.
Choosing Between OEM and Aftermarket Replacement Blades
Original equipment manufacturer (OEM) blades guarantee perfect fit and performance but cost more. Aftermarket options offer savings but vary wildly in quality—poorly made blades can actually damage your pasta machine’s mechanism. When selecting replacements, look for blades made from the same material as your original (typically high-carbon steel or stainless steel) and check reviews specifically mentioning compatibility with your exact model number. A slight mismatch in blade thickness or tooth pattern can cause catastrophic cutting failures.
Proactive Maintenance to Prevent Future Cutting Failures
The 30-Second Post-Use Cleaning Routine
Develop the habit of brushing your cutter clean immediately after each use while dough remains soft and pliable. A dedicated pastry brush kept near your pasta station makes this effortless. Focus on the cutting mechanism and feed roller areas where residue accumulates fastest. This simple habit prevents 80% of cutting problems by stopping buildup before it hardens into performance-killing deposits.
Monthly Performance Checkup Protocol
Once a month, perform a complete operational assessment. Run test strips of dough through all thickness settings, noting any resistance points or inconsistent cutting. Check for play in the handle mechanism—excessive wobble indicates worn bearings. Examine blade edges with a magnifying glass for early signs of dulling. Address minor issues immediately before they develop into major cutting failures that disrupt your pasta-making sessions.
Proper Storage Techniques That Extend Blade Life
Never store your pasta cutter assembled with flour residue inside. After thorough cleaning, apply a barely visible coat of food-safe mineral oil to all metal surfaces using a paper towel. Store disassembled if possible, or at minimum with the cutting mechanism in the open position. Keep in a cool, dry place away from humidity that causes rust—silica gel packets in your storage container help maintain optimal conditions for metal components.
When your pasta cutter stops cutting properly, remember that most issues stem from simple causes that respond well to systematic troubleshooting. Start with the easiest solutions—dough consistency checks and basic cleaning—before progressing to more involved fixes like blade alignment or replacement. The key to reliable pasta cutting lies in consistent maintenance: clean immediately after use, store properly, and perform monthly checkups to catch developing problems early. With these techniques, you’ll restore smooth cutting performance and enjoy perfect homemade pasta every time. For model-specific guidance, always consult your manufacturer’s manual before attempting major adjustments or part replacements.