Nothing ruins a crafting project faster than jagged edges or incomplete cuts when you’re trying to make the perfect greeting card or custom fabric appliqué. Learning how to use a die cutter properly transforms your workflow, giving you clean, professional results every time—whether you’re cutting delicate paper or rugged hook and loop fasteners. This precision cutting technique works like an industrial-grade cookie cutter, using sharp steel dies to punch out shapes with surgical accuracy. By the end of this guide, you’ll know exactly how to set up, operate, and maintain your die cutter for flawless results on paper, cardstock, fabric, and specialty materials.
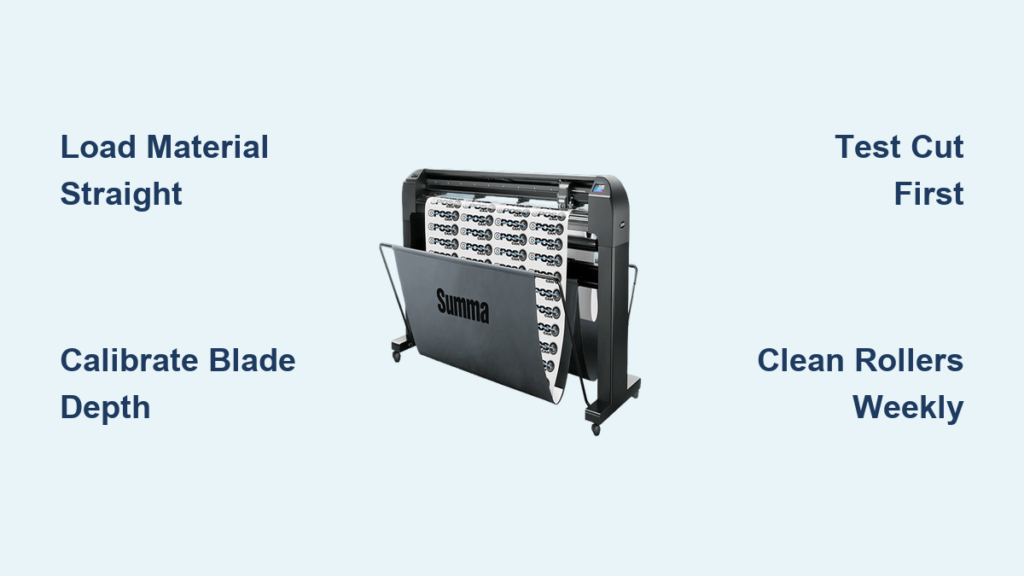
Essential Equipment Setup for Perfect Cuts
Required Tools and Materials Checklist
Before you begin cutting, gather these critical components. You’ll need your die cutting machine (either manual hand-crank or electronic), sharp steel dies designed for your specific material, cutting plates or mats compatible with your model, and your chosen material—whether paper, fabric, or hook and loop fasteners. Don’t forget test scraps for calibration and smoothing tools to eliminate wrinkles.
Pro tip: Organize your workspace with everything within arm’s reach. The sandwich assembly process requires quick, precise movements, and fumbling for tools mid-process leads to misalignment and wasted material.
Machine Positioning and Surface Preparation
Place your die cutter on a stable, level surface away from table edges to prevent tipping during operation. Install cutting mats according to your manufacturer’s diagram—this isn’t optional as incorrect placement causes uneven pressure and incomplete cuts. Wipe all surfaces with a lint-free cloth to remove debris that could mar your cuts or damage expensive dies. Always test the machine’s movement without materials first to ensure rollers turn smoothly.
Material Preparation Techniques for Flawless Results
Pre-Cutting Material Prep Essentials
Cut your material slightly larger than the die shape—about 1/4 inch extra on all sides provides crucial handling room and prevents alignment issues. Smooth the material completely using your hands or a brayer tool to eliminate any wrinkles. Critical warning: Any folds, bumps, or air bubbles will transfer directly into your final cut, ruining the shape and wasting your material.
Testing Material Compatibility Before Committing
Before cutting your final piece, always test with scrap material. Different materials require different pressure settings—cardstock needs less pressure than thick fabric or hook and loop fasteners. Document successful combinations in a notebook for future reference. This simple step saves significant material waste and frustration, especially when working with expensive specialty fabrics or industrial materials.
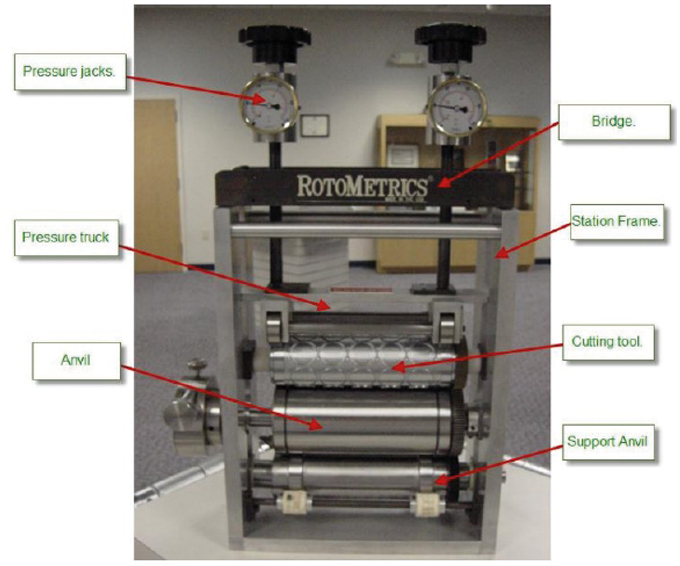
Die and Material Placement Method: The Sandwich Technique

Creating the Perfect Cutting Sandwich
The “sandwich” method ensures even pressure distribution for clean cuts. Layer your components in this exact sequence:
1. Bottom cutting plate
2. Material (right side up)
3. Die (cutting edge down)
4. Top cutting plate
Alignment check: Hold the sandwich up to light to verify die positioning before inserting into the machine. Proper alignment prevents partial cuts and material waste.
Preventing Movement During Cutting Process
Once assembled, avoid shifting the sandwich. Use registration marks on your cutting plates if available. For intricate dies with small details, place a small piece of washi tape over the die edge to prevent sliding—remove before cutting. Movement during the process creates double cuts or incomplete shapes that ruin your project.
Operating Your Die Cutter: Manual vs. Electronic Methods
Manual Machine Operation Step-by-Step
Turn the hand crank at a steady, consistent pace—about one complete rotation every 2-3 seconds. Never force the crank; resistance indicates improper sandwich thickness or alignment issues. Continue cranking until the entire sandwich passes through the rollers completely. Rushing causes uneven pressure and incomplete cuts.
Electronic Machine Operation Protocol
Power on your machine and wait for initialization. Insert the sandwich until the machine grabs it automatically—don’t force it. Press start and let the machine control speed and pressure. Critical warning: Don’t attempt to stop mid-cut—this can damage both machine and die, creating safety hazards and ruining your project.
Shape Removal and Quality Control Procedures
Safe Shape Extraction Process
Disassemble the sandwich carefully in this sequence:
1. Remove top plate first
2. Lift die straight up (never slide it)
3. Pop out your cut shape gently
4. Inspect edges immediately under good lighting
Quality indicators: Perfect cuts feature clean, sharp edges with no hanging chads or incomplete sections. Edges should look professionally manufactured, not frayed or torn.
Troubleshooting Poor Cuts Immediately
If edges appear fuzzy or incomplete, check these common issues:
– Die sharpness (dull dies cause frayed edges)
– Pressure settings (increase slightly with shims if needed)
– Material thickness compatibility
– Clean die edges of material buildup
Specialized Cutting Applications for Professional Results
Hook and Loop Fastener Cutting Techniques
Use fabric-rated dies specifically designed for cutting Velcro® or similar hook and loop materials. These dies feature reinforced edges to handle the tough backing without dulling quickly. Test first—hook and loop requires more pressure than paper but less than thick leather. Industrial note: For large quantities or precise industrial components, consider professional die cutting services as home machines work best for small batches.
Fabric Cutting Best Practices for Clean Edges
Choose steel-rule dies engineered specifically for textiles—they maintain sharpness longer when cutting fibrous materials. Always cut fabric with the grain when directional cuts matter for professional results. Clean dies immediately after fabric use to prevent fiber buildup that affects subsequent cuts.
Common Mistakes Prevention Strategies
Alignment Errors: Prevention and Correction
Misaligned dies waste material and time. Prevention strategies include:
– Using light boxes for precise placement
– Marking registration points on cutting plates
– Double-checking positioning before each cut
– Starting with less expensive materials when learning
Equipment Damage Avoidance Protocol
Never force materials exceeding your machine’s thickness capacity. Check manufacturer guidelines before attempting new materials. Forcing thick materials can bend machine rollers or break dies permanently, resulting in costly repairs or replacements.
Maintenance and Longevity Tips for Your Equipment
Daily Care Routine for Optimal Performance
Clean dies with soft brushes after each session to remove material residue. Store dies in protective cases or magnetic organizers—never loose in drawers where blades can nick or dull. Keep cutting plates clean and replace when warped or deeply grooved to maintain even pressure distribution.
Extending Die Life Through Proper Usage
Rotate dies between uses to prevent uneven wear on specific cutting edges. For intricate dies, use release paper to prevent sticking and material waste. Document successful pressure settings for each material type to avoid trial-and-error damage during future projects.
Advanced Techniques and Pro Tips for Complex Projects
Multi-Material Projects Assembly Method
Create layered designs by cutting different materials separately then assembling. Use registration marks to ensure pieces align perfectly. This technique works especially well for dimensional greeting cards with fabric accents or multi-textured industrial components.
Standardized Testing Protocol Development
Establish a repeatable test routine:
1. Cut test shape on scrap material
2. Inspect edges under magnification
3. Adjust pressure as needed
4. Record settings for future use
5. Proceed with final materials
Time-saving tip: Maintain a labeled swatch book of successful material/pressure combinations to eliminate guesswork on future projects.
Machine Selection Guidance for Your Specific Needs

Manual vs. Electronic Comparison for Your Workflow
Manual machines offer precise speed control and lower cost but require physical effort, making them ideal for occasional crafters. Electronic machines provide consistent results across multiple cuts and handle complex dies better, perfect for high-volume or professional use. Choose based on your project frequency and physical capabilities.
Capacity Considerations When Purchasing
Match your machine to your typical projects. Small machines handle greeting cards and scrapbooking needs efficiently. Larger machines accommodate fabric bolts and industrial hook loop requirements. Buy once, cry once—underpowered machines lead to frustration, wasted materials, and ultimately cost more through replacement purchases.
Mastering how to use a die cutter opens endless creative possibilities, but perfect results require proper technique and equipment knowledge. Start with simple shapes and basic materials, then progress to complex designs as you build confidence. Document your successful settings and develop muscle memory for the cutting process—soon you’ll produce professional-quality cuts consistently. Remember that regular maintenance prevents most common issues, and testing on scrap material saves valuable project materials. Whether you’re crafting at home or working with industrial materials, these techniques ensure clean, precise cuts every time you operate your die cutter.