Removing existing grass is often the most challenging step in any landscape renovation project, but knowing how to cut sod with a sod cutter transforms this backbreaking task into a manageable process. Whether you’re preparing space for a new patio, garden bed, or complete landscape redesign, this powerful tool slices through turfgrass efficiently while preserving the soil structure beneath. The right technique ensures clean, even cuts across your entire lawn without damaging underground utilities or creating uneven terrain.
This comprehensive guide delivers the precise steps needed to operate a sod cutter effectively—regardless of your experience level—so you can remove your existing lawn quickly and prepare a professional-grade foundation for your next landscaping project.
Select the Right Sod Cutter for Your Project
Matching equipment to your specific needs prevents wasted time and effort. Choosing between manual and motorized options depends entirely on your lawn size, physical capability, and budget constraints.
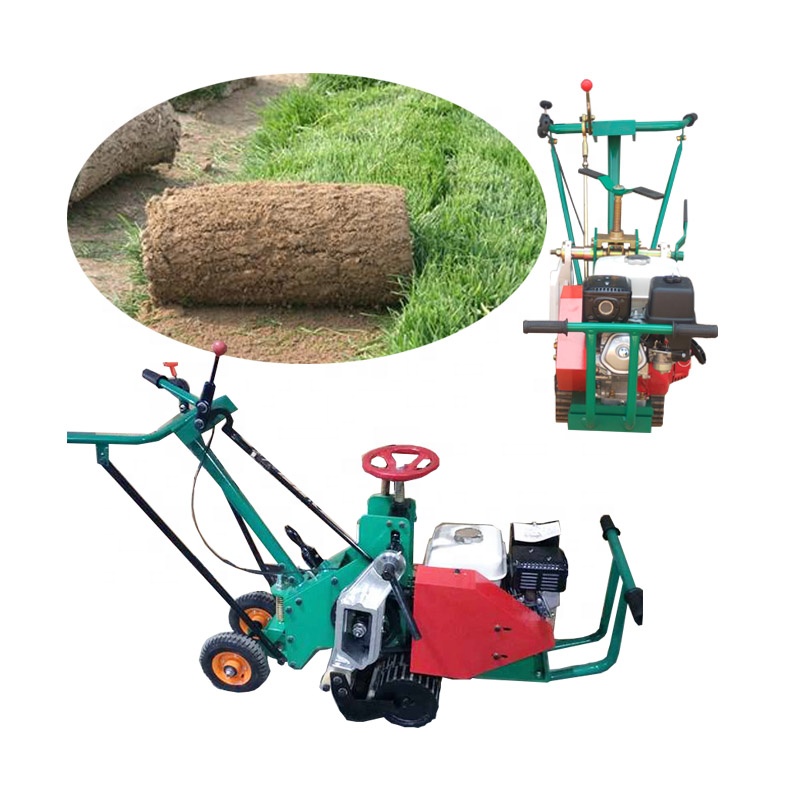
Self-Propelled Walk-Behind Cutter
These motorized units function like heavy-duty lawnmowers but with significantly more power for slicing through turfgrass roots. Four-wheel drive models excel on sloped terrain where maintaining straight cutting lines proves challenging with standard two-wheel units.
Rental reality check: Expect to pay $65-$80 for a four-hour rental or $90-$110 for a full day at most equipment rental centers. While purchasing a new unit costs $3,000+, renting remains the most practical option for occasional users.
Manual Kick-Plow Cutter
This increasingly rare option features two handlebars with a knee-level crossbar you kick to advance the cutting blade. While requiring considerable leg strength and coordination, these tools cost only $25 per day to rent—making them attractive for small projects under 500 square feet.
Physical warning: Using this cutter delivers an intense leg workout. Many homeowners abandon this method mid-project when they realize the physical demands exceed expectations.
Square-Edge Cutter (Landscaper Spade)
This shovel-like tool works for tiny areas around mailboxes or driveway edges but becomes impractical for anything larger than 500 square feet. The $45-$80 purchase price seems reasonable until you experience the backbreaking labor required to cut sod with this method.
Tractor-Mounted Cutter
Reserve this heavy-duty option for properties exceeding typical residential sizes. With combined rental costs of $340-$460 per day (cutter plus tractor), professional services often prove more economical unless you already own suitable tractor equipment.
Prepare Your Lawn for Flawless Cutting
Critical preparation prevents costly mistakes during operation. Skipping these steps often results in damaged equipment, uneven cuts, or unexpected obstacles that derail your entire project.
Remove Surface Obstacles
Walk your entire work area with a rake to clear rocks, twigs, and garden hoses. Even small debris can damage cutter blades or create uneven cuts that require rework. Pay special attention to areas where children play—they often leave toys buried in the grass.
Mow Low and Time Watering Correctly
Mow your grass to the lowest setting 2-3 days before removal to reduce cutting resistance. Then water the lawn 1-3 days before cutting—aim for moist but not saturated soil. Proper moisture levels enable smooth cutting while preventing equipment bogging in mud.
Mark Boundaries Precisely
For partial lawn removal, use measuring tape to establish exact boundaries before marking with water-based paint or chalk spray. Flag all sprinkler heads with bright tape to prevent expensive damage during operation—replacing a single sprinkler head costs more than a full day’s equipment rental.
Execute Test Cuts
Before committing to your entire project, cut a 3-foot test section to verify proper depth (1.5-3 inches) and ensure the blade remains level with the ground. Adjust settings based on this test to avoid wasting time correcting mistakes across your entire lawn.
Operate Your Sod Cutter Like a Pro
Self-Propelled Cutter Setup
Start the engine by priming 3-5 times, setting the choke, and pulling the starter cord. Allow 30-60 seconds for warm-up before engaging the cutting blade. Locate the depth control lever (typically near rear wheels) and begin with shallow cuts (about 1 inch deep), gradually increasing depth as needed. Maintain a steady walking pace while overlapping each pass by 2-3 inches for complete grass removal.
Manual Kick-Plow Technique
Position yourself behind the handles with one foot on the crossbar. Kick forward firmly while pulling back slightly on the handles to advance the cutter while maintaining consistent depth. Create straight cutting lines by marking your path with spray paint beforehand—this visual guide proves invaluable when your focus shifts to the kicking motion.
Troubleshoot Common Cutting Problems

Equipment Jams During Operation
Immediate response: Release all controls and inspect for obstacles. Large roots or buried rocks can instantly jam blades. Never force the cutter through resistance—excavate the obstacle completely before resuming. Sod cutters generally prove safer than tillers in rocky soil since they only skim the top inch of soil.
Inconsistent Cutting Depth
Diagnosis: Usually caused by uneven ground pressure, dull blades, or improper tire pressure on motorized units. Solution: Check blade sharpness, verify all wheels maintain ground contact, and ensure tire pressure matches manufacturer specifications. For manual units, focus on maintaining consistent kicking force.
Manage Removed Sod Effectively
Transform Waste into Garden Gold
Stack cut sod grass-side-down in out-of-the-way areas, cover with 6-10 sheets of newspaper, add 4-6 inches of compost materials, and top with 3-4 inches of wood chips. Wait 6-12 months for complete decomposition into nutrient-rich soil perfect for garden beds.
Immediate Reuse Strategy
Roll fresh-cut sod into tight circles for easy transport and lay immediately in areas needing grass coverage. Water thoroughly within 30 minutes of relocation for successful establishment. Keep unused sod moist and shaded—if it dries out, it becomes nearly impossible to work with.
Navigate Slopes with Confidence
Critical equipment selection: Standard walk-behind cutters struggle on slopes exceeding 15 degrees. Rent four-wheel drive models like the Ryan 18″ Jr. or Classen SC-18 for challenging terrain. Always cut up and down hills (never across) while reducing speed to half your normal pace for maximum control and consistent depth.
Calculate Realistic Time Requirements
Small projects (under 1,000 sq ft): 2-4 hours including setup and cleanup
Medium lawns (5,000-10,000 sq ft): One full day with motorized cutter
Large areas (20,000+ sq ft): Consider professional services or multiple-day rental
Time-saving tip: Pre-cut your sod into 12-18 inch wide strips—the ideal width for rolling and handling during removal.
Follow Essential Safety Protocols
Non-negotiable protective gear: Safety glasses, heavy gloves, long pants, and closed-toe shoes. Steel-toed boots provide extra protection from dropped equipment. Complete a pre-operation checklist verifying safety guards, fuel levels, blade condition, and cleared work areas.
Emergency readiness: Know your equipment’s kill switch location before starting and keep a phone nearby when working alone. Professional consultation proves wise for inexperienced users or challenging terrain.
Recognize When to Hire Professionals
Consider professional help when:
– Your property exceeds 20,000 square feet
– Slopes exceed 20 degrees
– Underground utilities are present
– Physical limitations prevent safe equipment operation
– Timeline requires completion within 24-48 hours
Professional services typically charge $0.15-$0.30 per square foot, often including sod removal and disposal—a worthwhile investment for complex projects.
Prepare Your Freshly Cut Surface
Rake the exposed soil smooth immediately after sod removal, eliminating any remaining grass fragments. This creates an ideal base for your new landscape design. Install temporary erosion control measures like straw wattles if your project timeline extends beyond one week.
Your precision-cut area now provides a professional-grade foundation for patios, gardens, or new grass varieties. The efficiency of proper sod cutting saves weeks of manual labor while delivering results that enhance your property’s value and aesthetic appeal.