
That sharp wrist pain when cutting fabric? It’s not you—it’s your rotary cutter. Traditional cutters force your wrist into unnatural angles, causing strain that builds with every project. The Martelli rotary cutter solves this with its revolutionary above-surface blade design, but only if you use it correctly. Unlike standard cutters where the blade sits beside your hand, Martelli’s elevated position lets you cut with a relaxed grip and straight wrist. Within this guide, you’ll master techniques that reduce hand fatigue by up to 60% while achieving razor-sharp edges on everything from delicate silks to thick denim. Forget everything you know about rotary cutting—this is how to unlock your Martelli’s full potential.
Position Your Martelli Cutting Station at Perfect Height
Your workspace setup makes or breaks cutting precision. Stand naturally and measure 2-3 inches below your elbow crease—that’s your ideal cutting surface height. At this level, your arm extends straight without shoulder hunching, preventing the fatigue that derails long cutting sessions. Place your self-healing mat on a rock-solid surface; even slight wobble transmits through the ruler into crooked cuts. Position a daylight-bright lamp directly above your work area to eliminate shadows that hide cutting lines.
Secure Rulers Against Fabric Slippage
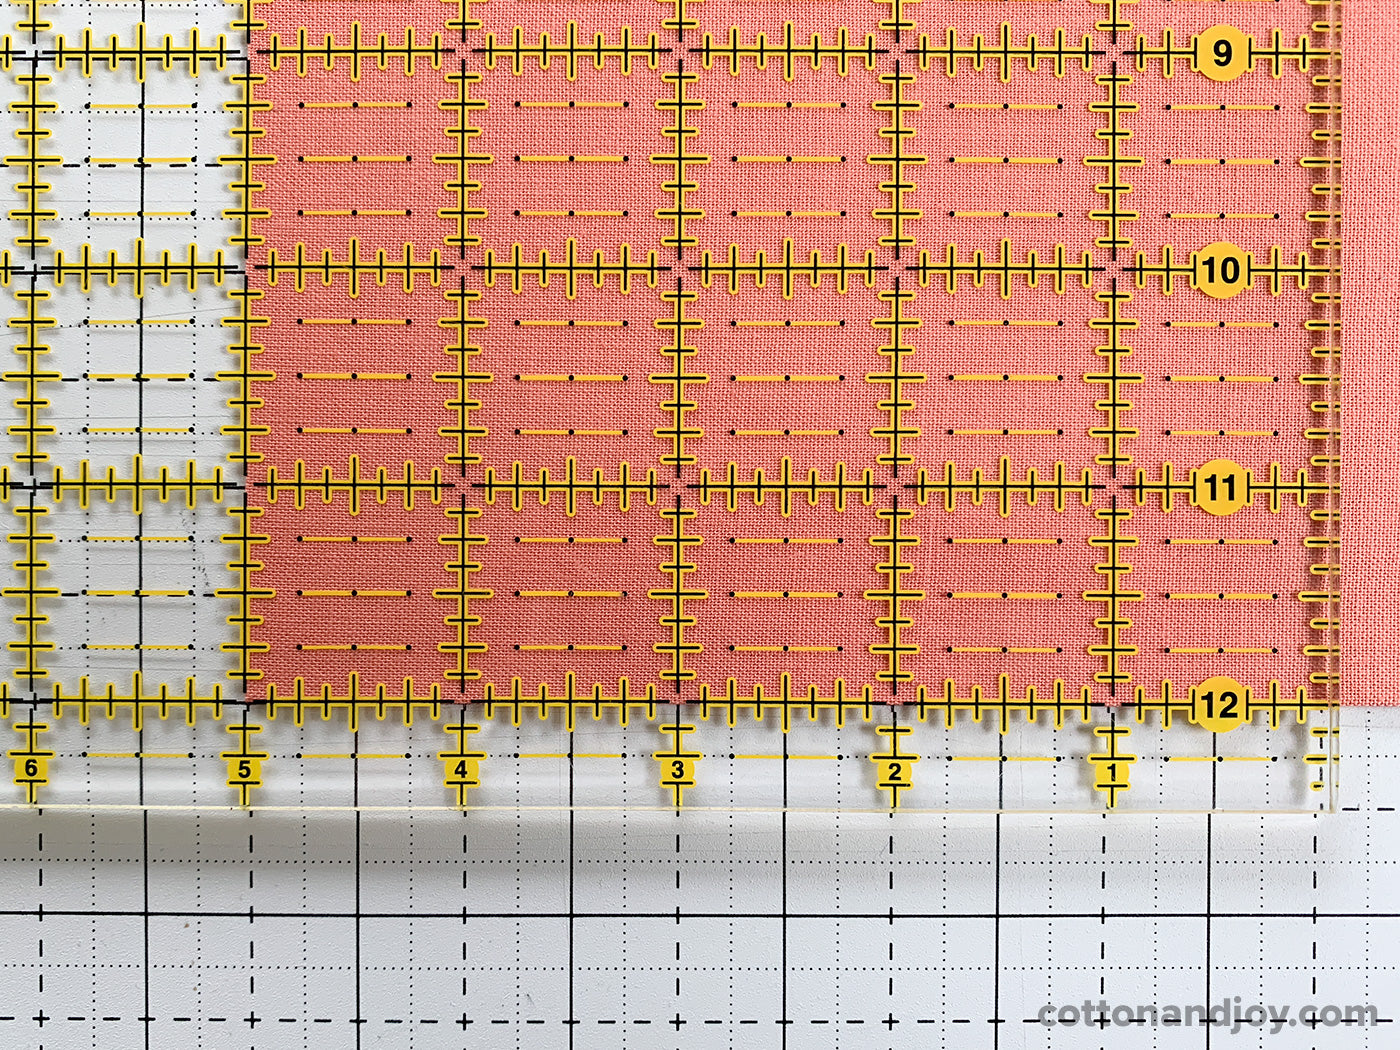
Never skip this step: Apply non-slip gripper dots to ruler edges or use Martelli’s proprietary gripper-backed rulers. Standard acrylic rulers slide unpredictably during cuts, ruining accuracy. Press your non-cutting hand firmly on the ruler’s top edge—not the side—throughout the entire cut. Test stability by gently tugging the ruler; if it moves, add more gripper dots. This 10-second fix prevents hours of wasted fabric.
Prepare Your Martelli for First Use
Inspect your cutter for shipping damage before removing packaging tape. Engage the safety lock (it should click audibly) then disengage it with your thumb—this tests the mechanism’s smooth operation. If installing a new blade, use the included tool to mount it on the spindle. Spin the blade: it must rotate freely without wobble. Any vibration means improper installation—reseat the blade immediately. This pre-flight check prevents dangerous blade wobble during use.
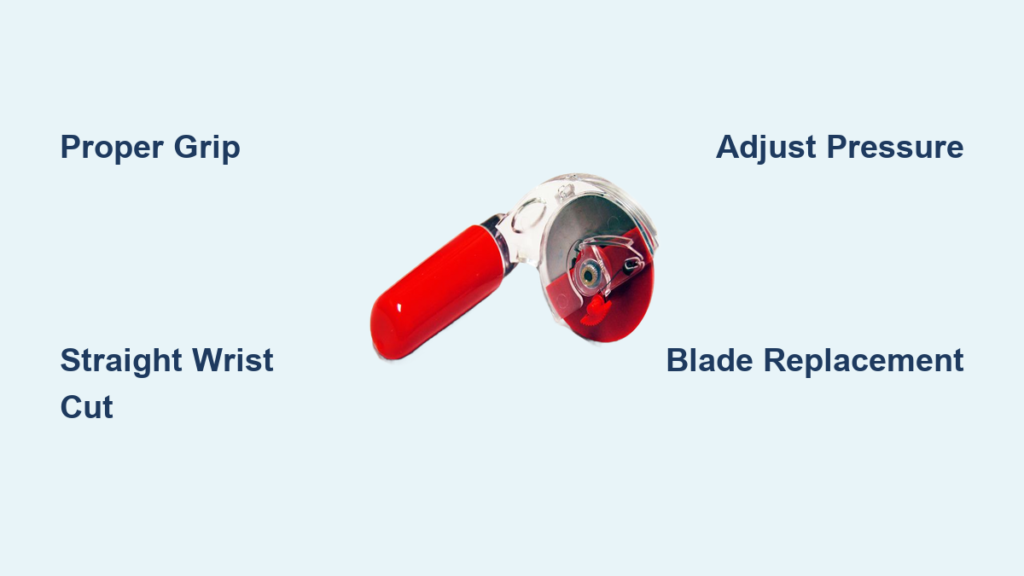
Hold Your Martelli Like a Pro: The Grip That Prevents Wrist Pain
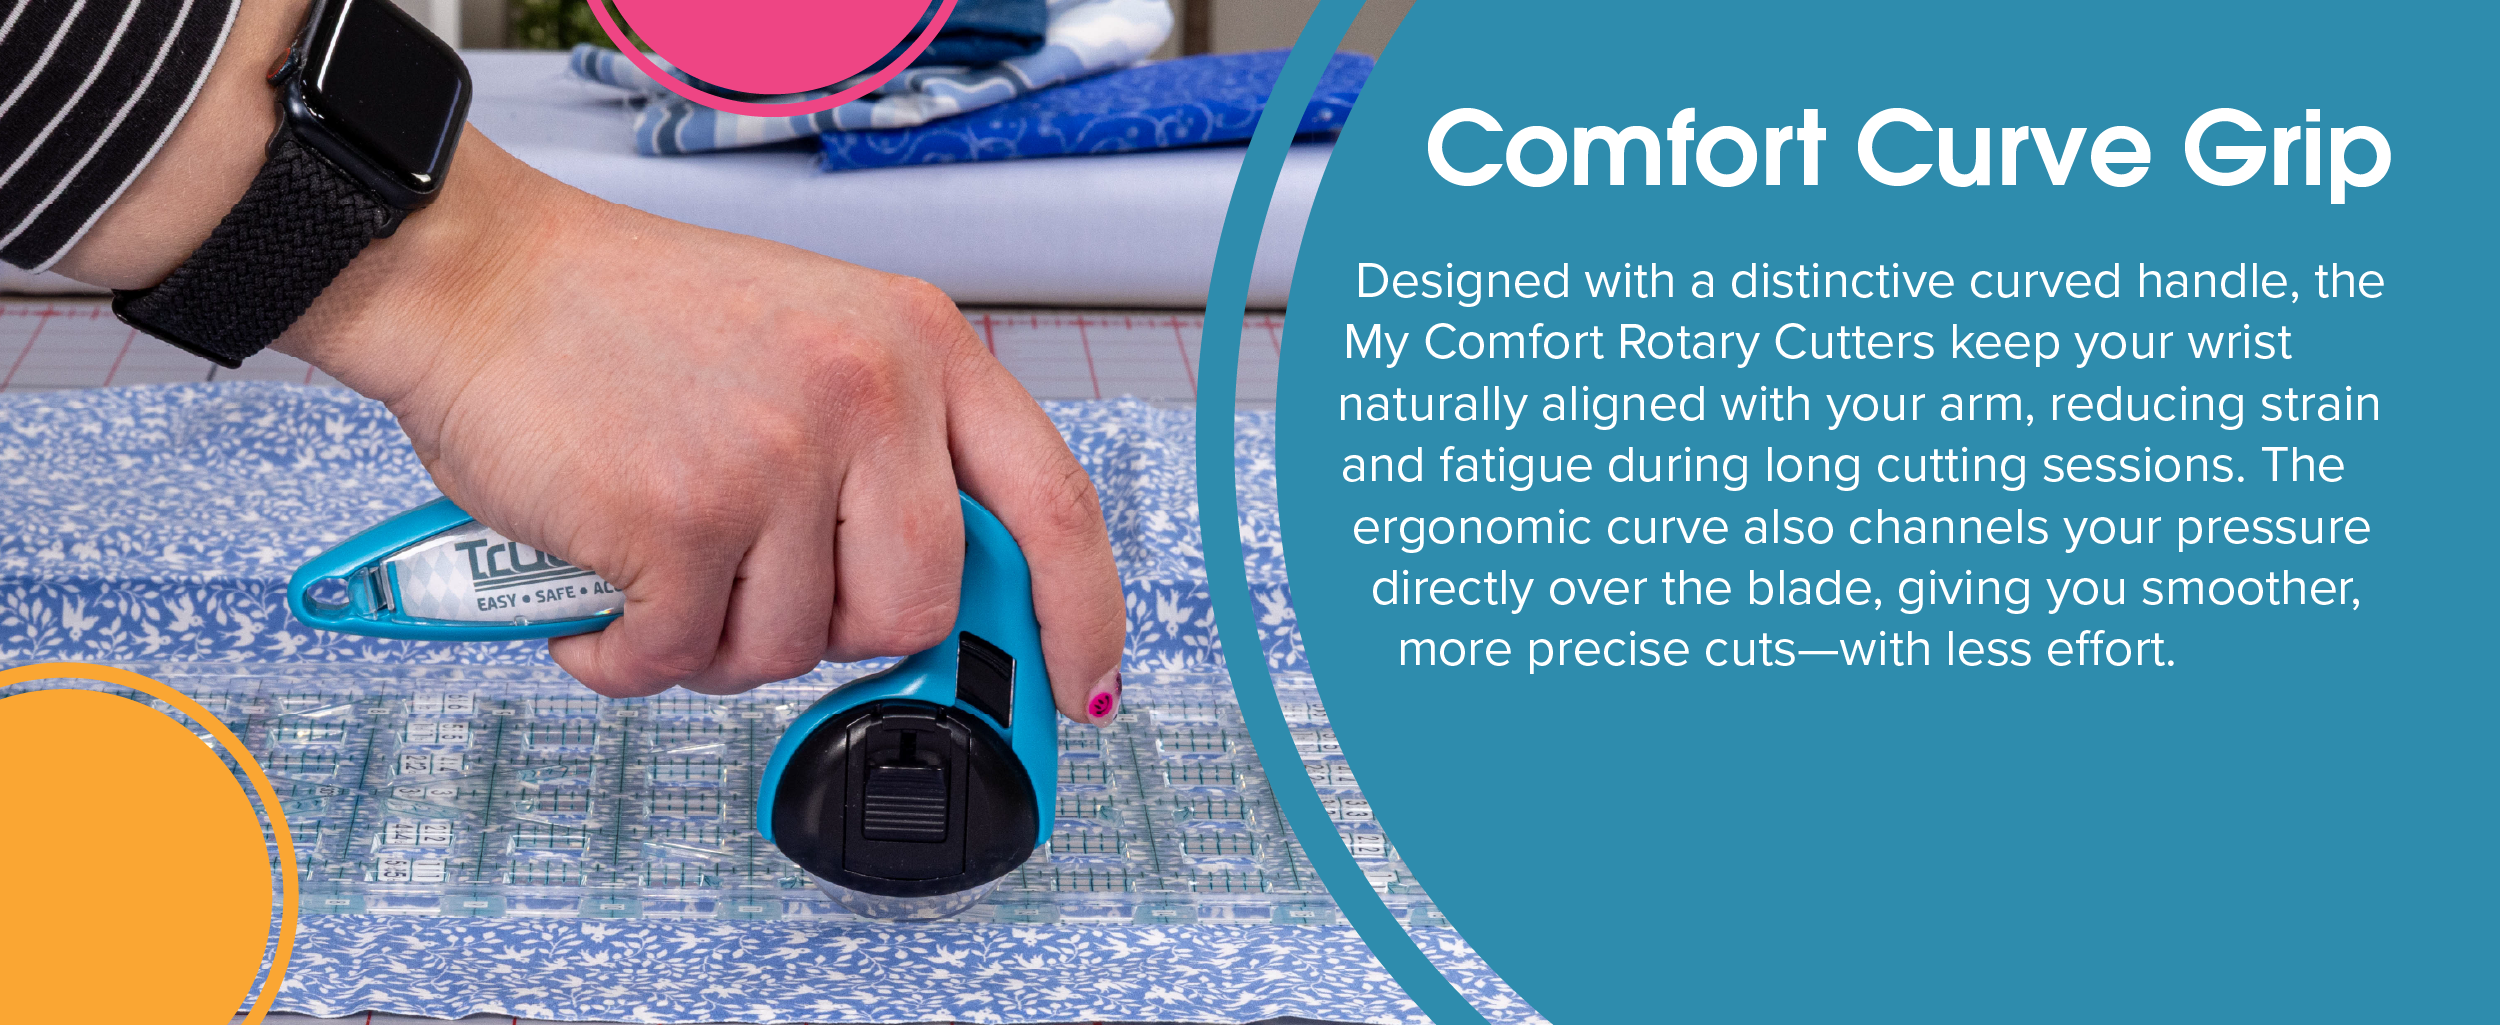
Forget the finger-pinching grip of traditional cutters. Your entire hand should nestle into Martelli’s curved handle like a handshake. Wrap fingers naturally around the contour with your thumb resting on the upper ridge—not gripping the side. Your wrist stays completely straight, parallel to the cutting mat. This neutral position eliminates the “bent-wrist” strain that plagues standard cutter users.
Execute Straight Cuts Without Fabric Drag
Place your ruler on the cutting line and press down firmly with your non-cutting hand. Disengage the safety lock with your thumb, then position the blade at the fabric’s edge. Apply 2-3 pounds of downward pressure—imagine gently pressing a thumbtack into corkboard. Push the cutter forward in one fluid motion, never pull it toward you. Complete each cut 1-2 inches past the fabric edge before engaging the safety lock. This “push-and-release” technique prevents fabric from snagging under the blade guard.
Critical mistake: Gripping too tightly. Tension in your hand reduces control and accelerates fatigue. Practice holding the cutter while relaxing your shoulder—your arm should move from the shoulder, not the wrist.
Adjust Pressure for Fabric Types in Seconds
– Silk/chiffon: Feather-light pressure (1 lb), fast smooth motion
– Quilting cotton: Moderate pressure (2 lbs), steady pace
– Denim/fleece: Firm pressure (3+ lbs), slow deliberate push
– 6+ layers: Double pressure, cut 50% slower than single layers
Test pressure on scrap fabric first. If fabric edges look pulled or frayed, you’re using too much force. If cuts are incomplete, increase pressure—not speed.
Cut Complex Curves Without Retracing Edges
The Martelli’s elevated blade gives you unmatched visibility for curved cuts. Mark your curve clearly with a fabric pen. Instead of forcing one long cut, make overlapping 1-2 inch straight cuts along the curve. Pivot the fabric—not the cutter—by keeping your cutting hand stationary while your non-cutting hand rotates the fabric under the ruler. This maintains consistent blade angle for smooth curves.
Master Strip Cutting for Quilting Projects
Square one fabric edge, then cut your first strip to the desired width. Flip this strip horizontally and place it against your fabric’s freshly cut edge. Use it as a spacer for your next cut—this eliminates measurement errors. Continue cutting strips without repositioning the main fabric piece. For perfect 2.5″ strips across 100+ pieces, this technique delivers consistency traditional cutters can’t match.
Trim Seam Allowances Without Stretching Knits
When finishing garment seams, position the Martelli so the blade rolls away from the seam. Apply minimal pressure and cut in short 3-inch segments. The rolling action prevents knit fabrics from stretching under tension—a common flaw with standard cutters that pull fabric as they cut.
Fix These 3 Martelli Cutting Failures Immediately
Fabric Won’t Cut Completely? Check These
Incomplete cuts mean either a dull blade or incorrect pressure. First, inspect the blade edge under bright light for nicks—if visible, replace it. Next, test your cutting mat: press a ruler into it—if it leaves a permanent groove, the mat is worn out. Finally, verify your pressure: for denim, you need firm downward force. Too light, and the blade skips; too heavy, and it jams. Reset by cutting 2 layers of cotton at medium pressure—this is your baseline.
Stop Fabric Shifting Mid-Cut
Slipping fabric ruins precision. Apply gripper dots to all ruler edges and press your non-cutting hand down with 5 pounds of force (like squeezing a stress ball). If cutting thick layers, place a second ruler vertically against your cutting ruler for extra stability. Pro tip: Spray a light mist of starch on fabric edges before cutting—it adds temporary grip without residue.
Eliminate Ragged Edges on Delicate Fabrics
Ragged cuts on silk or chiffon mean blade wobble or excessive speed. Engage the safety lock and spin the blade by hand—it must rotate smoothly without vibration. If wobbling, tighten the retaining screw with the blade-changing tool. For delicate fabrics, cut at half-speed with feather-light pressure. If edges still fray, switch to Martelli’s 28mm blade for finer control.
Replace Blades in 90 Seconds Without Injury
Blades dull faster than you think—replace them immediately when cutting requires noticeably more effort or fabric edges look pulled. Never run a dull blade: it increases injury risk by forcing unsafe pressure.
Blade Replacement Safety Protocol
- Engage safety lock and place cutter blade-up on stable surface
- Insert blade-changing tool into blade center hole
- Unscrew retaining screw counterclockwise (hold tool steady)
- Slide old blade off spindle into metal container—never plastic
- Insert new blade with sharp edge facing forward (arrow points toward cutting direction)
- Tighten screw firmly—stop when resistance increases—over-tightening strips threads
- Disengage safety lock and test rotation
Store used blades in a dedicated metal container (like a coffee can) labeled “SHARP ITEMS.”
Maintain Your Martelli for Lifetime Reliability
After every cutting session, wipe the blade with a dry microfiber cloth to remove fabric lint. For stubborn residue, dip a cotton swab in rubbing alcohol—never submerge the cutter. Monthly, apply one drop of sewing machine oil to the blade spindle hole. Store with safety lock engaged in a hard case—loose storage in drawers causes accidental blade exposure.
Pro maintenance tip: When cutting through 8+ layers of denim, pause every 30 seconds to clear thread buildup from the spindle. A bent paperclip works perfectly for this. This 5-second habit prevents 90% of mechanical failures.
Your Martelli rotary cutter isn’t just another tool—it’s a precision instrument that transforms cutting from a chore into a controlled, pain-free process. Master these techniques, and you’ll cut through 10 layers of denim as smoothly as single-layer silk. The initial adjustment period pays off exponentially: within two projects, your wrist pain disappears and cutting accuracy becomes second nature. Start today with straight cuts on scrap fabric, then progress to curves using the fabric-pivot method. Within a week, you’ll wonder how you ever managed with traditional cutters. Remember—the perfect cut isn’t about force, but finesse. Engage that safety lock, position your grip, and push forward with confidence. Your next project awaits, and it’s already cut sharper.


